Using Power Automate with RapidStart CRM — Part 2: Flow from Scratch
In Part 2, we build a Power Automate Flow from scratch using the latest Dataverse connectors, column-level filters, and dynamic email notifications — a more powerful and practical approach than using a template.
To demonstrate how you can easily customize RapidStart CRM to meet your needs, we created this “Tips and Tricks” Series. In this series we will outline some simple-to-perform solutions to common things customers ask about RapidStart CRM. Enjoy!
Power Automate
Power Automate is a part of the Microsoft Power Platform, and works hand-in-hand with RapidStart CRM. If you read our previous post in this series, we created a Power Automate flow using a pre-built template. You may find a pre-built template to fit your needs, but more often you will want to build a flow from scratch. That is what we will cover in this Part 2.
Option 2: Create from Scratch
For this exercise, we are going to build a flow that does something similar to the Template from our previous post, but using the latest connectors and adding a few features. We will trigger this one on a change to the “Resolution” column on a Case. Start at make.powerautomate.com.
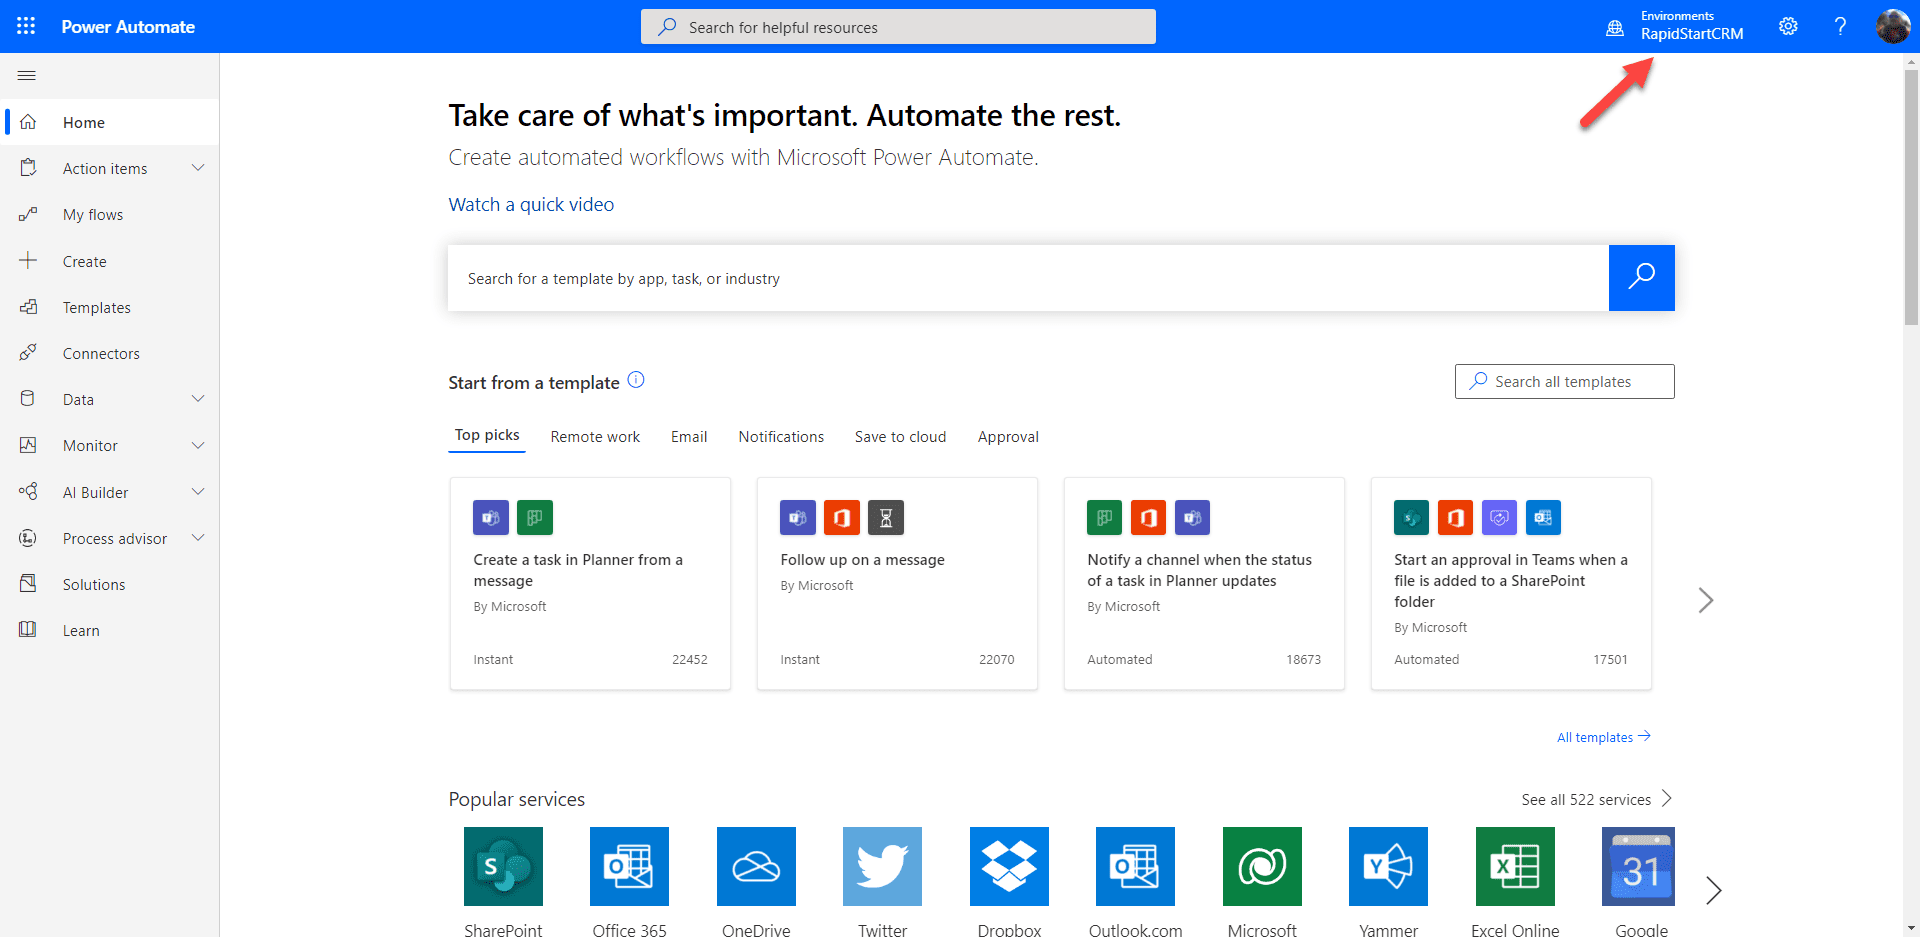
This time, instead of selecting “Templates” in the sidebar, we are going to select “Create” which will bring up the screen below.
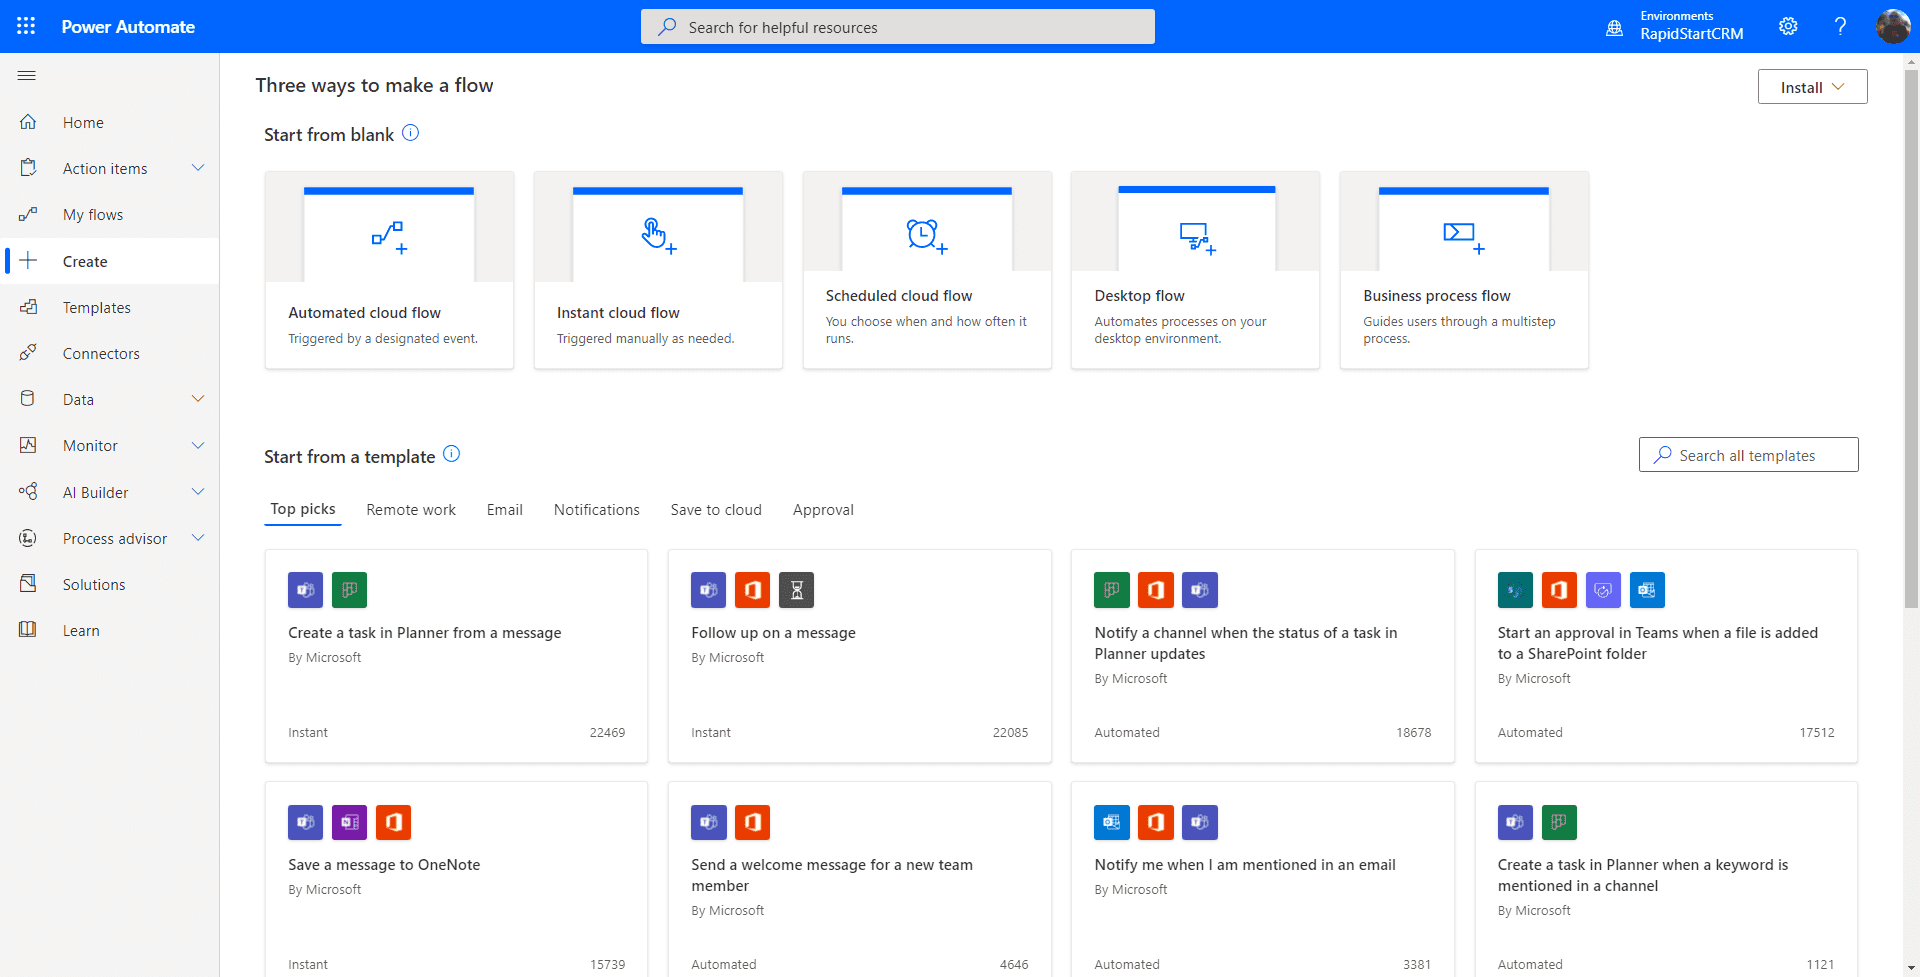
The first decision that we need to make is how we will trigger this Flow. Most of the time you will probably use the “Automated Cloud Flow”, and that is also what we need to replicate the template flow from before. So we will click that.
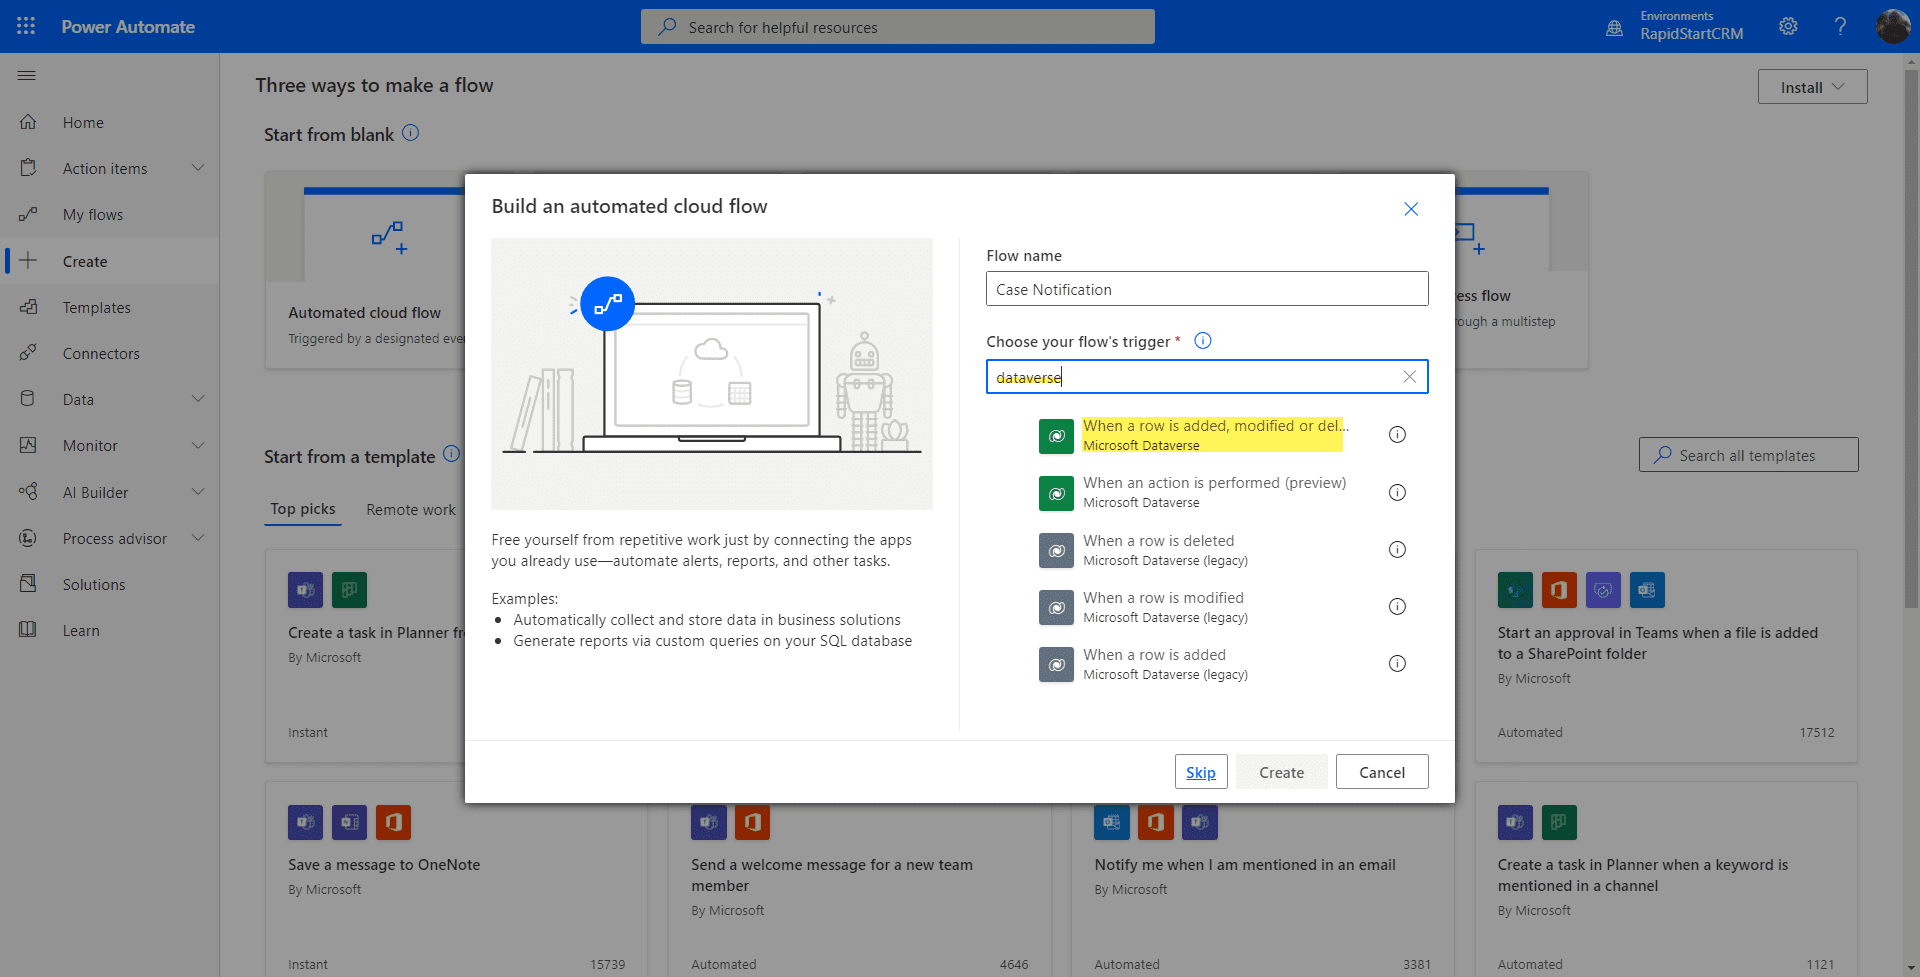
Start by giving your Flow a name, then in the trigger column type in “Dataverse” to search the available triggers. We are going to select the first one in the list: “When a row is added, modified or deleted”. The green icons are the new “Dataverse” connectors, and the grey ones are the older legacy connectors. Always prefer the green ones.
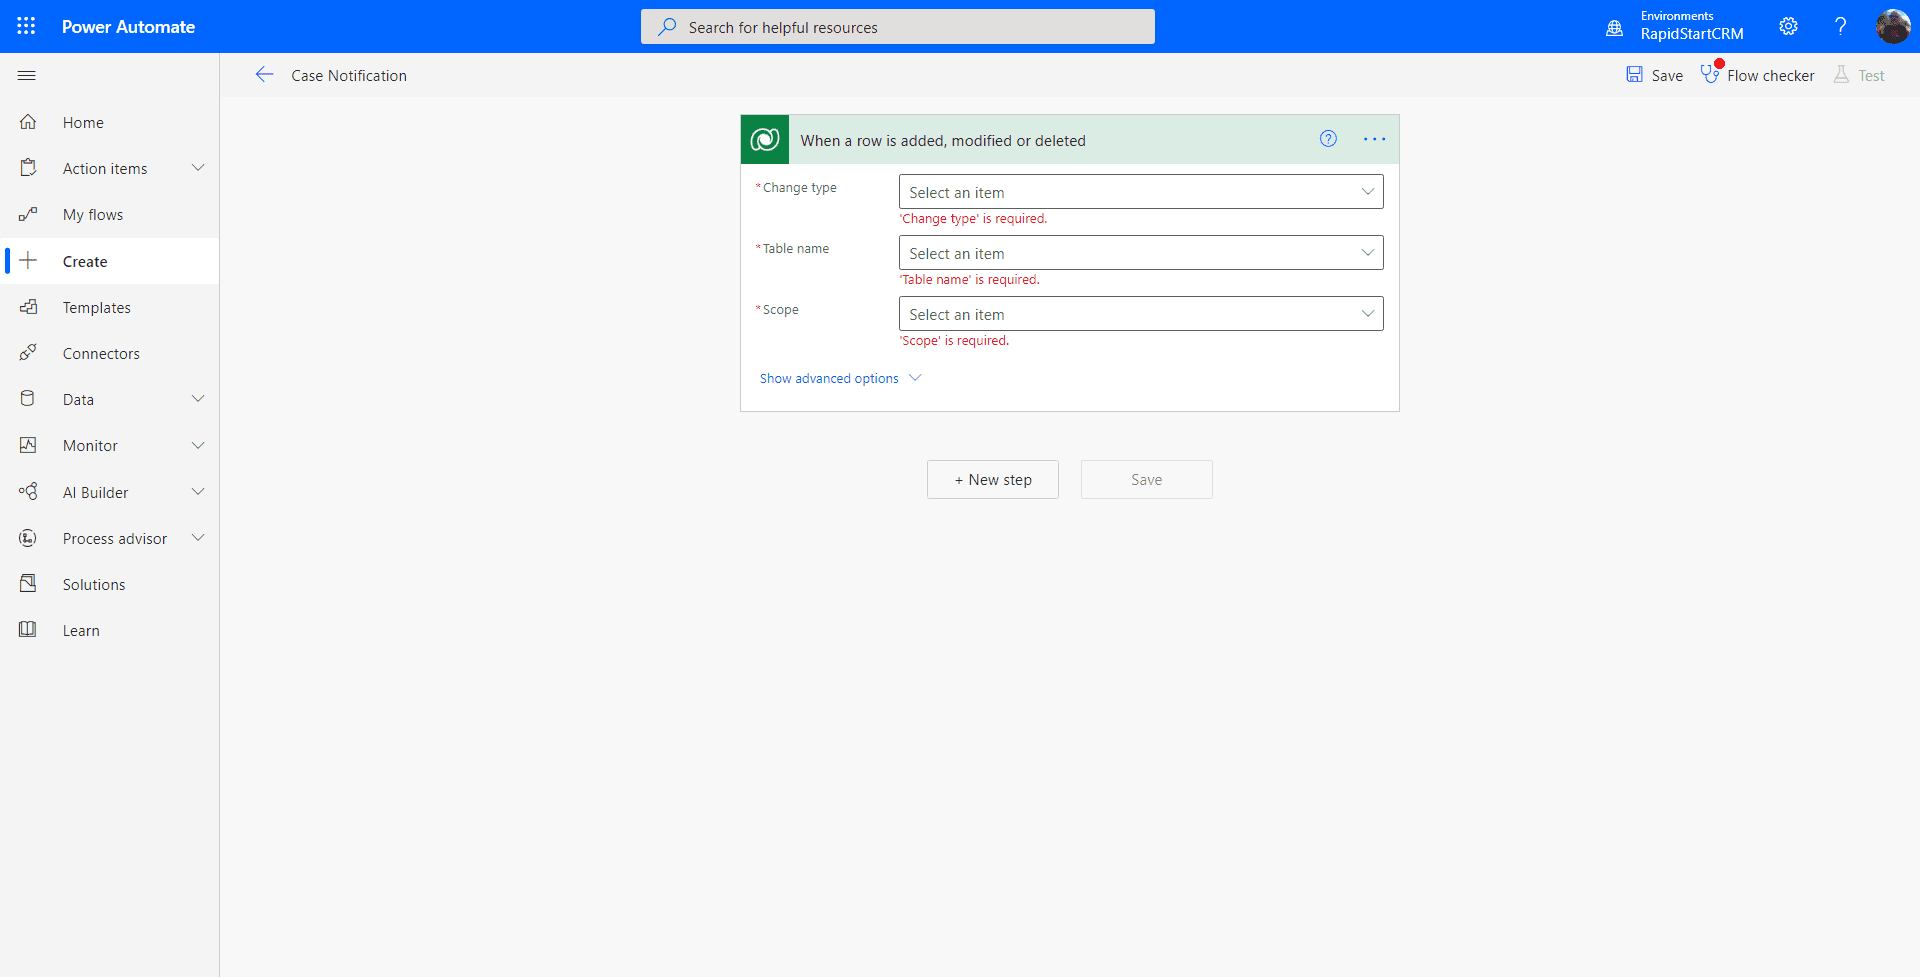
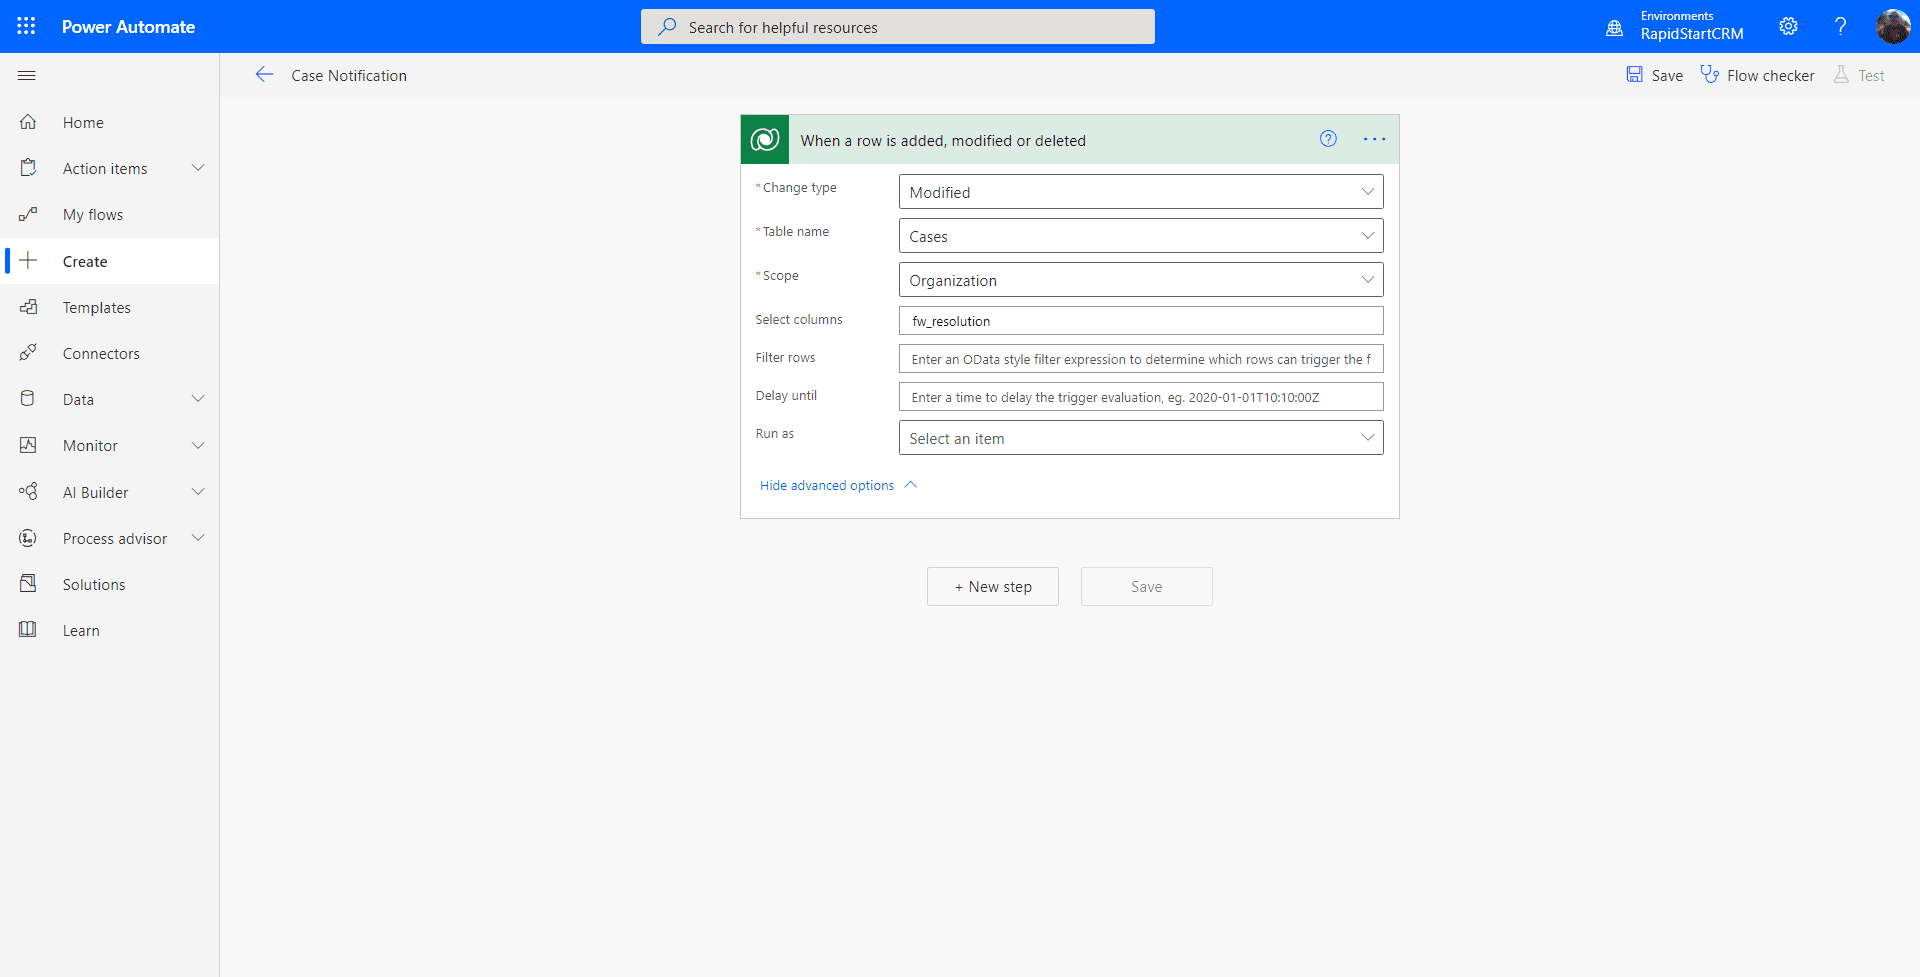
The first thing you may be asked to do is “sign in” to the Dataverse connection. After you sign in you can click “Continue” to be presented with the page above. While similar to the legacy connection we used with the template, there are some subtle differences. Click “show advanced options”, then let's do the following:
- For the “Change Type” column, select “Modified”.
- For the “Table Name” column, we will again select “Cases”
- For the “Scope” column, select “Organization”.
- For the “Select Columns” field, we need to enter the “unique name” for the Resolution column for cases. Unfortunately this is not simply the label “Resolution”, since labels do not have to be unique. In this case the “unique name” is
fw_resolution. In another post we will show you how to get these unique names.
Your page should now look like the image below. If it does, then select “New Step”:
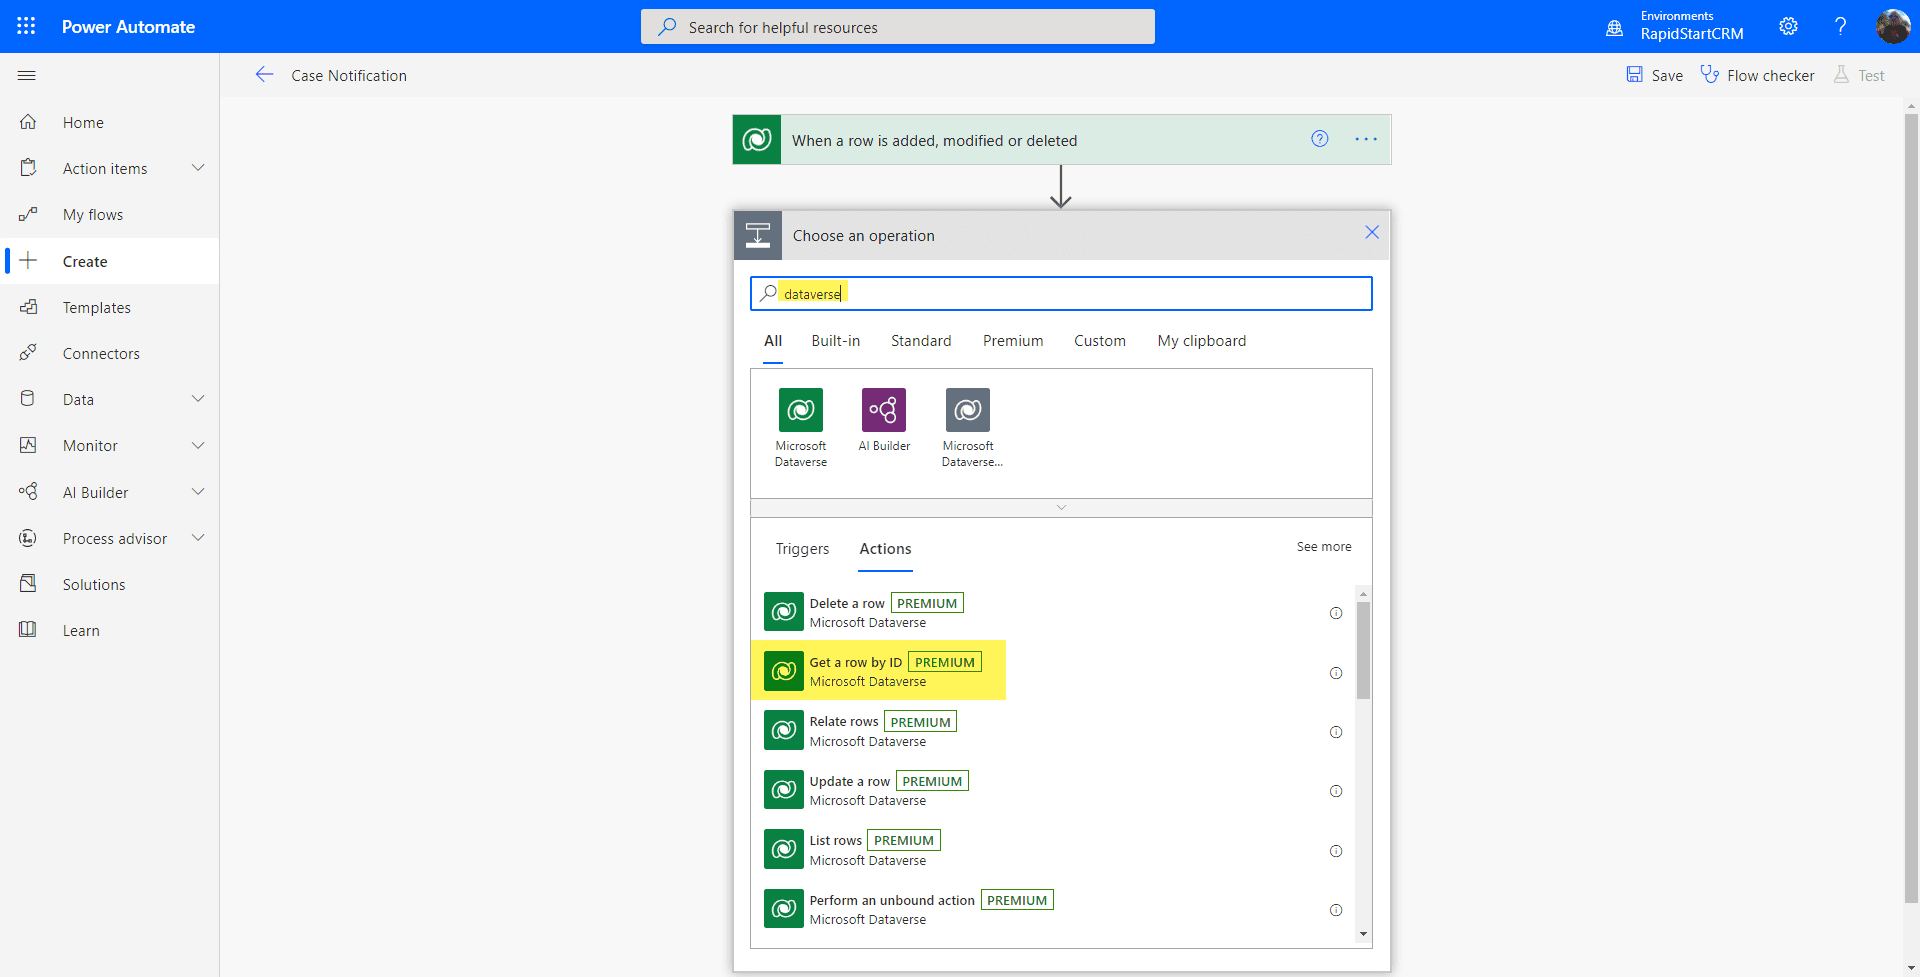
In the box that appears for the new step, we will search for “Dataverse” again, and select the “Get a row by ID” action.
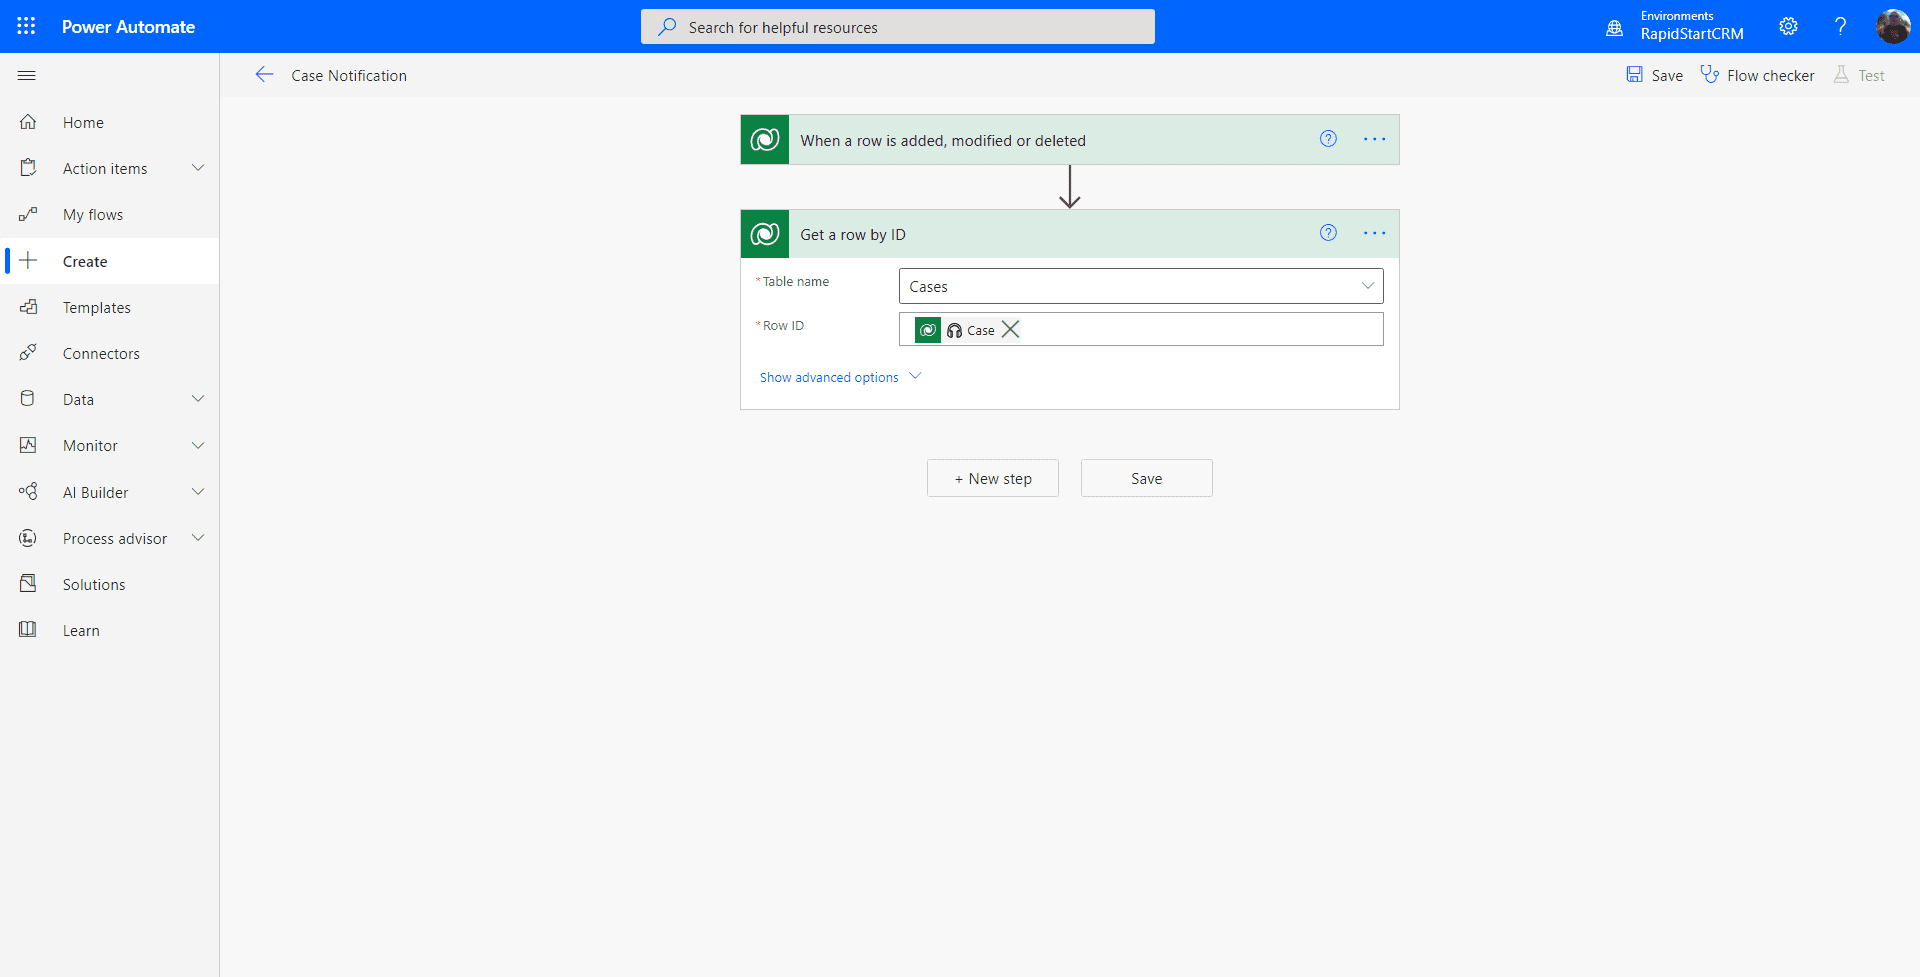
We will once again select “Case” in the “Table Name”, and use the Dynamic selector to select the “Unique Identifier for Case” in the “Row ID” column. So your screen should look like the image below. If it does, click on “New Step”.
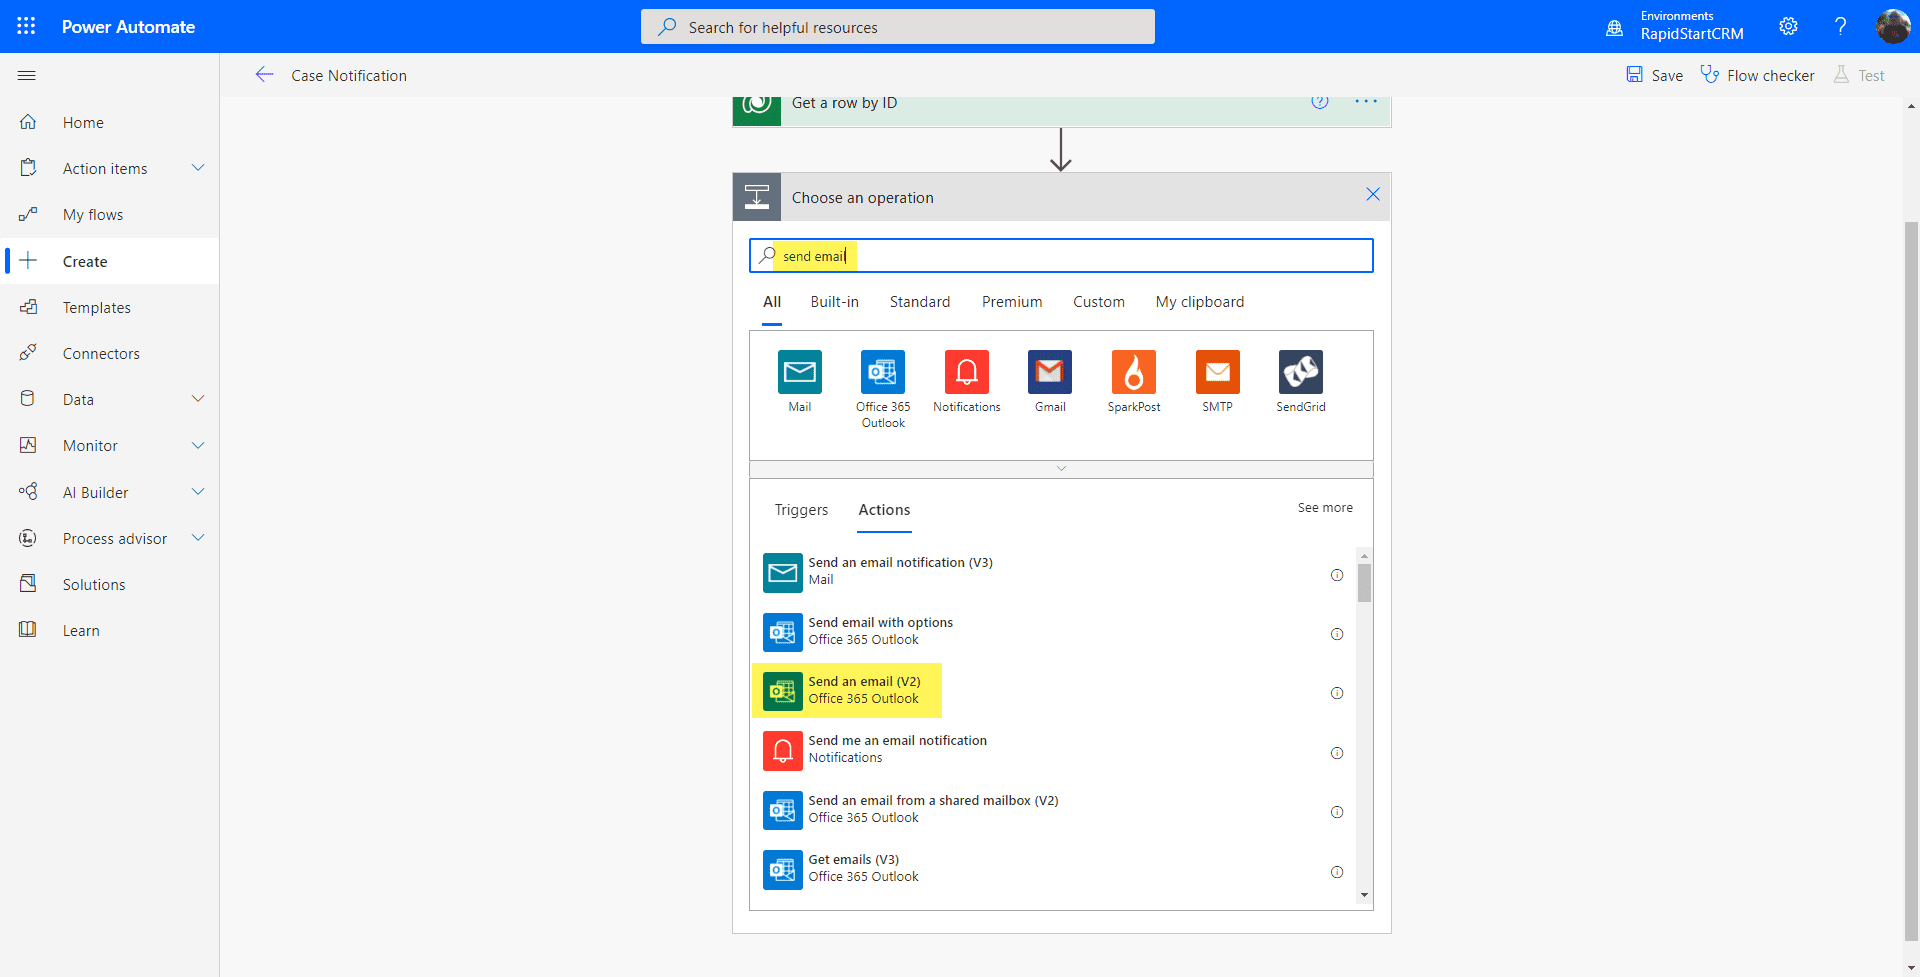
In the box that appears for the new step, we will search for “send email”, and select the “Send an email V2” action.
Similar to the template version, we will start typing user(s) in the “To” column and select our recipients, and give the email a subject, but this time we will make a more usable subject. We will also make a more informative body.
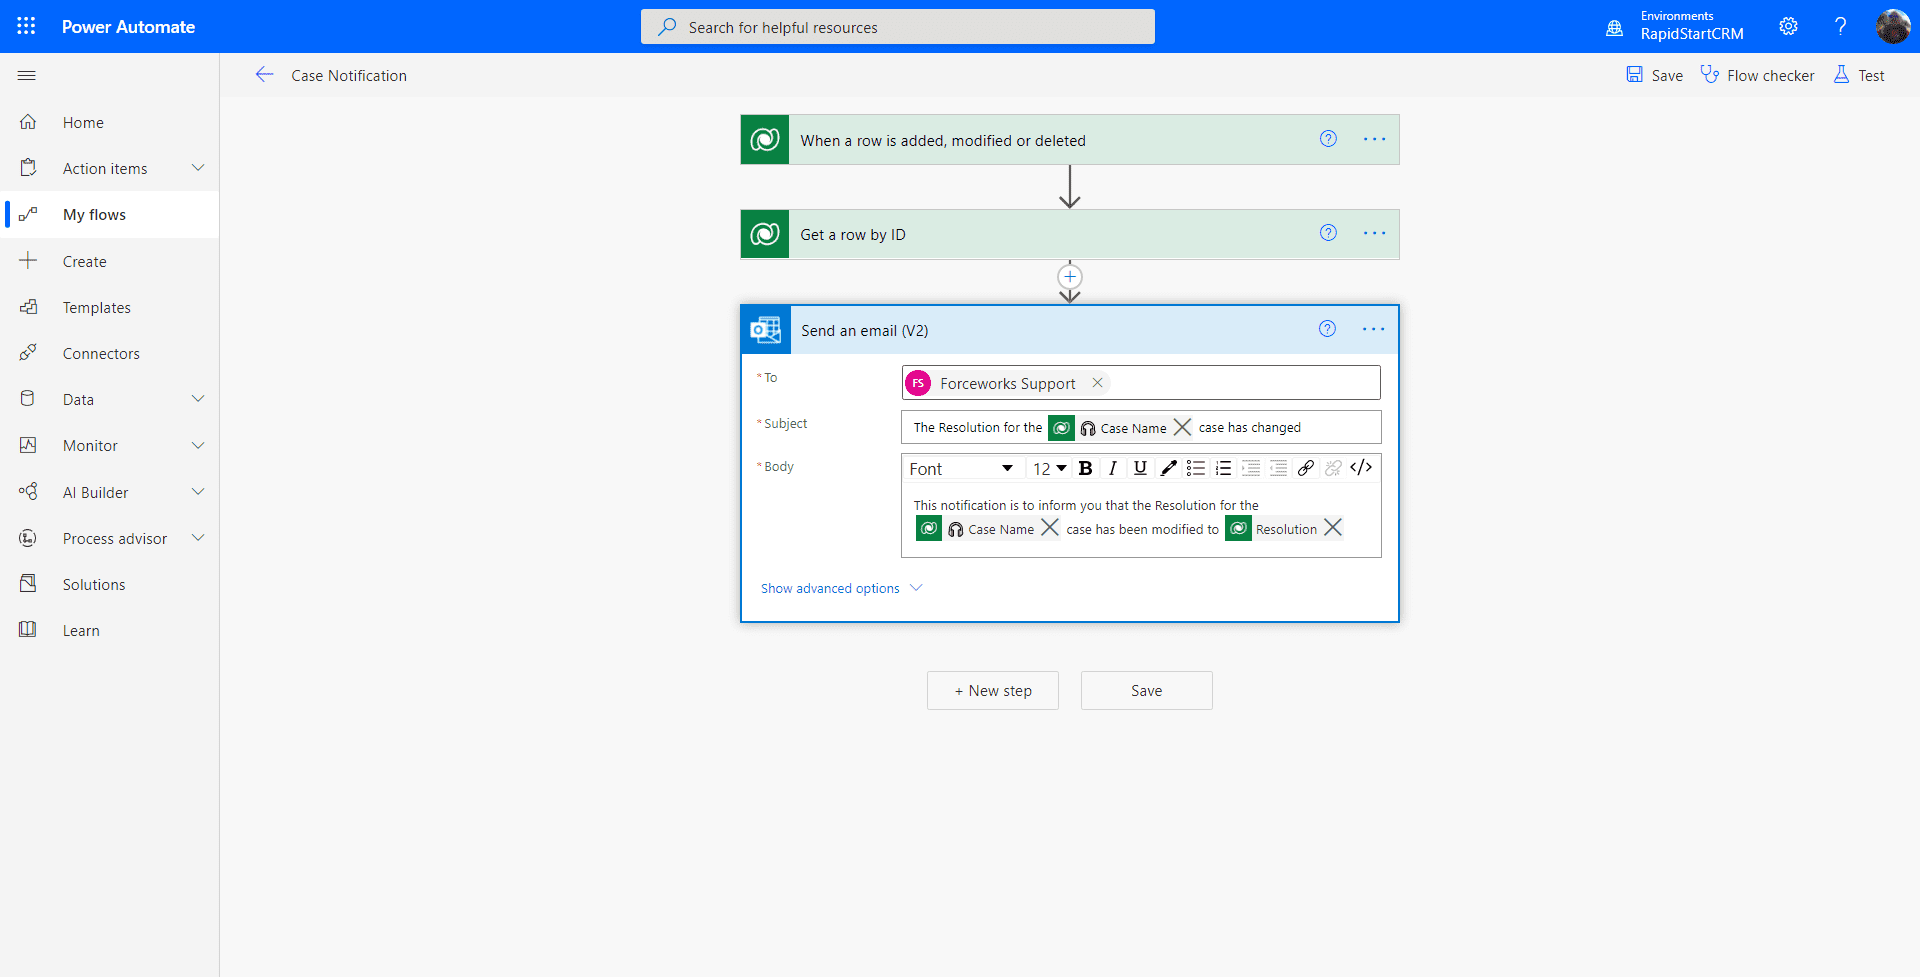
As you can see above, we have added a few more dynamic items to the subject and body of the message, using the Dynamic selector as we were typing in our text. So this “improved” notification will save the recipient from having to log in to see what happened.
You can now click the “Save” button, and if there is no alert next to the Flow Checker, your Flow will be activated. If there is an alert, you made a mistake somewhere. So let's test this Flow now, by clicking on “Test” in the upper right. We're going to perform our test Manually, so select that option and click “Test”.
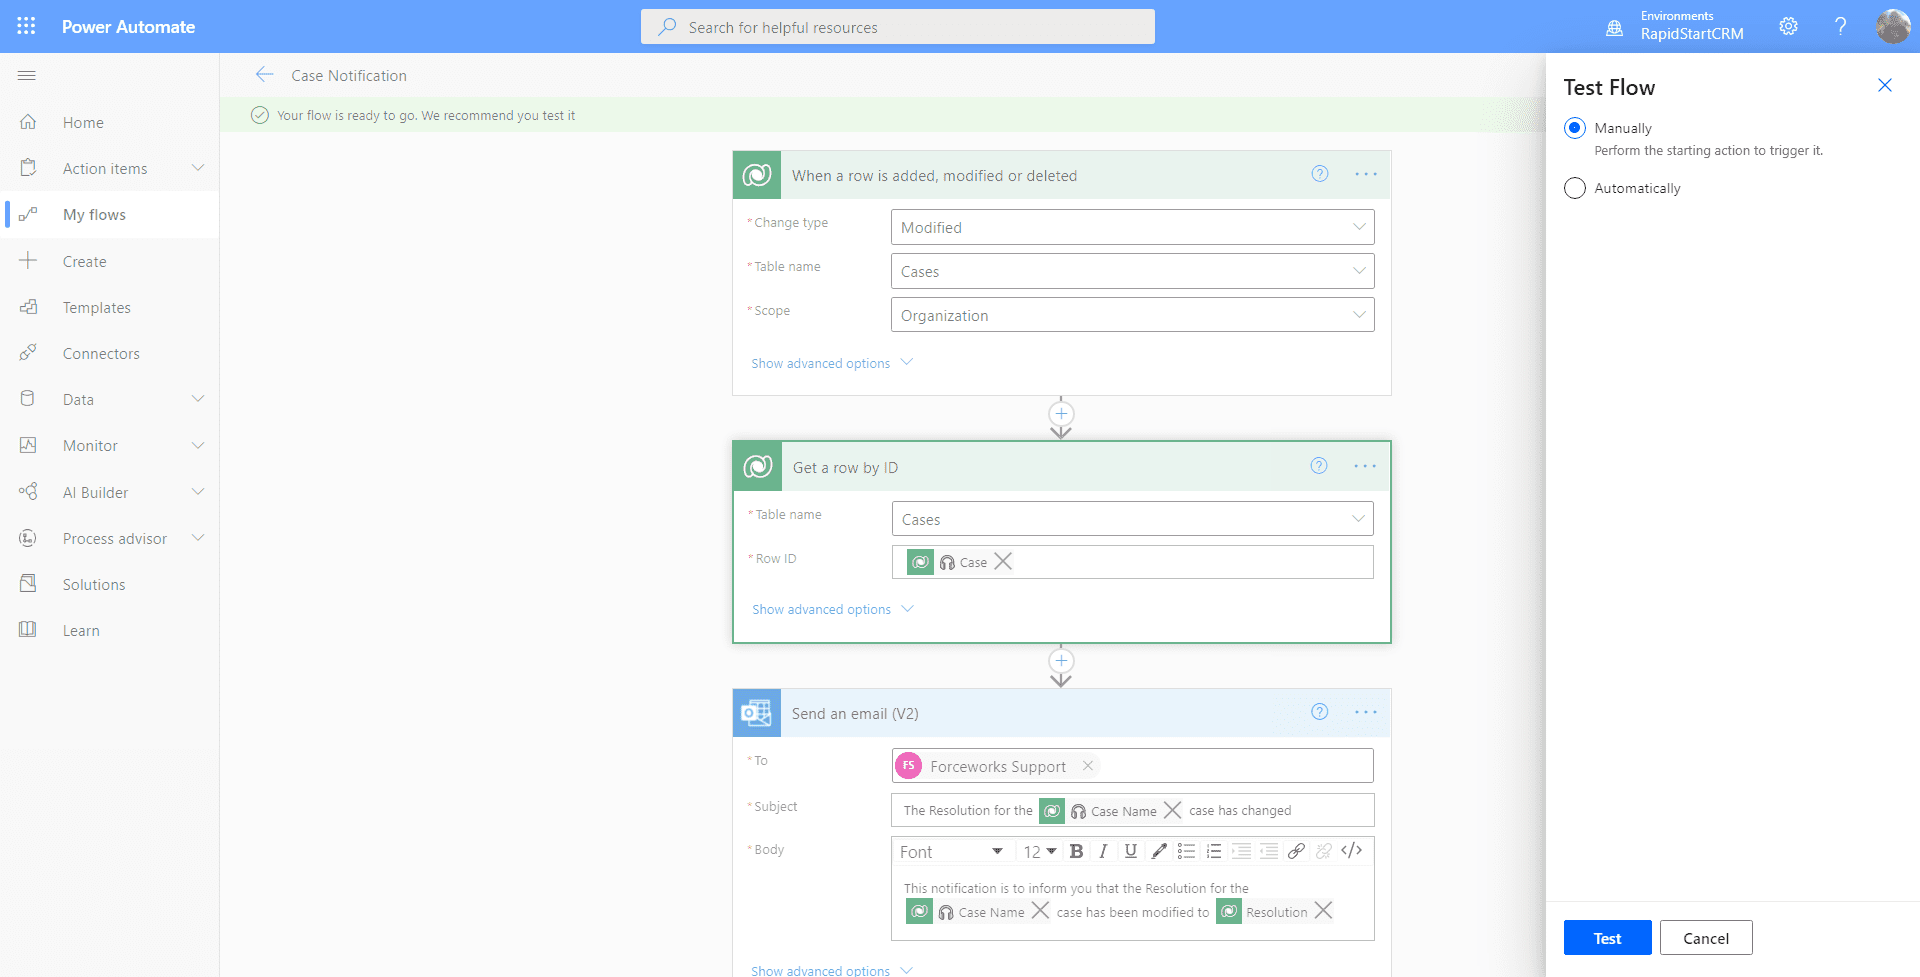
Open a new tab in your browser, go to RapidStart CRM and make a change to the Resolution column on any case record and save it. Then go back to the Flow tab. You should see the below screen.
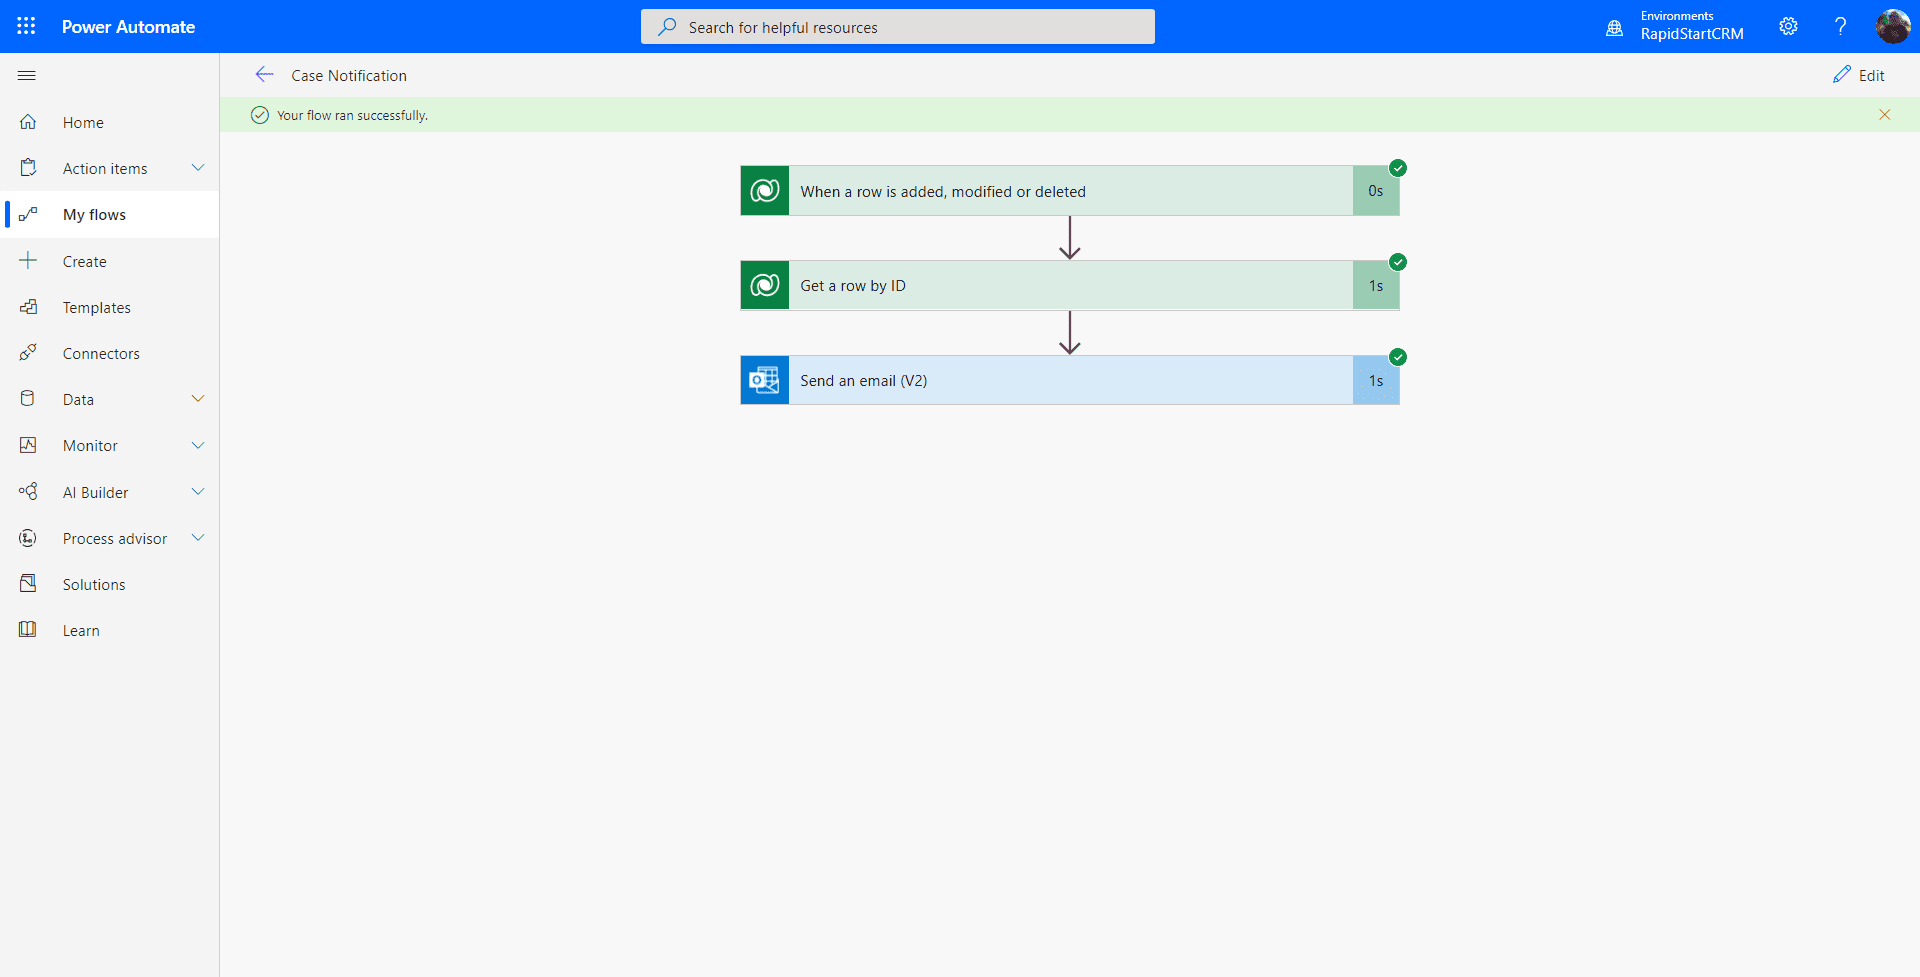
If you see all green checks on the steps… congratulations, you have built your first “from scratch” Power Automate Flow for RapidStart CRM! But just to make sure, check that your recipients did indeed get the email :)
Summary
Since we added the “Resolution” filter to the first step, this notification will only be sent when that column changes. Things get a little trickier when you want to include option set values, like Priority or Status for example. We may cover that in a future post.
Go back to Part 1 — Flow from a Template