Advanced Development for RapidStart CRM or Dynamics 365 — Part 3
In Part 3 of this series, we add existing components to our Solution so they are ready to be customized — the right way.
Adding Existing Components
Ensure you are in the correct environment, select Solutions in the sidebar, and double-click on your “My Customizations” solution to open it. Right now, there is nothing in it, so let's add something. Let's say you want to add a field to the existing RapidStart CRM Main Account Form. We'll start by adding the form by clicking “Add existing”.
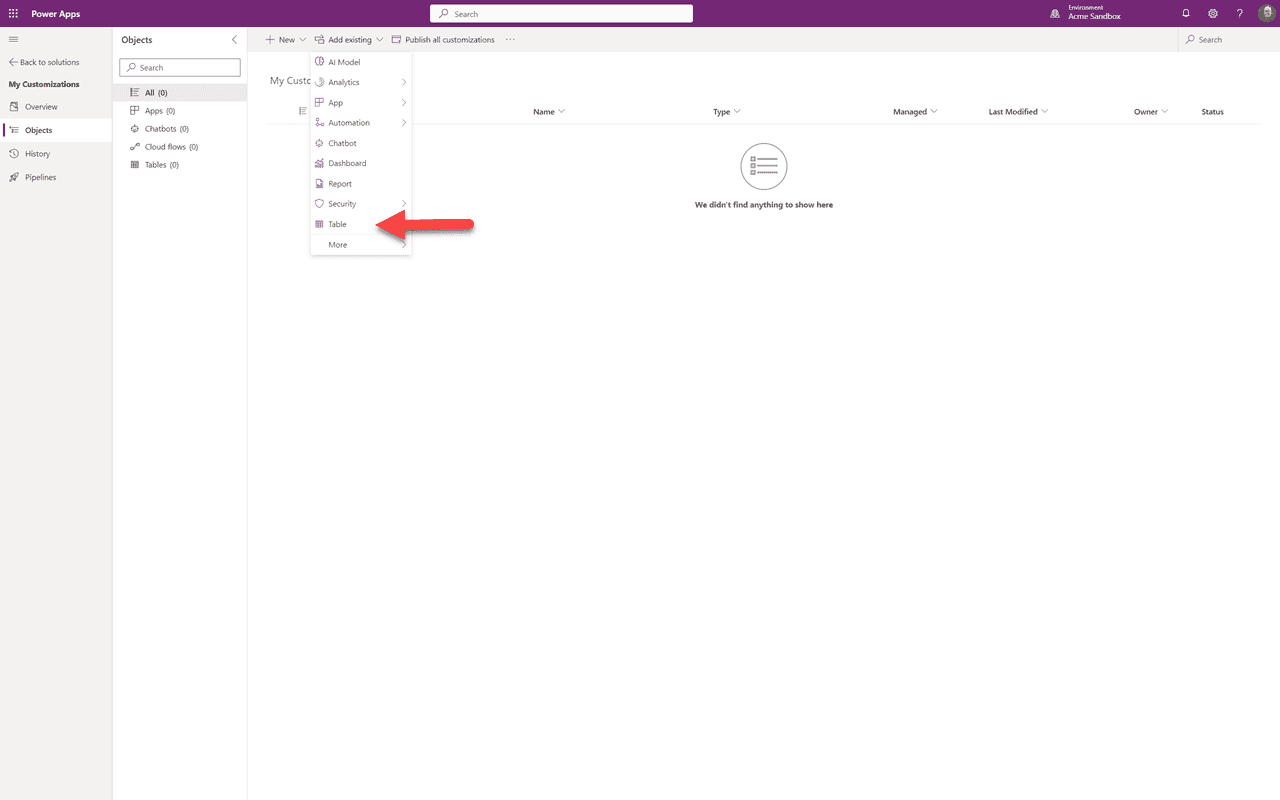
A dropdown appears with many options. Since we want to modify the RapidStart CRM Account form, we know that is part of the Accounts table, so we will select “Table” here.
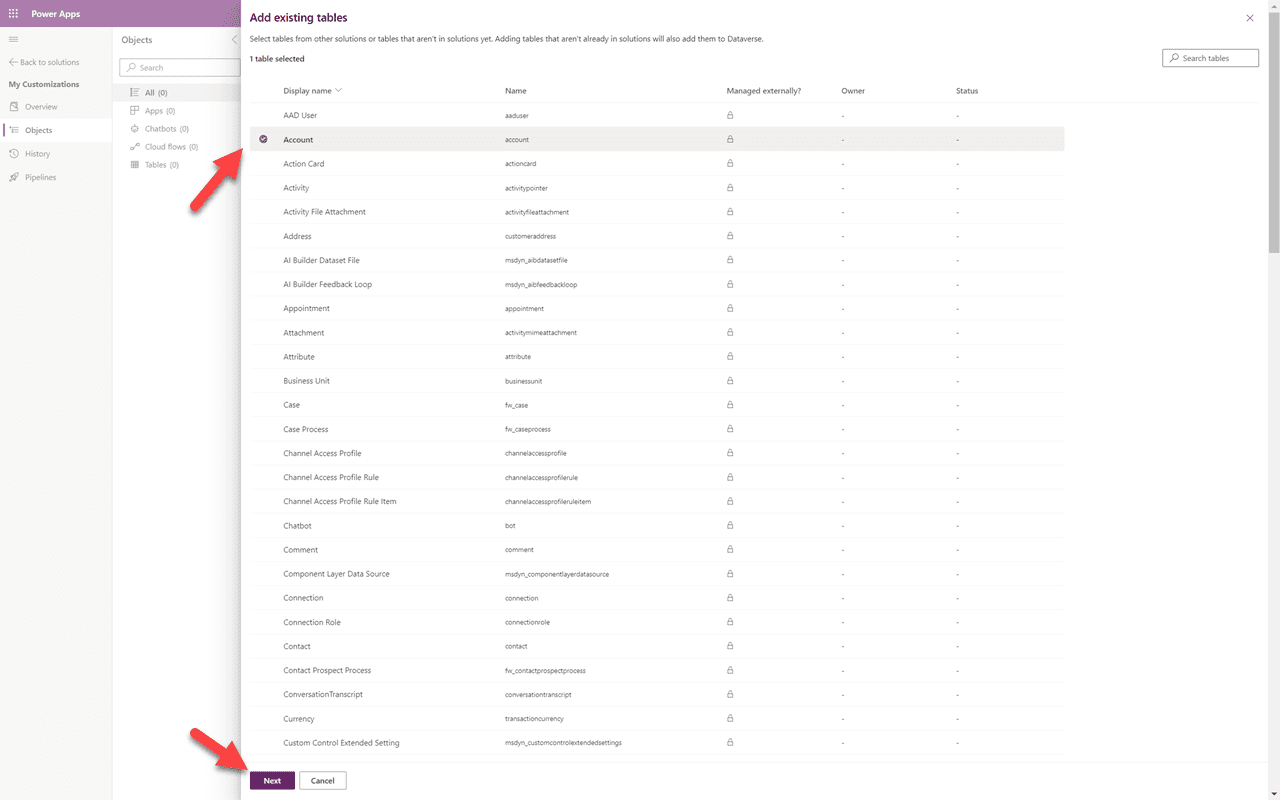
From the list of tables, we will select the “Account” table and click “Next”.
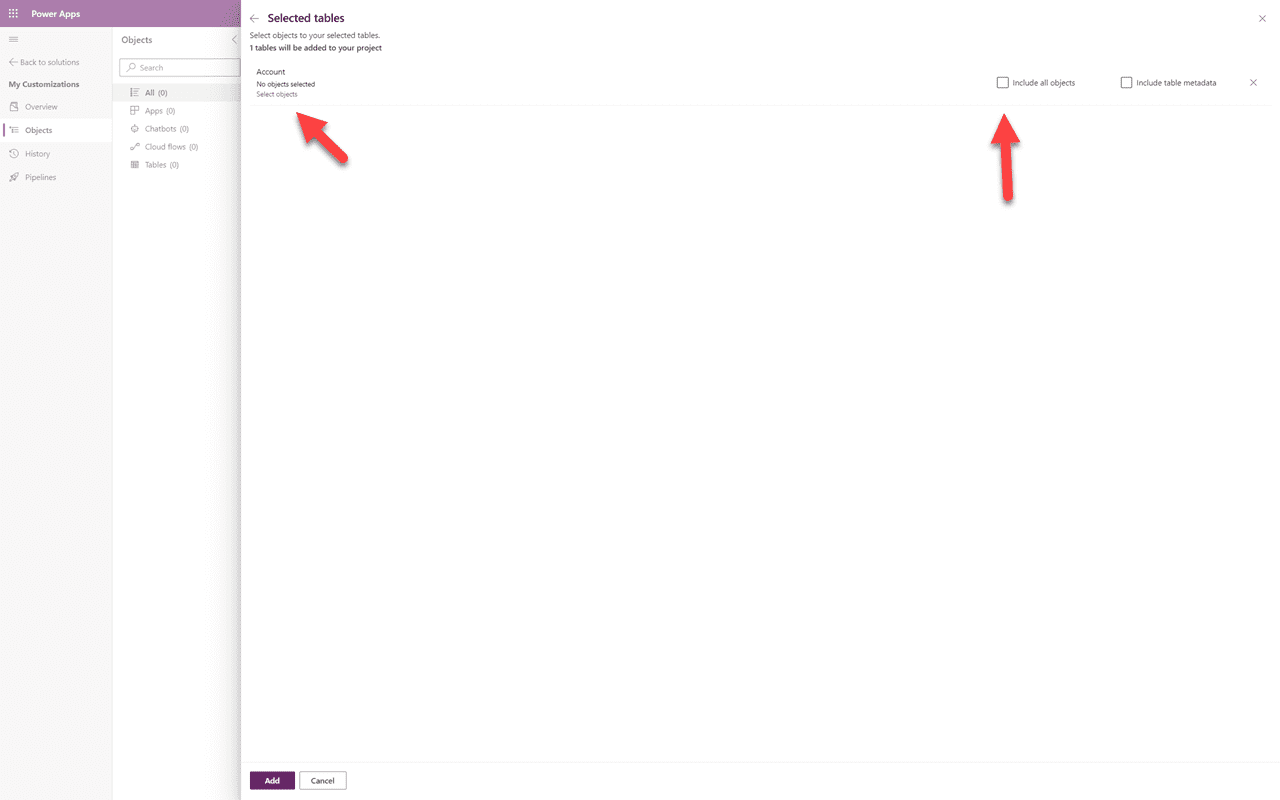
⚠️ Important
This is where many users make a huge mistake. NEVER select “Include all Objects”. This will create all kinds of issues for you down the line. Instead, click on “Select objects” to get only the items you need and nothing more.
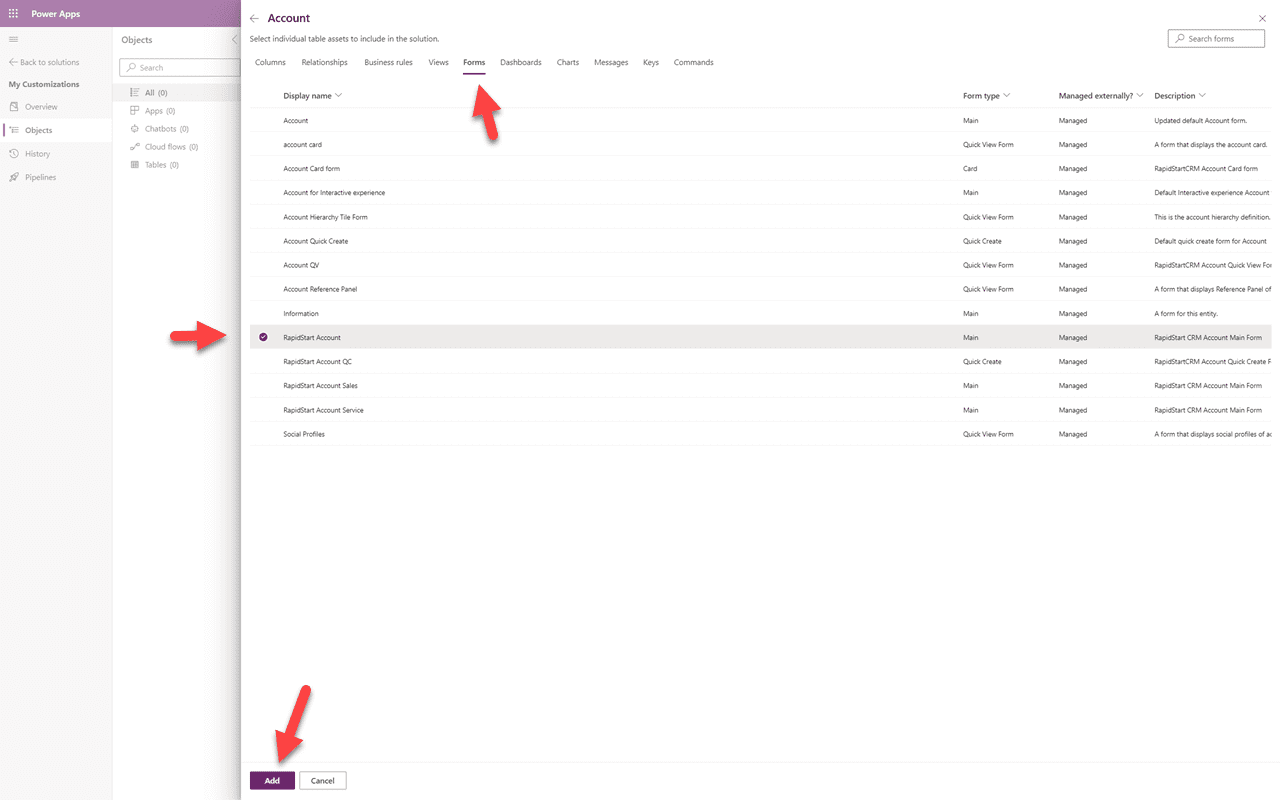
In the object selector click on “Forms” as that is what we are looking for, then click on the “RapidStart Account” form, and then click “Add”. You may have to click “Add” a second time.
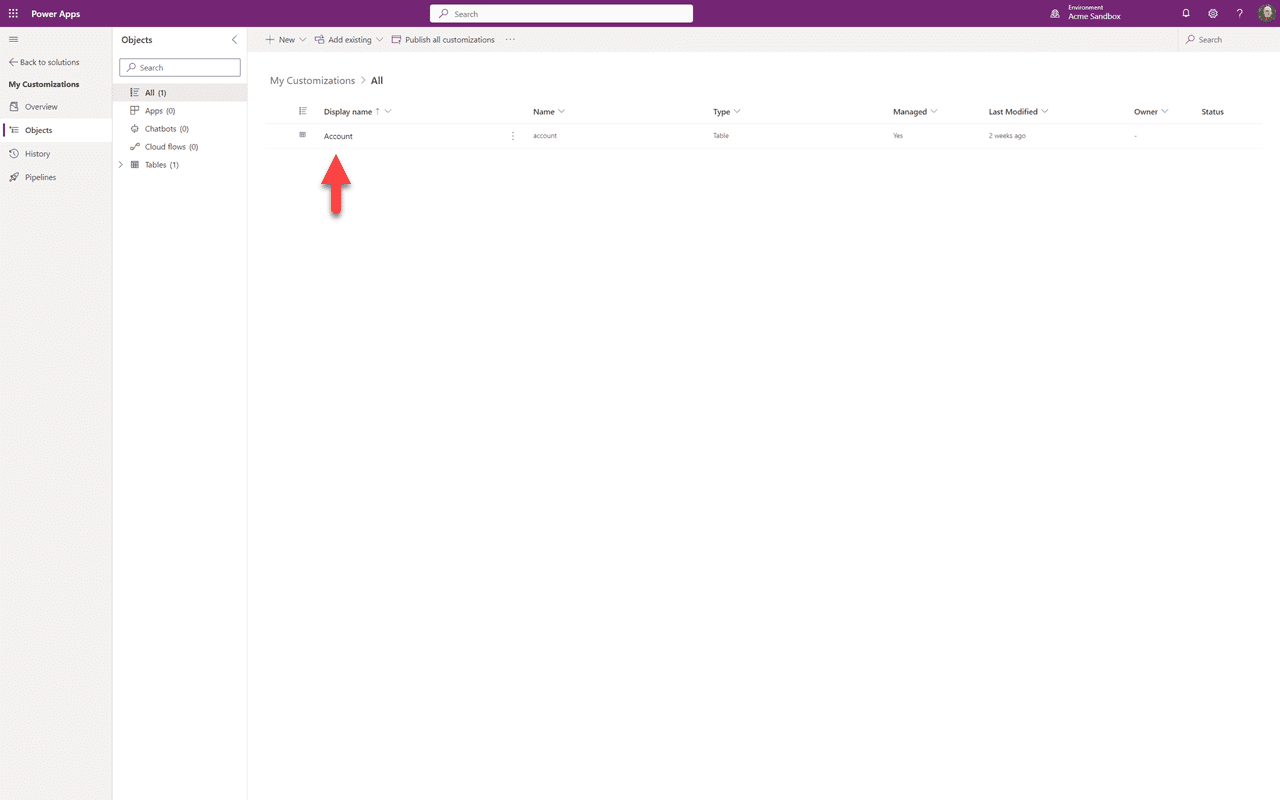
You can now see that the item has been added to your solution.
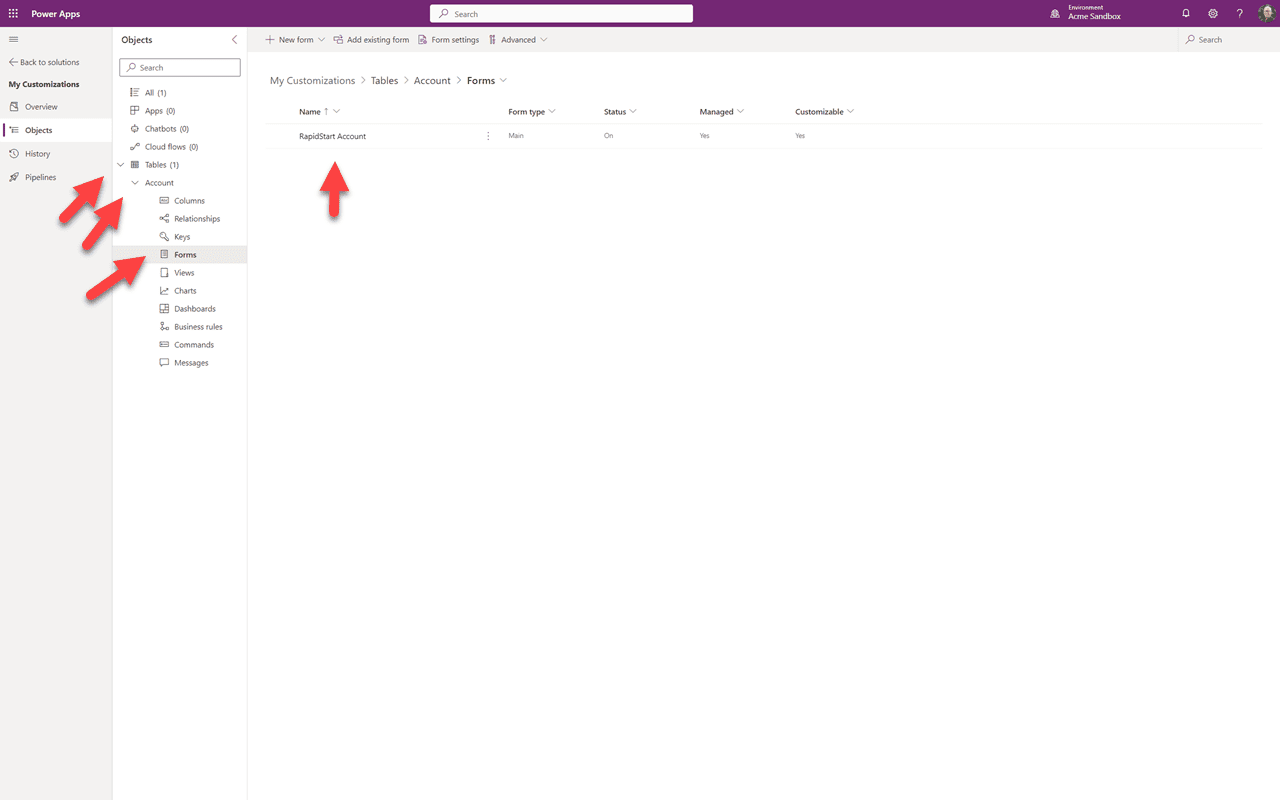
While it may look like the whole table was added, if you click the down arrow next to Tables, then the down arrow next to Account, then click on Forms, you will see there is only one item from the table that has been added — the RapidStart Account form. You can repeat these steps to add any other existing items that you plan to customize, either now or in the future.
Summary
In this Part 3 we have added existing components that we intend to customize to our “My Customizations” solution. In Part 4, we will continue in this solution by customizing the existing components we added.