Advanced Development for RapidStart CRM or Dynamics 365 — Part 4
In Part 4 of this series, we customize an existing component — modifying a form to add a new field — all within our Solution.
Customizing an Existing Form
Ensure you are in the correct environment, select Solutions in the sidebar, and double-click on your “My Customizations” solution to open it.
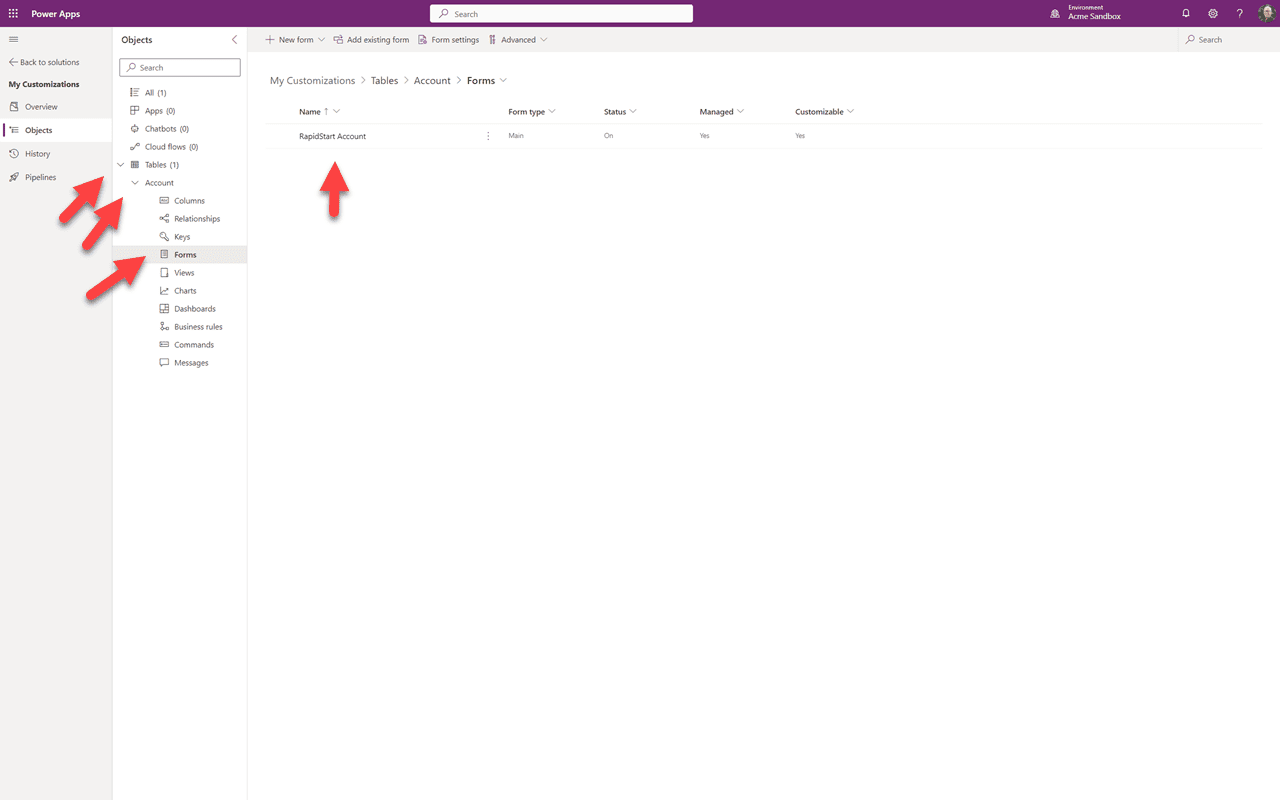
We'll pick up where we left off. In the sidebar click the down arrow next to Tables, then the down arrow next to Account, then click on Forms — you will see the form that we added in the last post.
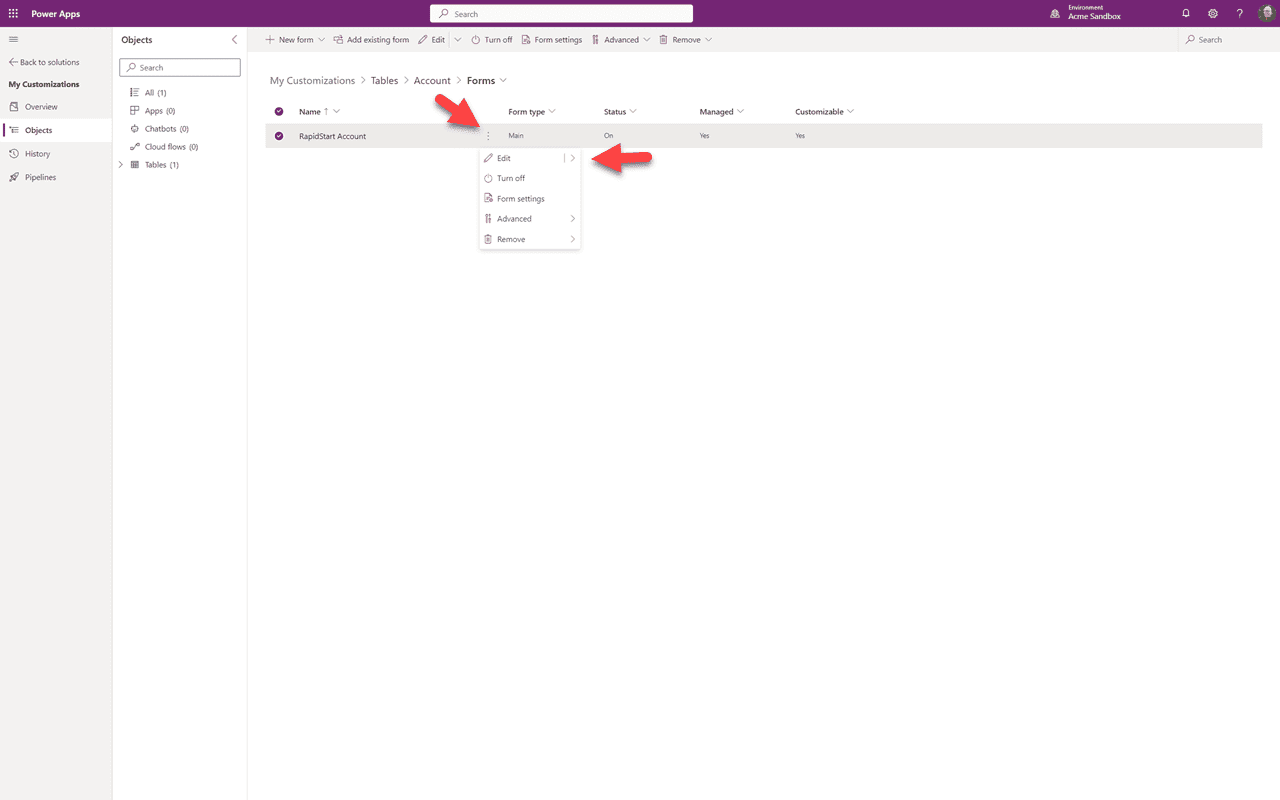
We'll click on the three dots and select “Edit” to open the form.
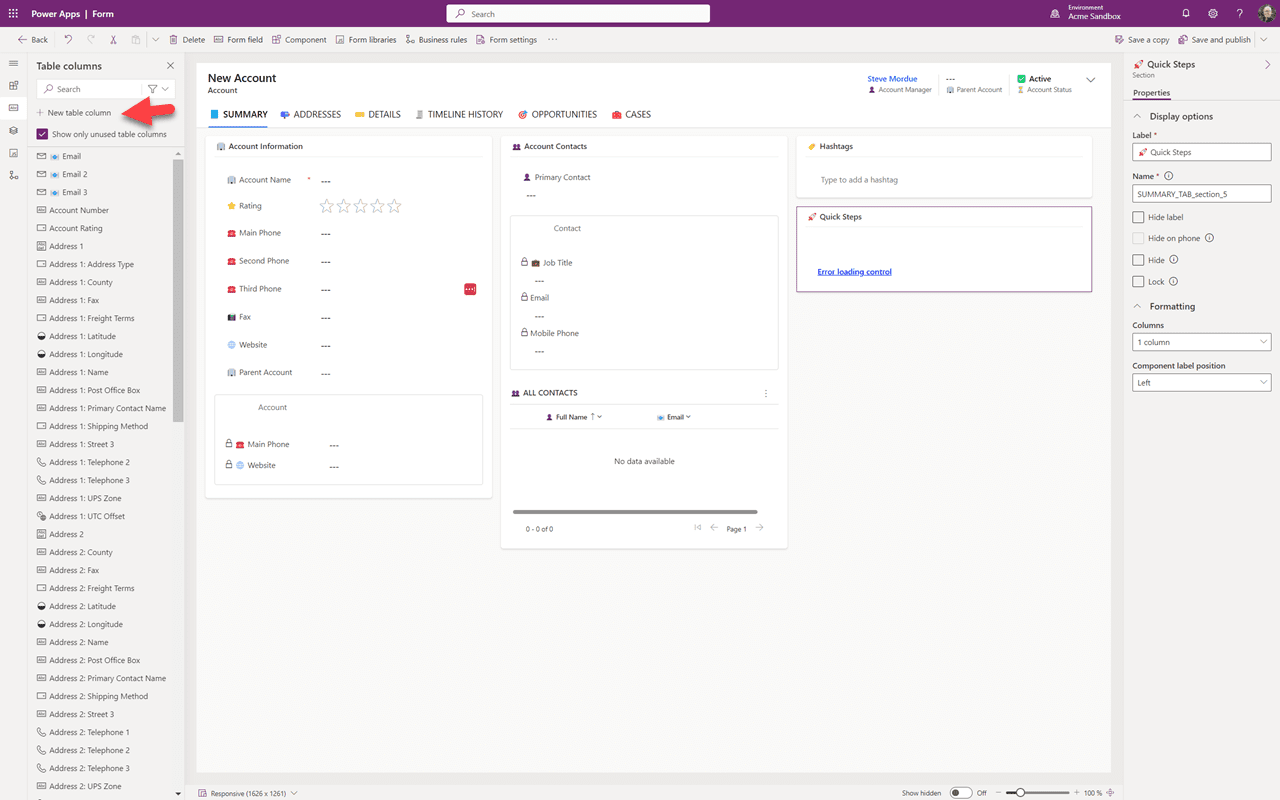
This is our form in the design canvas. We can switch tabs if we want. We'll start by creating our new field by clicking on “+ Add table column”.
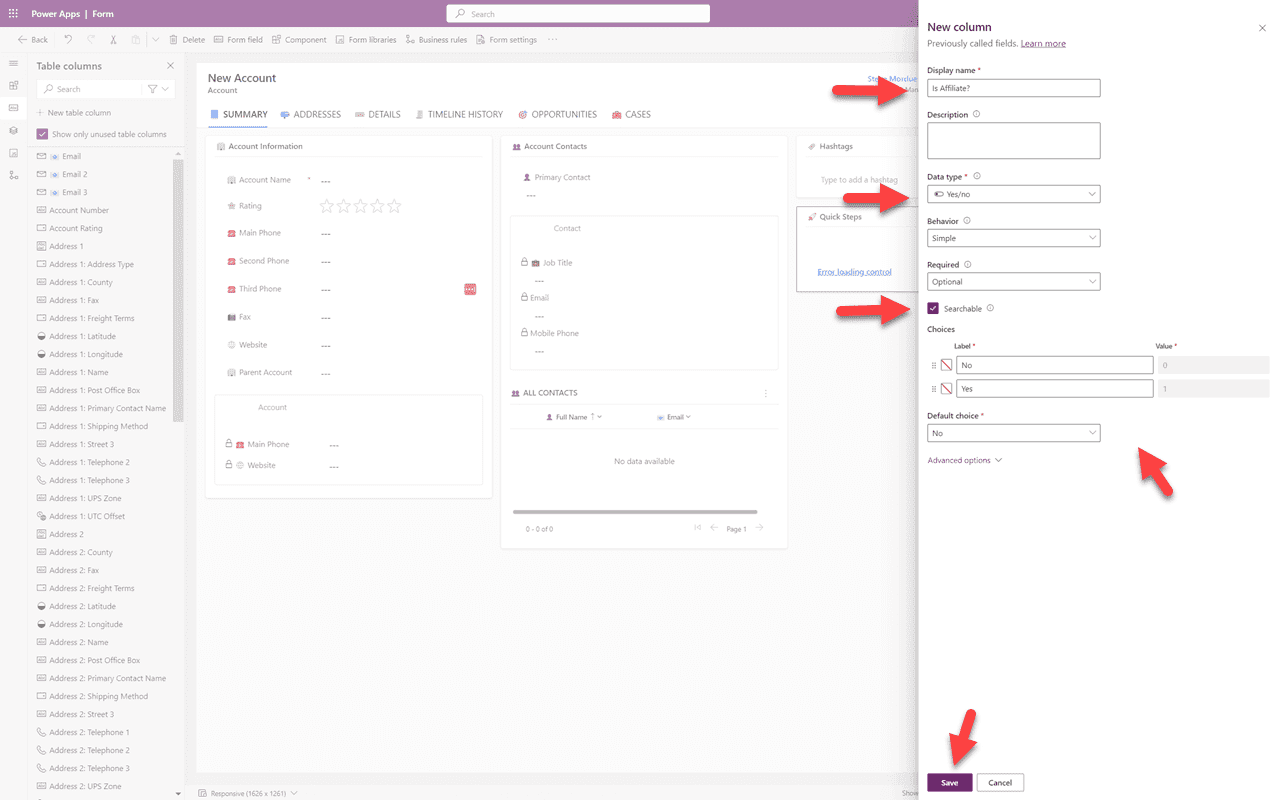
We'll give our field a name and then select the “Data Type”. For this, I am creating a simple “yes/no” field, but you have many options depending on the data you want to capture. You can also decide if you want to be able to search by this field. Depending on the field type you choose, you will see options for that field type. In my case, I selected to default to “No” for my yes/no field. Then click “Save”.
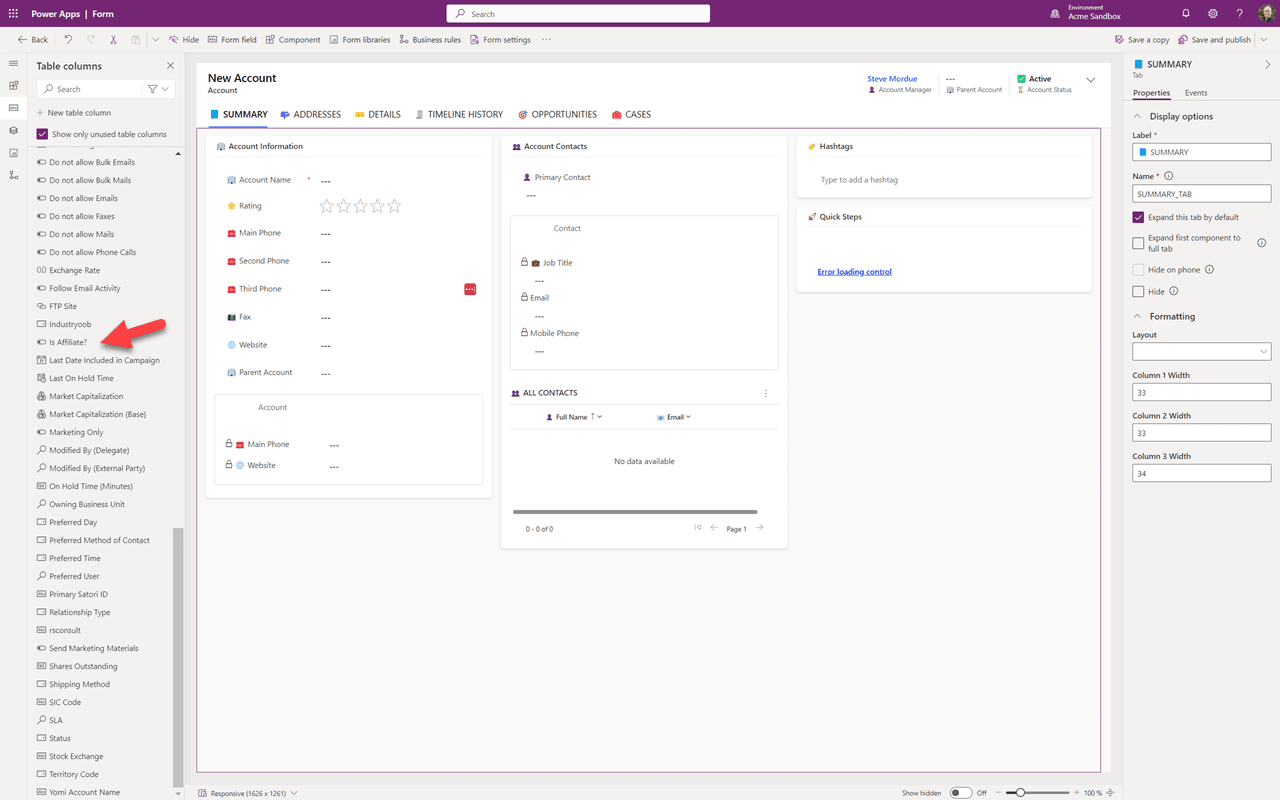
You can see that our new field has been added to the table columns list. You may need to scroll down to it. Navigate to the tab where you want to add it.
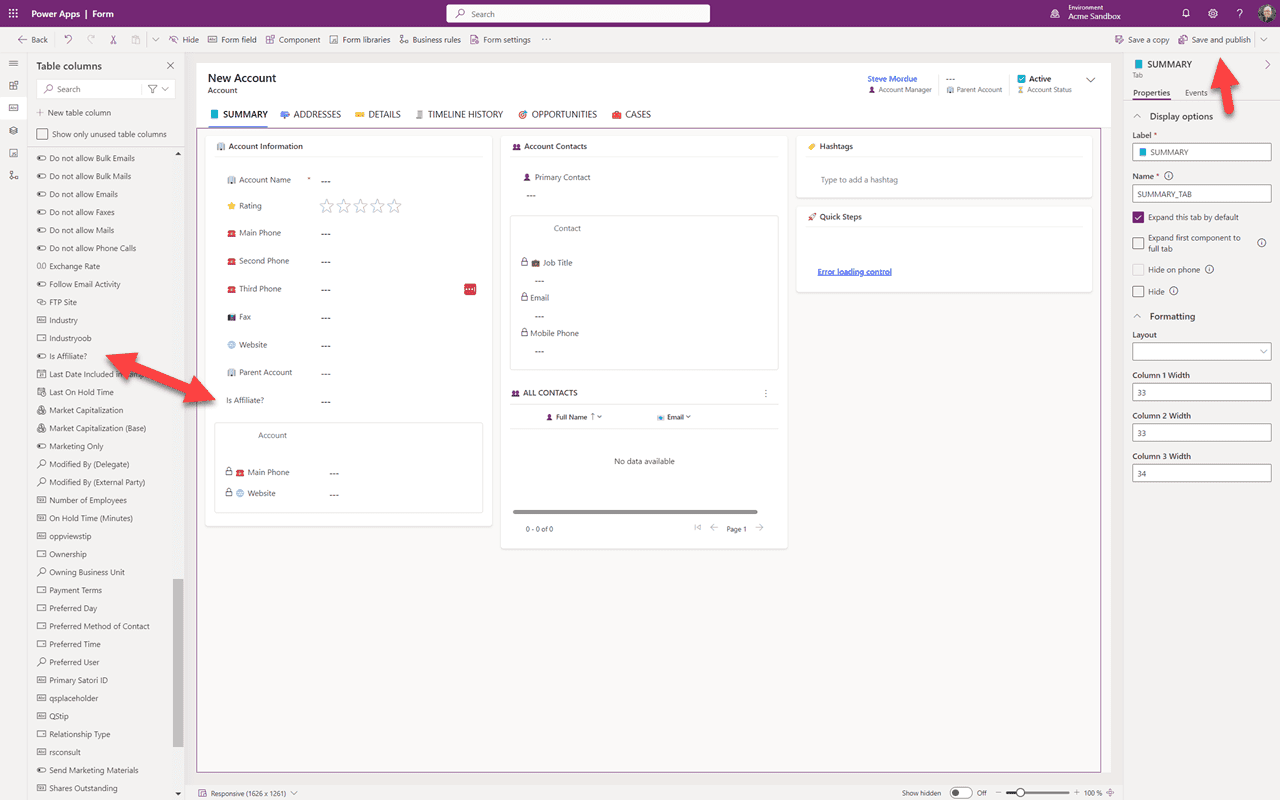
Now simply drag the field from the list on to the form wherever you want. While you're here you can also delete any fields you don't need and move other fields around if you like. When you are happy with the form, click on “Save and publish”. You can now leave and go back to your app in the sandbox and see the changes. You may need to refresh your browser.
Summary
In this Part 4 we have modified an existing component — a form — to add a new field. In Part 5, we will continue in this solution by adding a new component.