Advanced Development for RapidStart CRM or Dynamics 365 — Part 1
Before you start customizing RapidStart CRM or Dynamics 365, there is a right way to do it. This series covers best practices for advanced development, starting with setting up your environment for success.
One of the things about offering a fully customizable app is that users often… well… customize it. But before you run off and start hacking away at RapidStart CRM, or Dynamics 365 for that matter, there is a right way to do it, and then there are all the other ways. With all of the talk about “Citizen Development”, it is easy to think that anyone can do this. And they can! But there are still best practices that should be followed.
What's Wrong with Wrong?
You can perform your customizations in many ways, and even if none of them follow best practices, things may still work. So, what's the risk? The two biggest risks are the potential for your production system to stop working and challenges with upgrading. There is also a risk that whoever is doing the customizations leaves, and you can't figure out what they did or how to undo it. Following best practices mitigates all of these risks.
Start at the Beginning
So, you have installed RapidStart CRM, and maybe you have been using it for a while, and you have realized that you would like to tweak it to fit your business better. Great! Before you do a single customization, you would be wise to create a safety net. The absolute safest way to do that is to engage with us or one of our Certified Regional Partners.
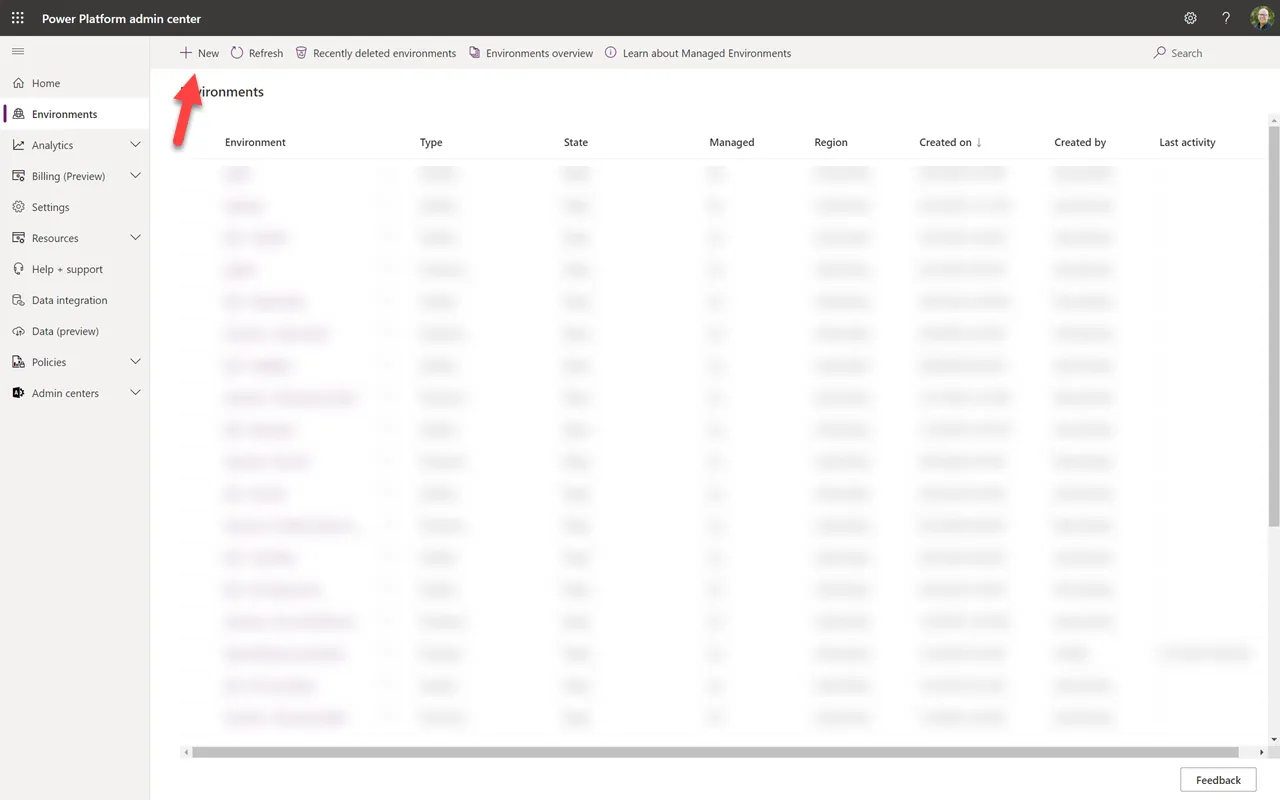
Create a Sandbox Environment. Like the name implies, this is an area where you can do stuff that does not impact your users directly. To do this, start at https://admin.powerplatform.microsoft.com/, and click on “Environments” in the sidebar.
We'll start by creating a Sandbox environment by clicking “+ New”.
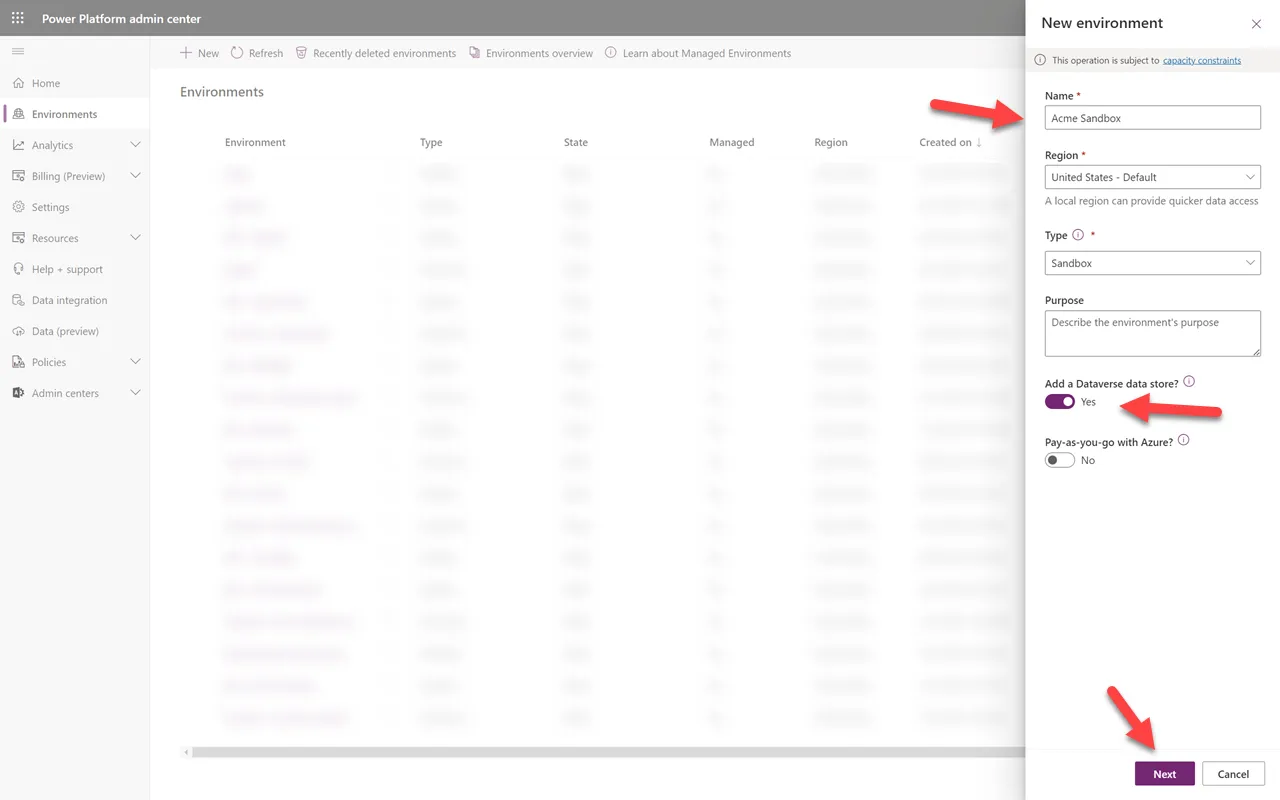
Give your new environment a name. Leave as Sandbox. Tick “Yes” to add a Dataverse data store, and then click “Next”. Note, if you do not have enough capacity, you will not be able to proceed until you acquire more.
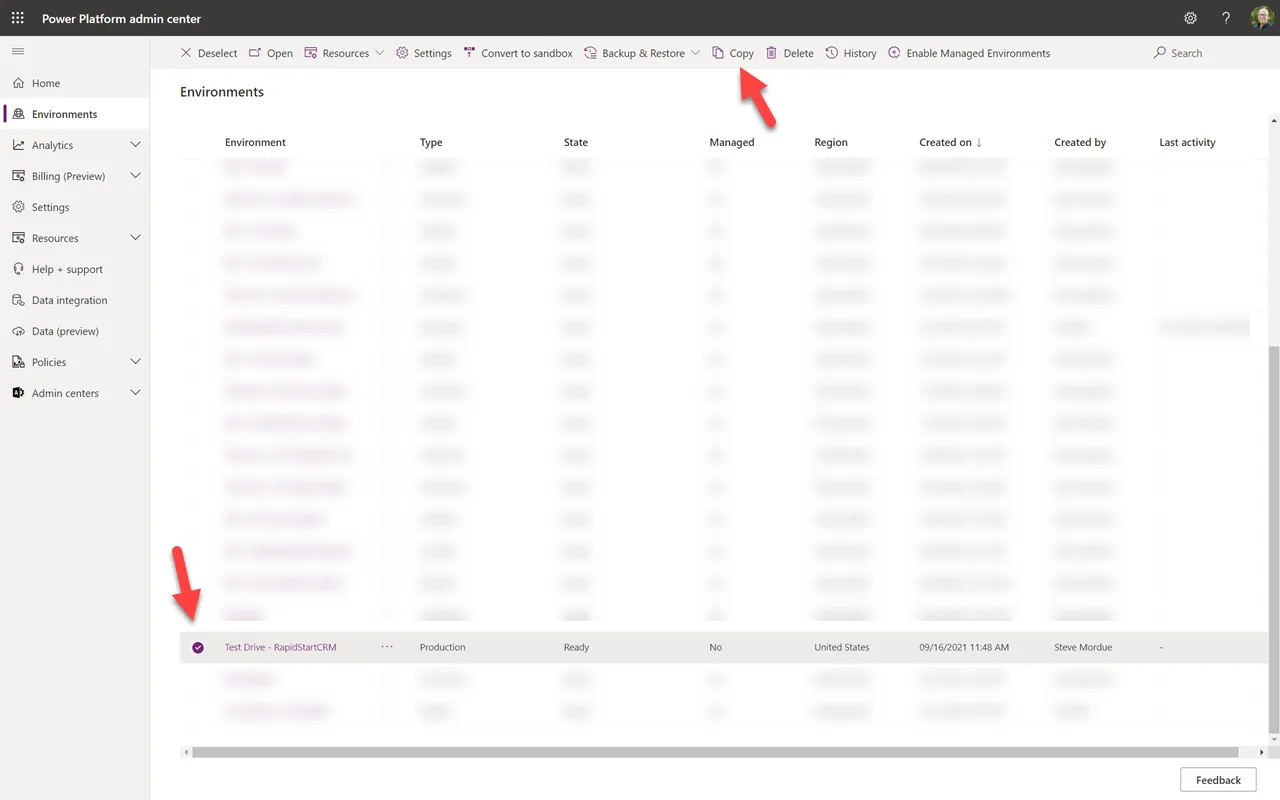
It should only take a few minutes for your new sandbox environment to be created. Then select your production environment where RapidStart CRM is installed. Then click “Copy”.
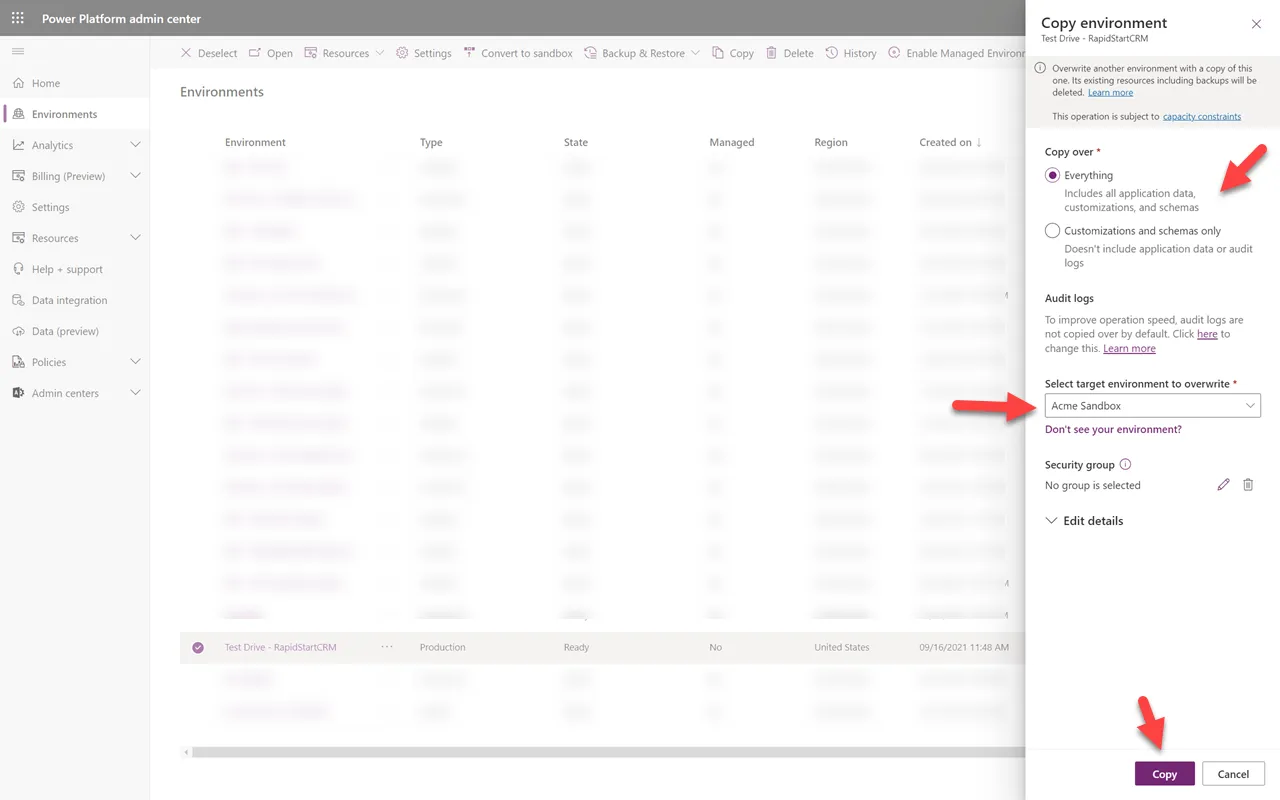
Decide if you want to copy everything, or just the applications without your data. If you don't have much data yet you may just want to copy everything. If you already have a lot of data, copying it will use capacity, so you may want to just create some demo data later. Select the sandbox environment you created earlier from the dropdown, then click “Copy”.
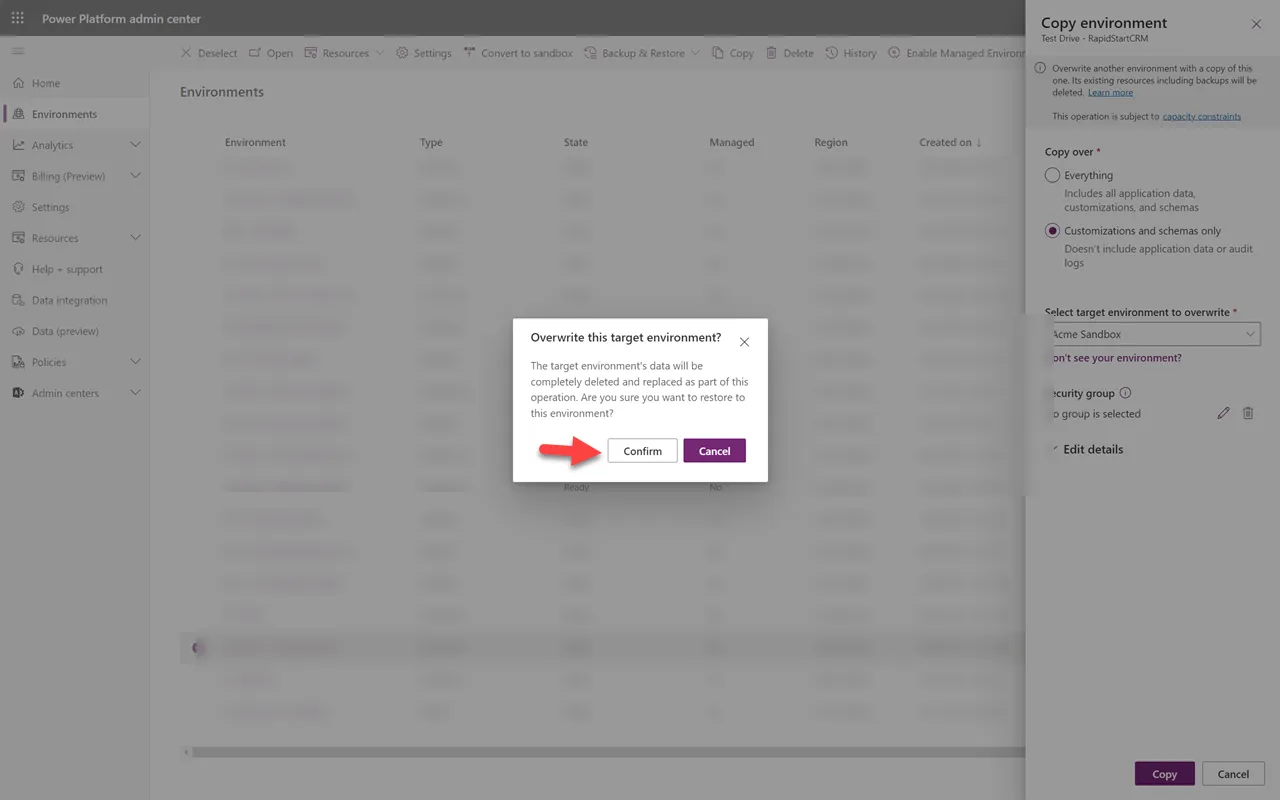
Go ahead and “Confirm” the overwriting of your sandbox; there isn't anything in there anyway.
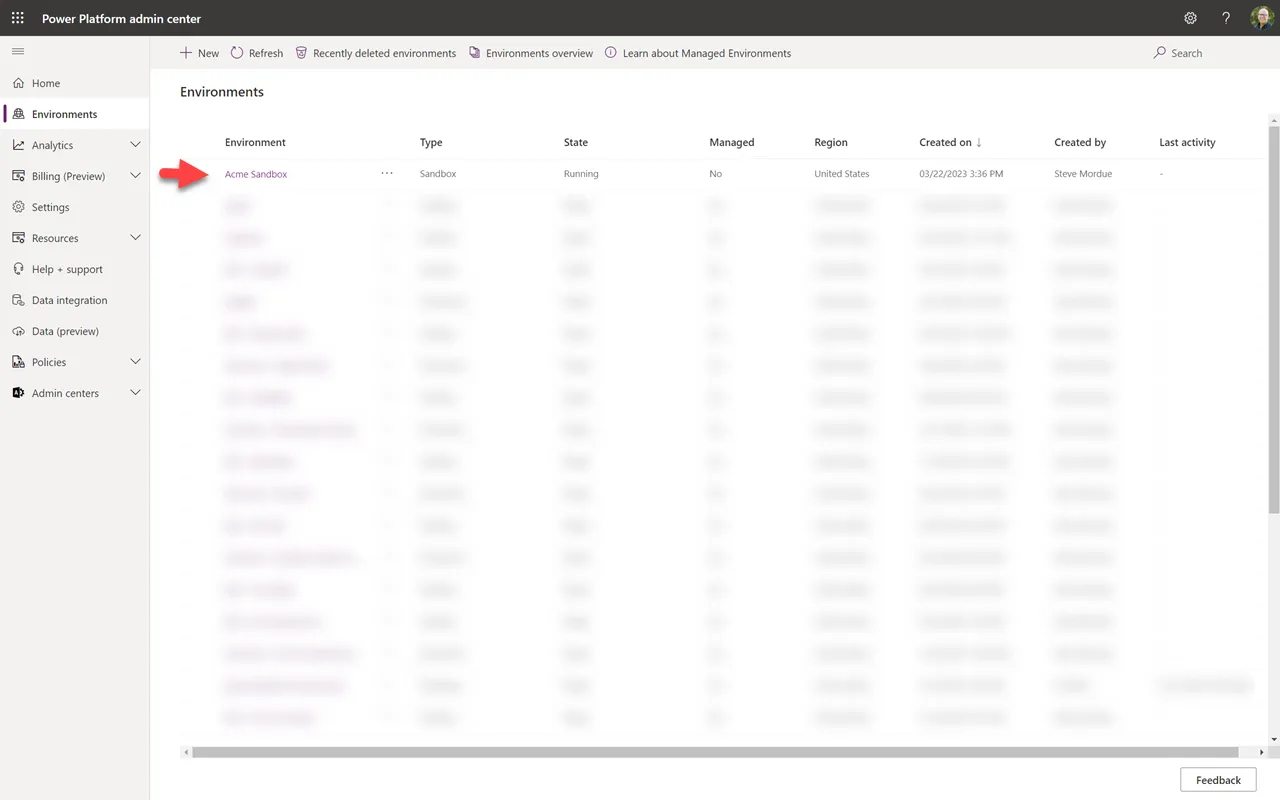
Congratulations! You have successfully created a copy of your environment into a new sandbox and are ready to start your customization journey. If you already did some customizations, don't worry; we'll capture those in a future post.
Summary
In this Part 1 we have set up your environment for future success. In Part 2, we will continue in this sandbox environment by creating a Solution for your Customizations.