Business Central Addon for RapidStart CRM Setup
Steps to install and configure the Business Central Addon for RapidStart CRM. Unlike our apps, this addon requires several steps from both the RapidStart CRM side and the Business Central side.
⚠️ Partner Recommended
Due to the complexity, we suggest using one of our RapidStart Certified Partners for this. However, if your Business Central partner is also skilled in the Power Platform, they can perform these steps for you. We do not recommend that an end-user attempt this process.
High Level Steps
- Create or use an existing Dataverse enabled environment.
- Install RapidStart CRM from AppSource on the Dataverse enabled environment.
- Configure the Integration from within Business Central.
- Updating the Application User Role
- Setup Record Mapping
- Install the Business Central Addon for RapidStart CRM from AppSource on the Dataverse enabled environment.
- Update Environment Variables
- Assign RapidStart CRM Security roles
- Link Environments (Optional)
- Power Automate Flows
We have already created a document that covers steps 1 & 2 here. Once those steps are complete, return here to continue with Step 3.
Make sure the Dataverse and BC environment types match: Production to Production, or Sandbox to Sandbox.
Step 3: Configure the Integration from within Business Central
Log into the Business Central Environment that you want to connect to.
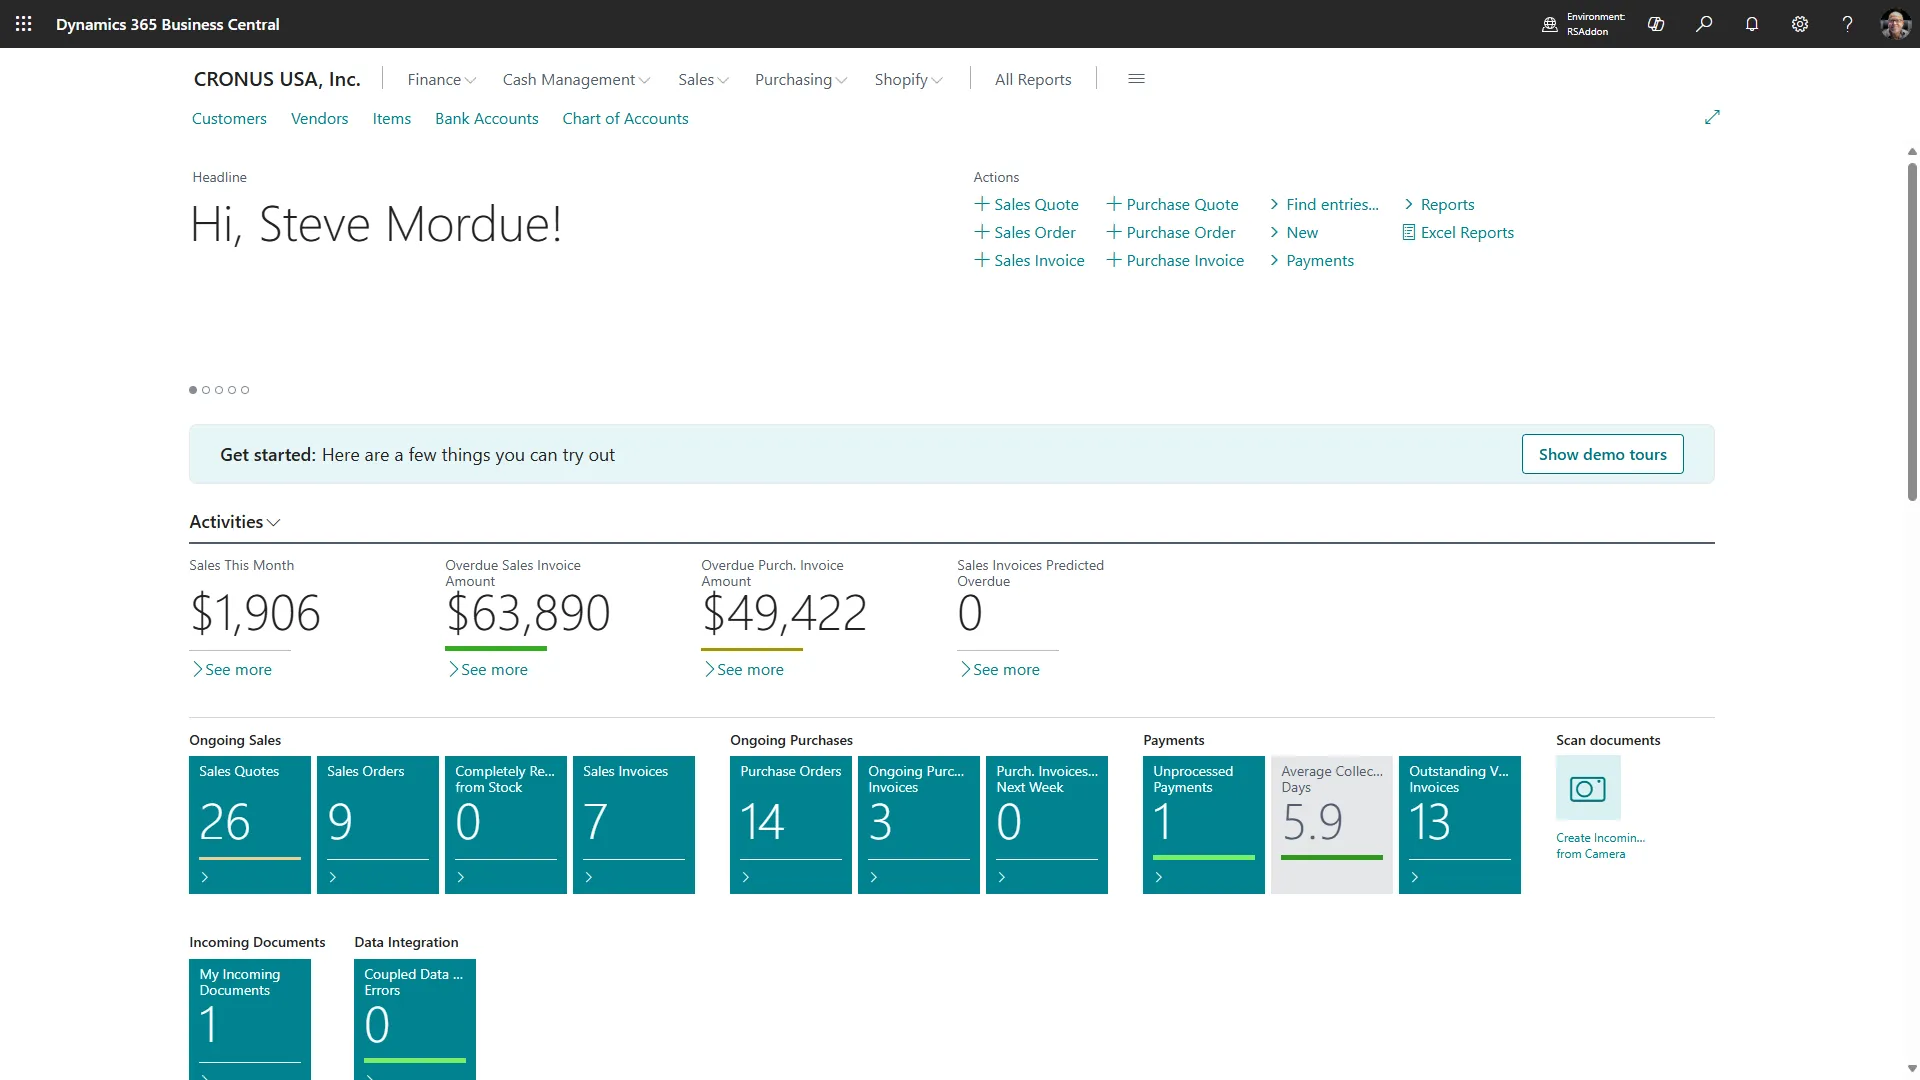
Take note of some information in the address bar.

Copy and paste to a Notepad page both the Environment ID (in yellow) and the Company Name (in green). We will need these later.

1. Click on the gear
2. Select “Assisted Setup”
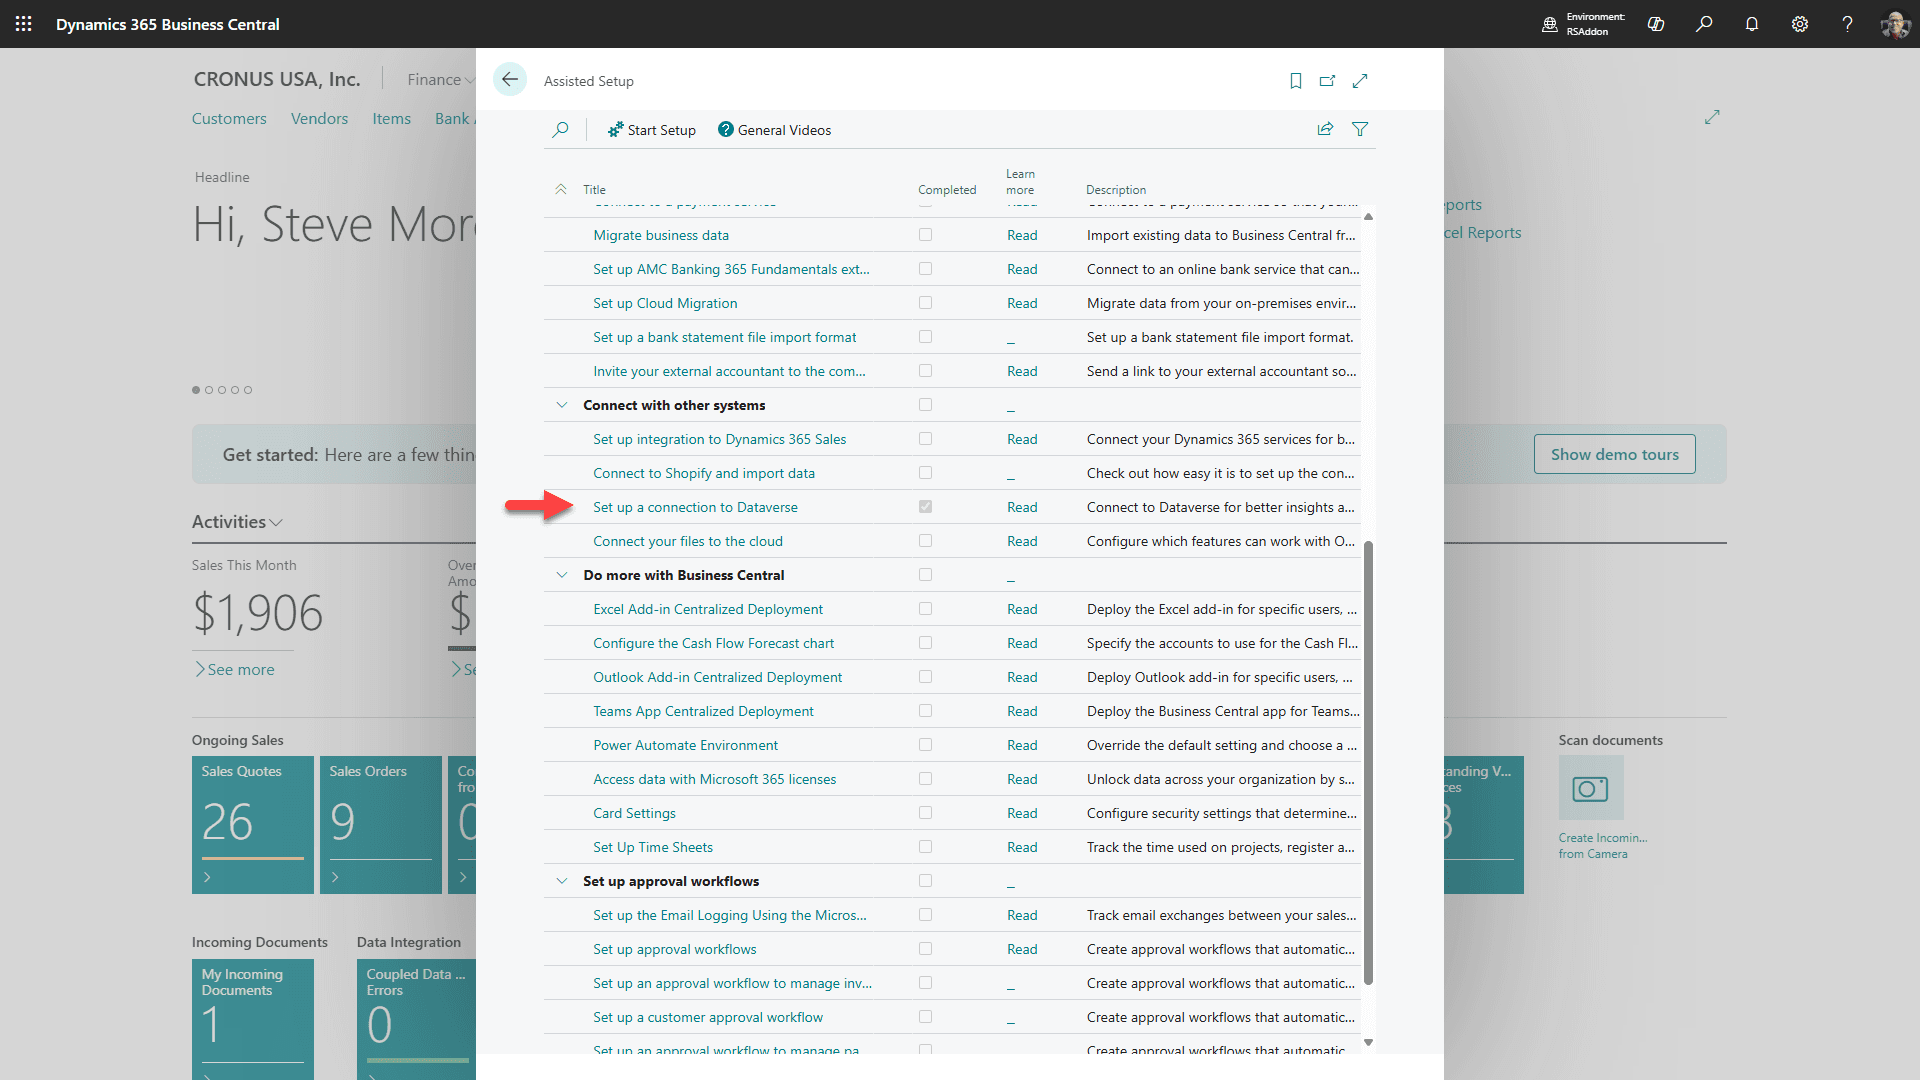
Scroll down to the “Connect with other systems” section and click on “Setup a connection to Dataverse”.
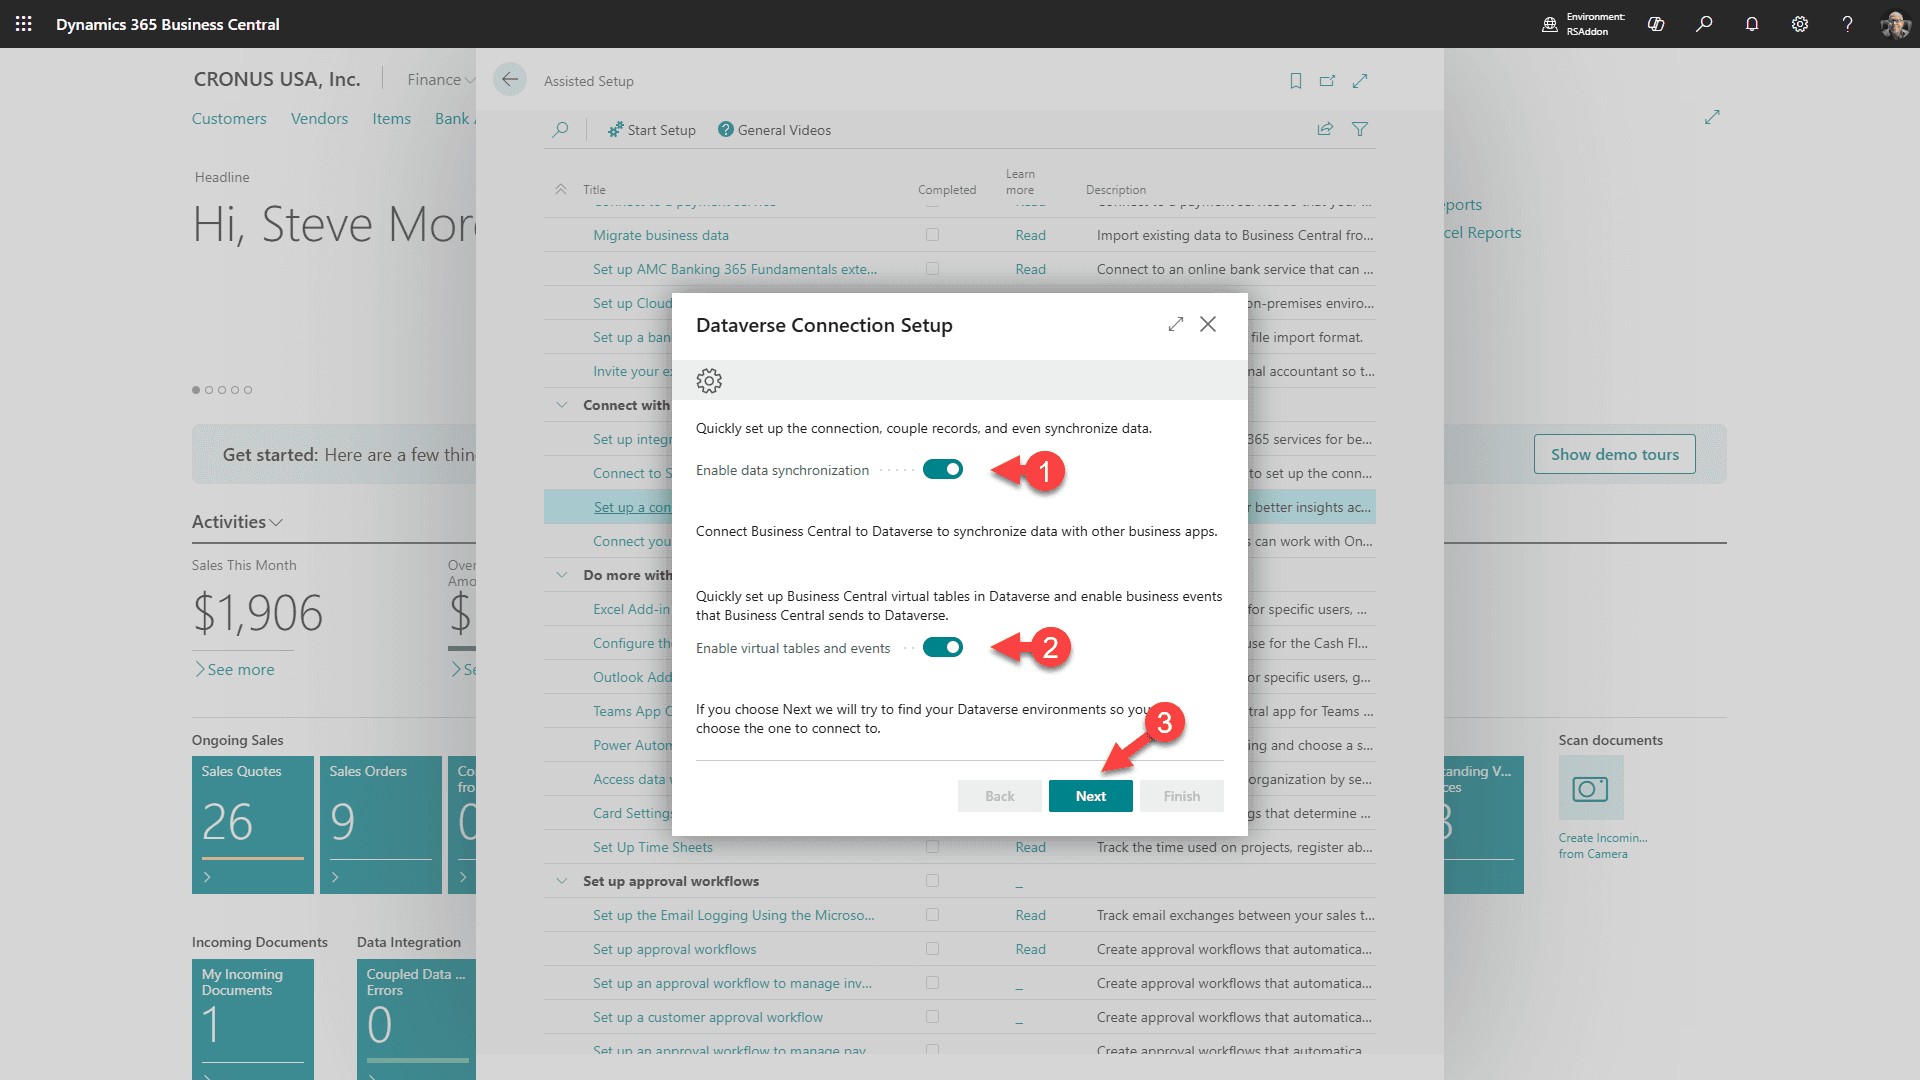
1. Select to Enable data synchronization
2. Select to enable virtual tables and events
3. Click “Next”
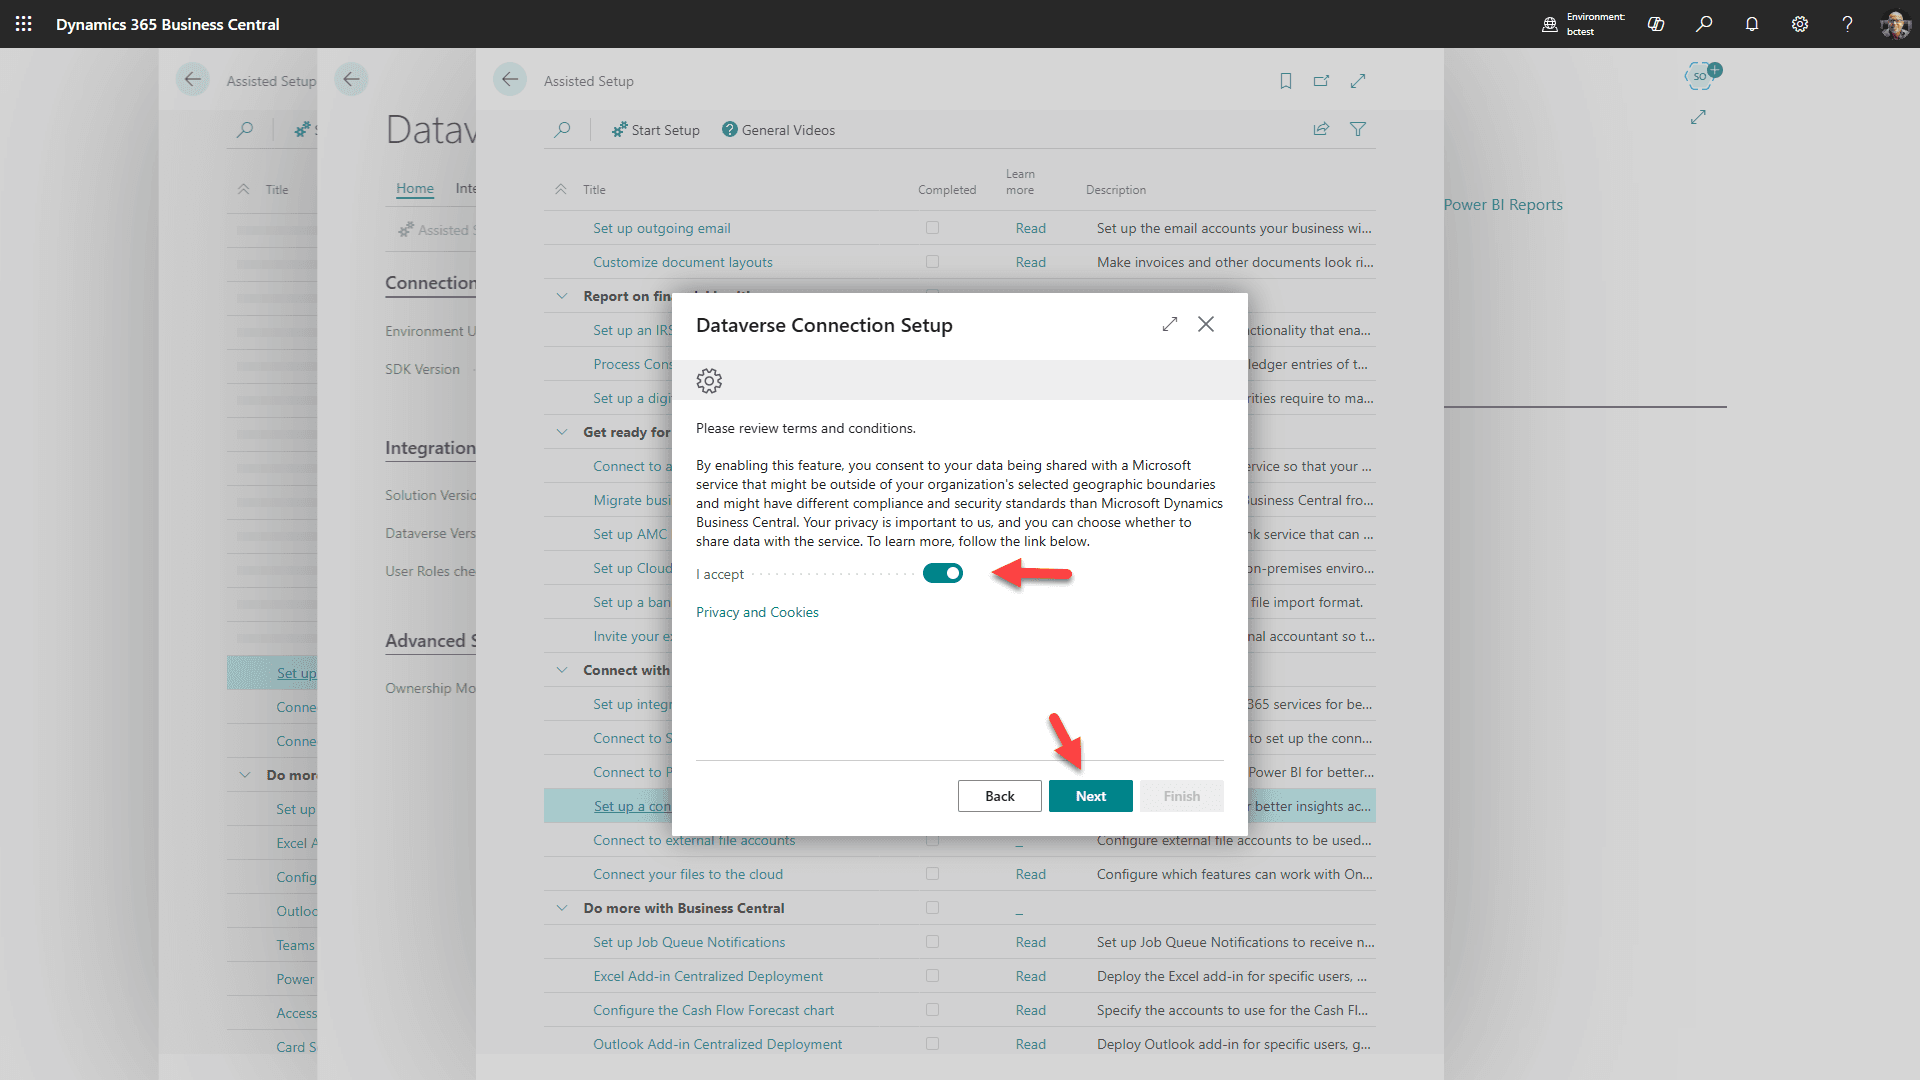
Accept the Terms and click “Next”
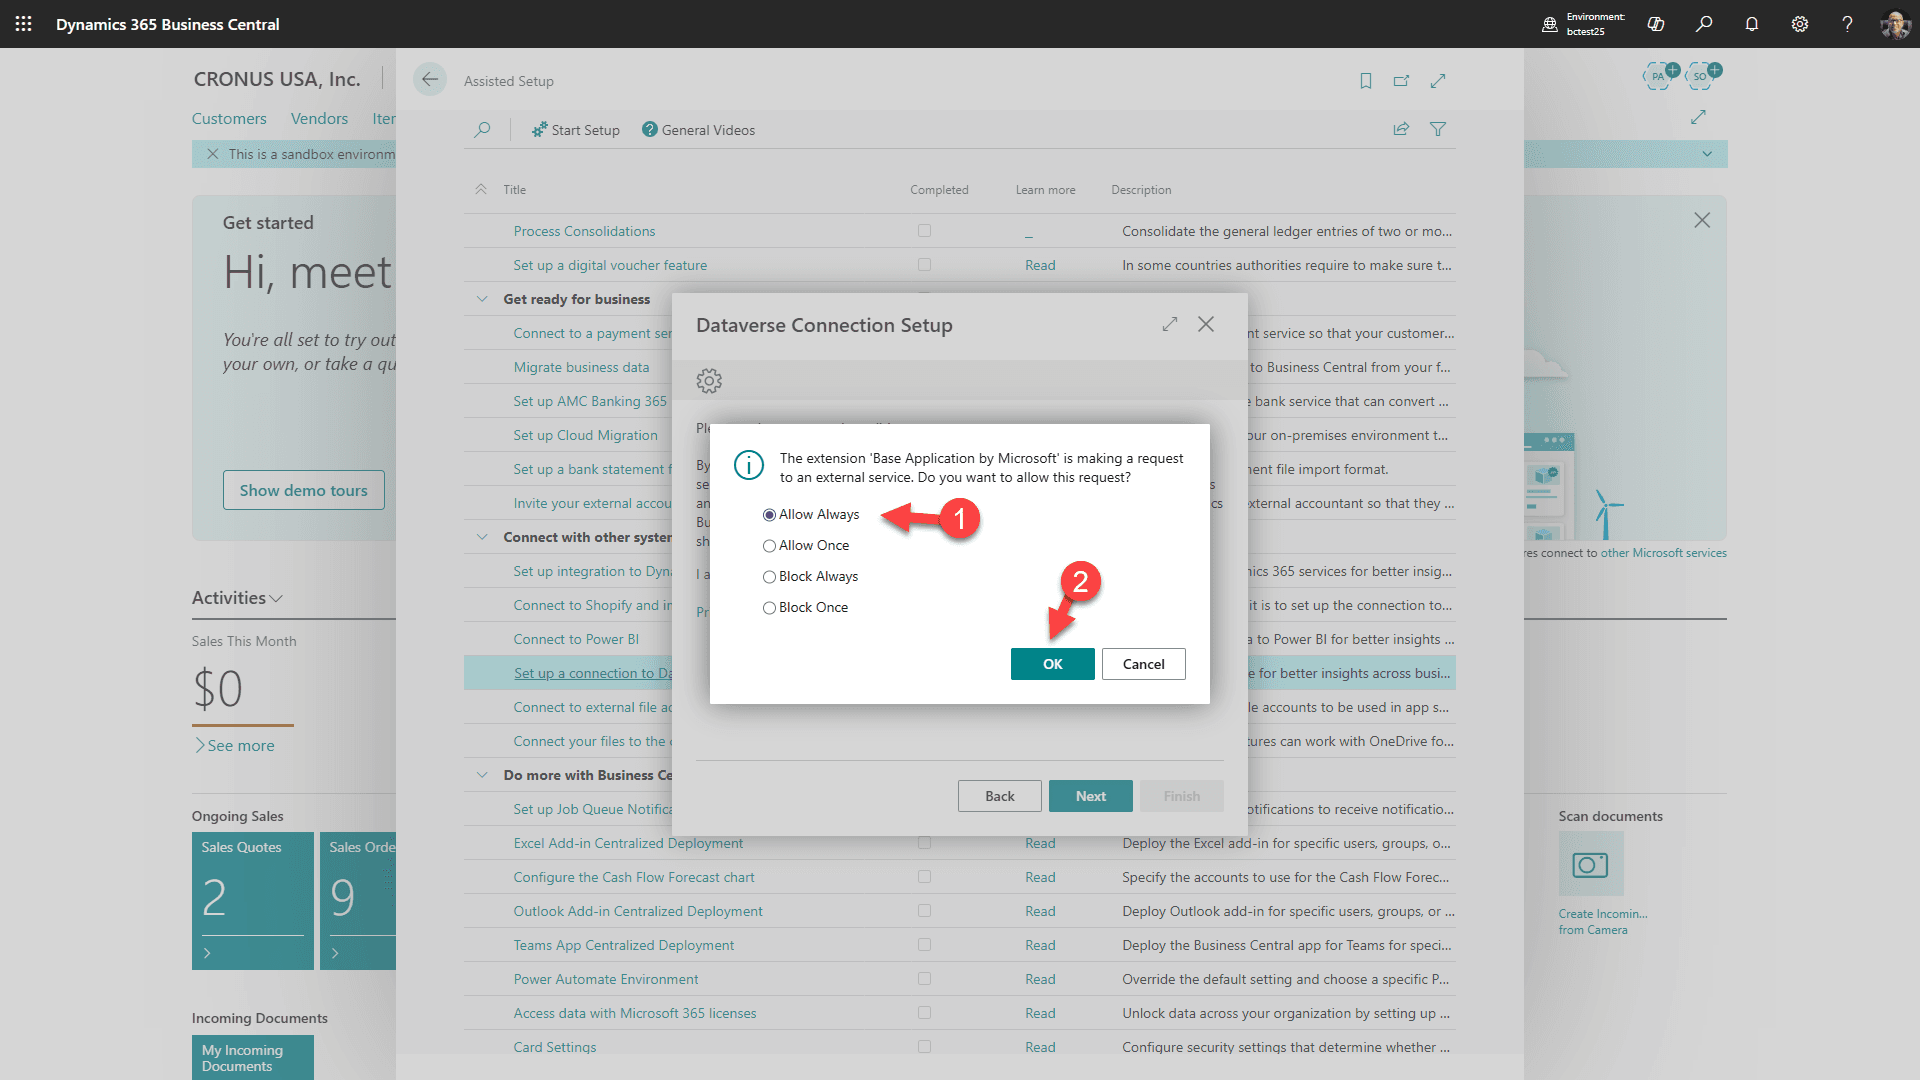
Accept the connection to Dataverse “Allow Always”, and click OK
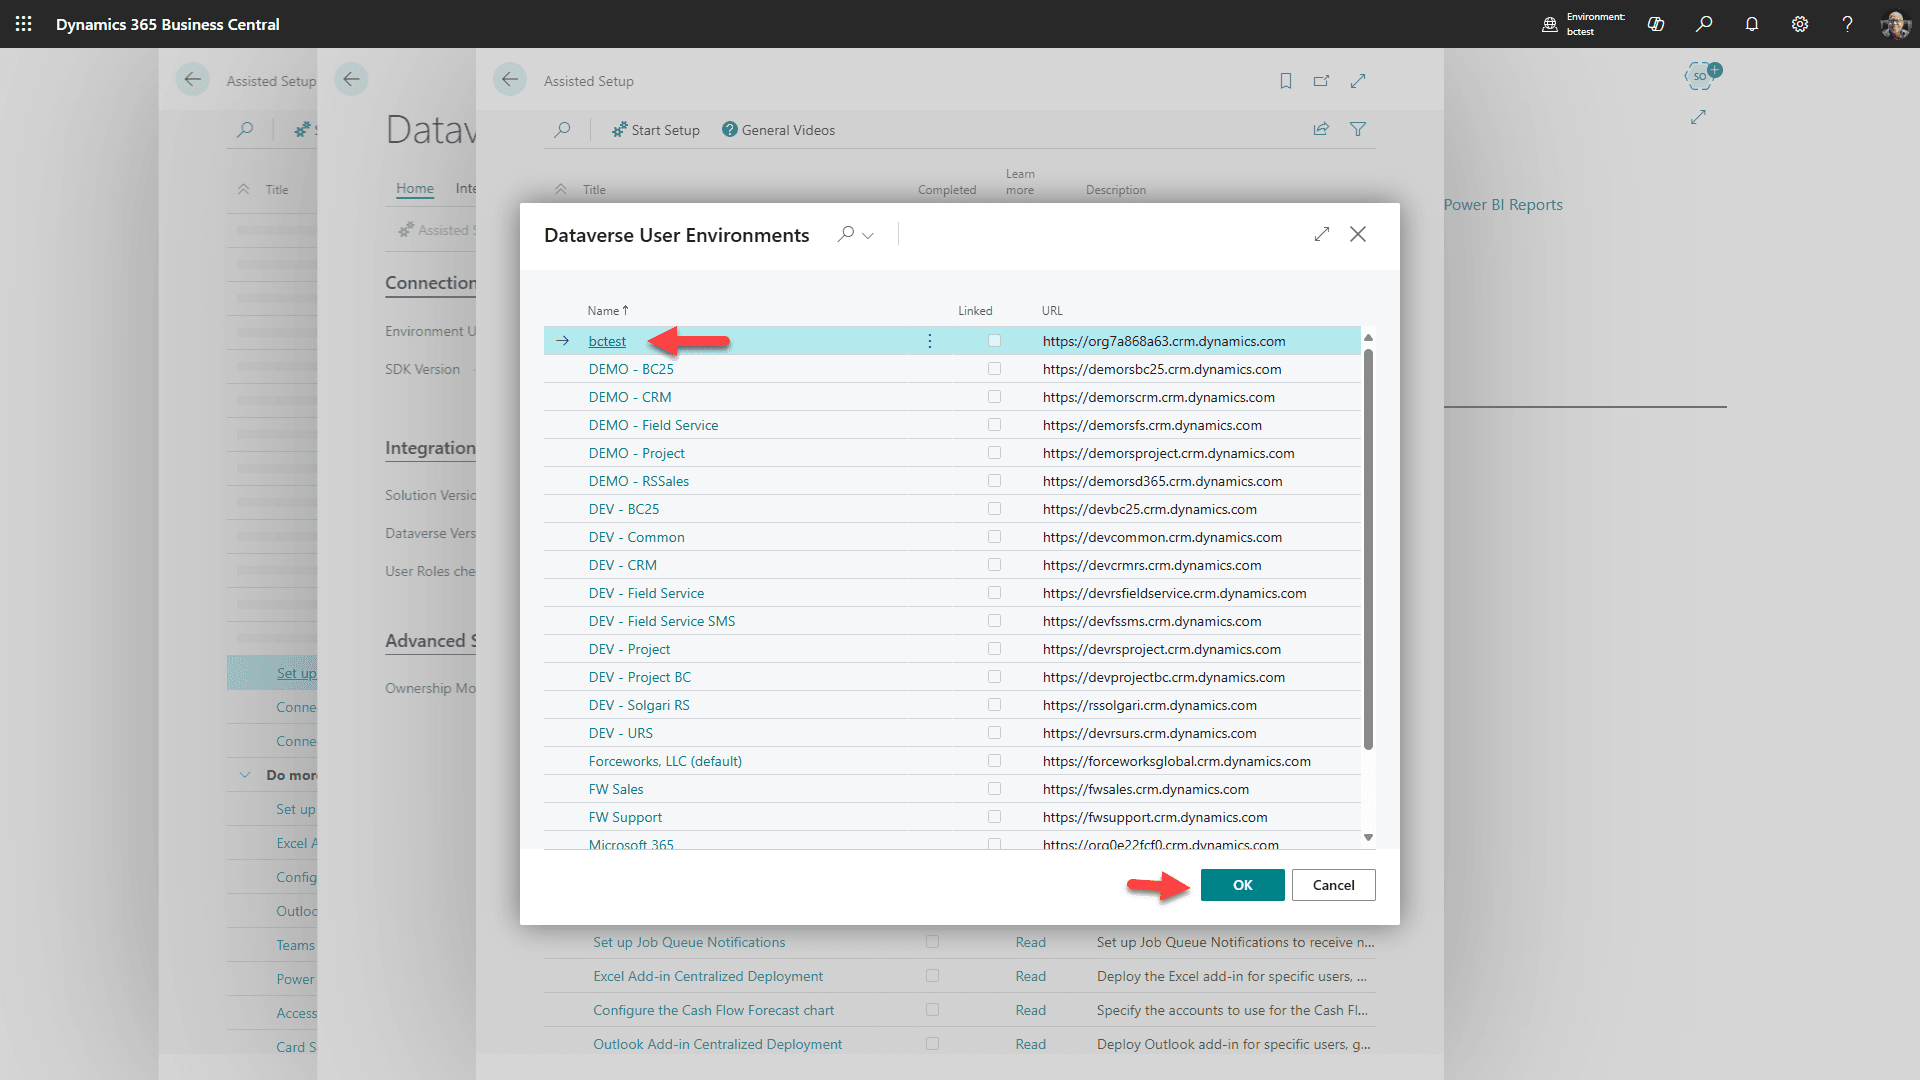
Select the target Dataverse enabled environment, and click “Ok”
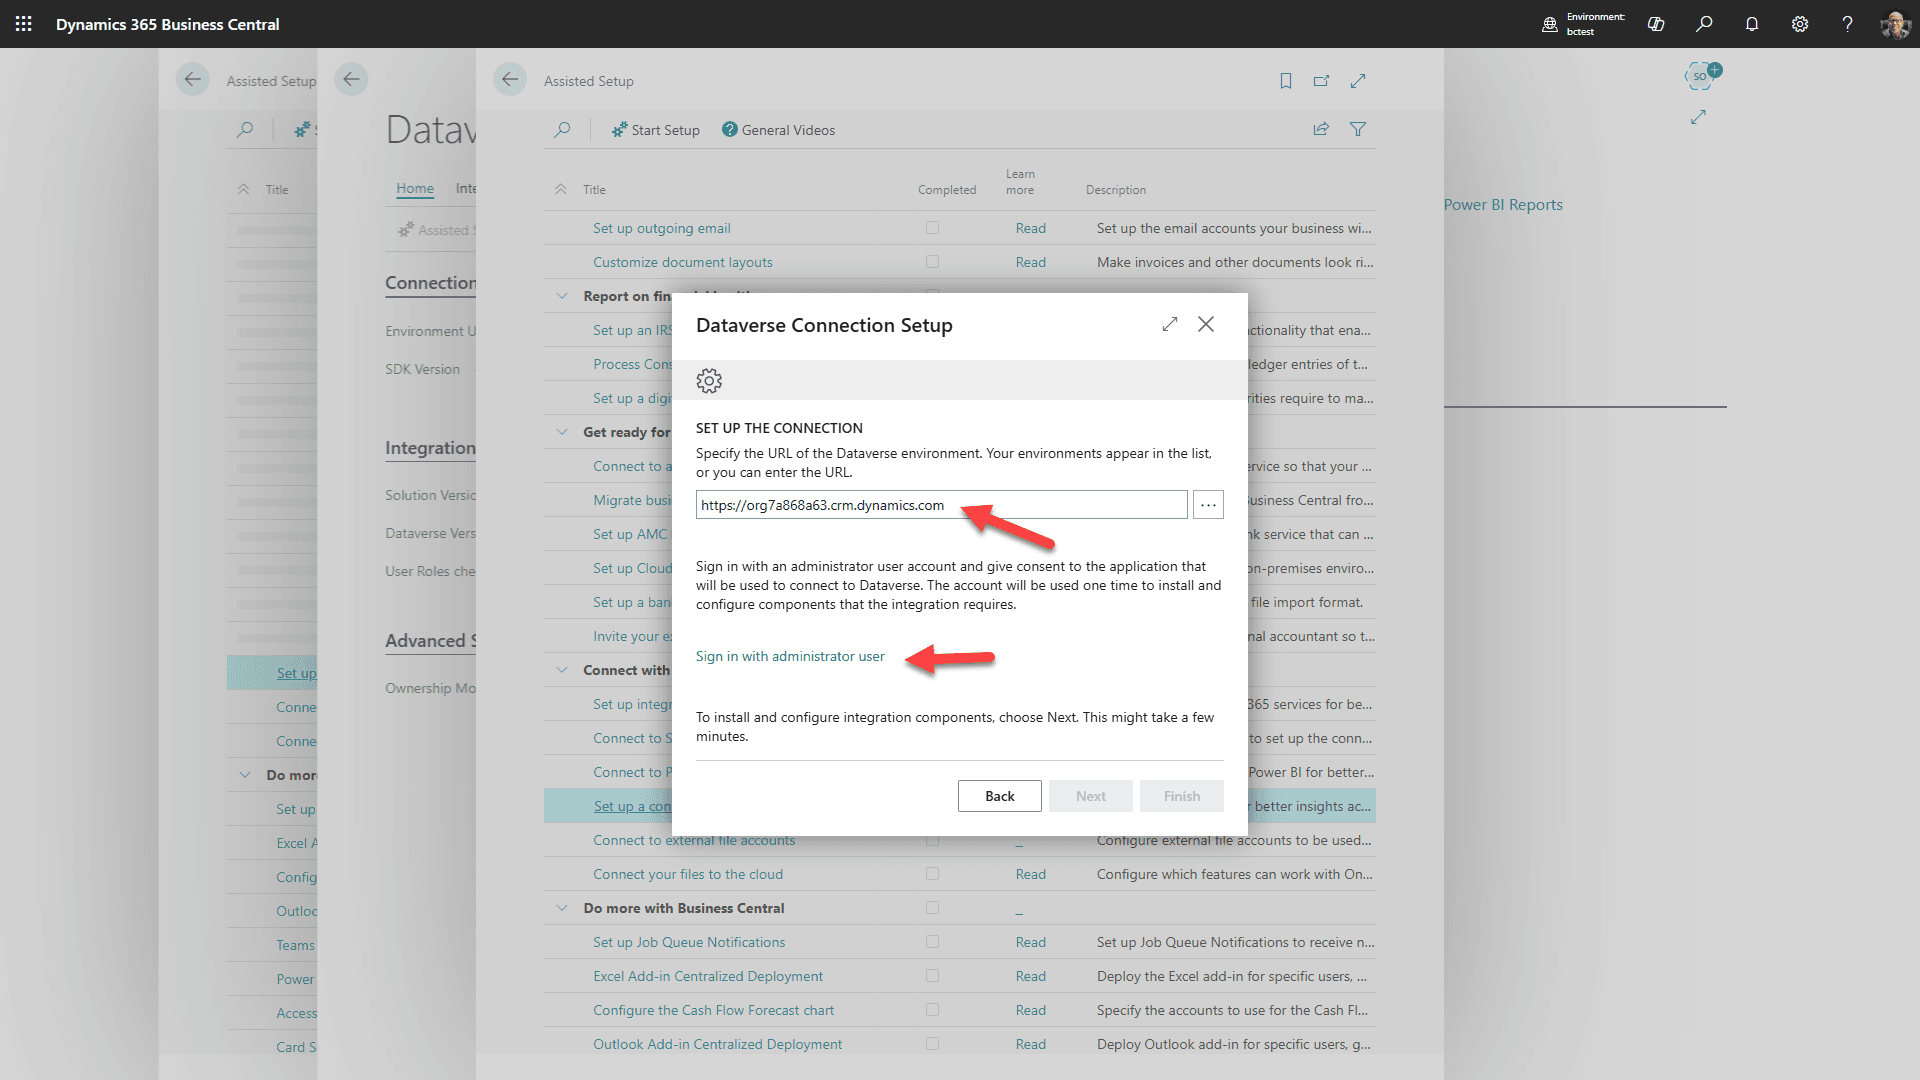
Confirm the environment is correct, then click the link to Sign in to the Dataverse environment. After signing in click “Next”
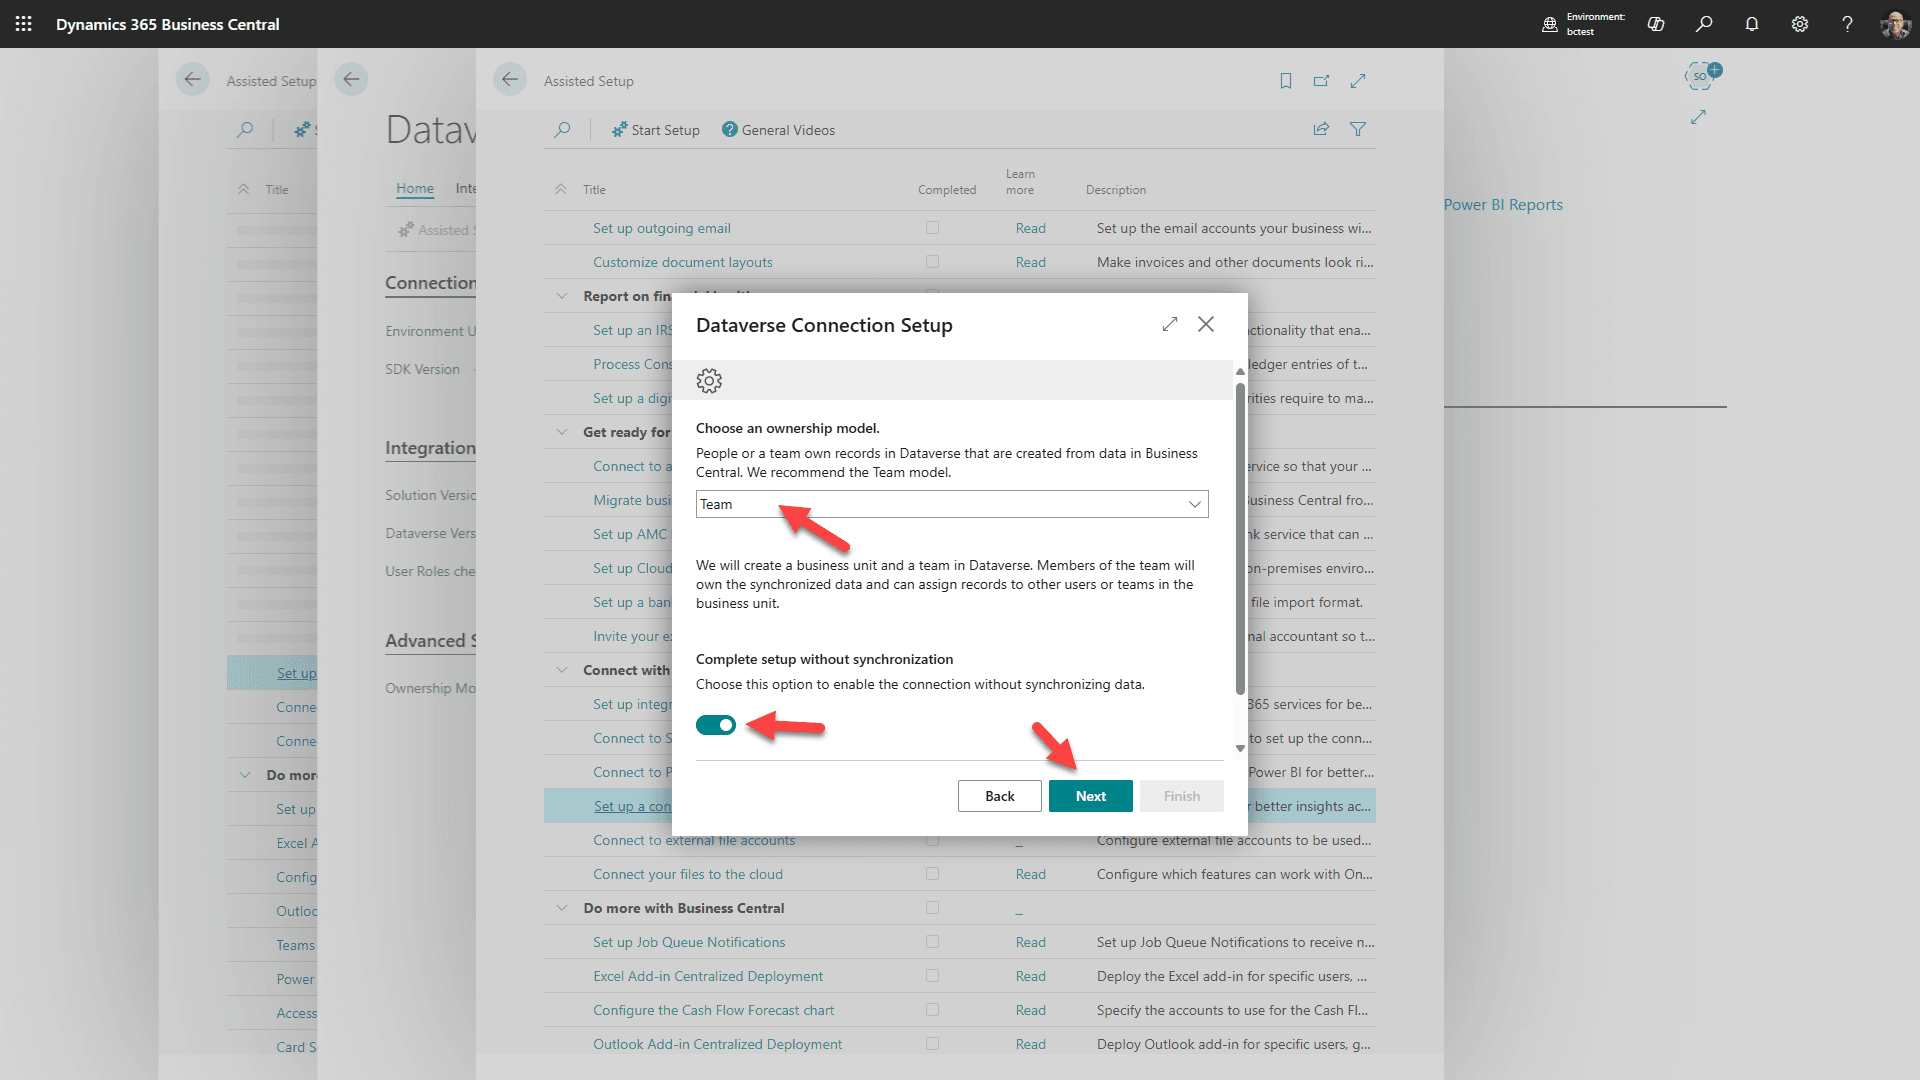
Select the recommended Team ownership, toggle to Complete without synchronization (we'll do this later) and click “Next”
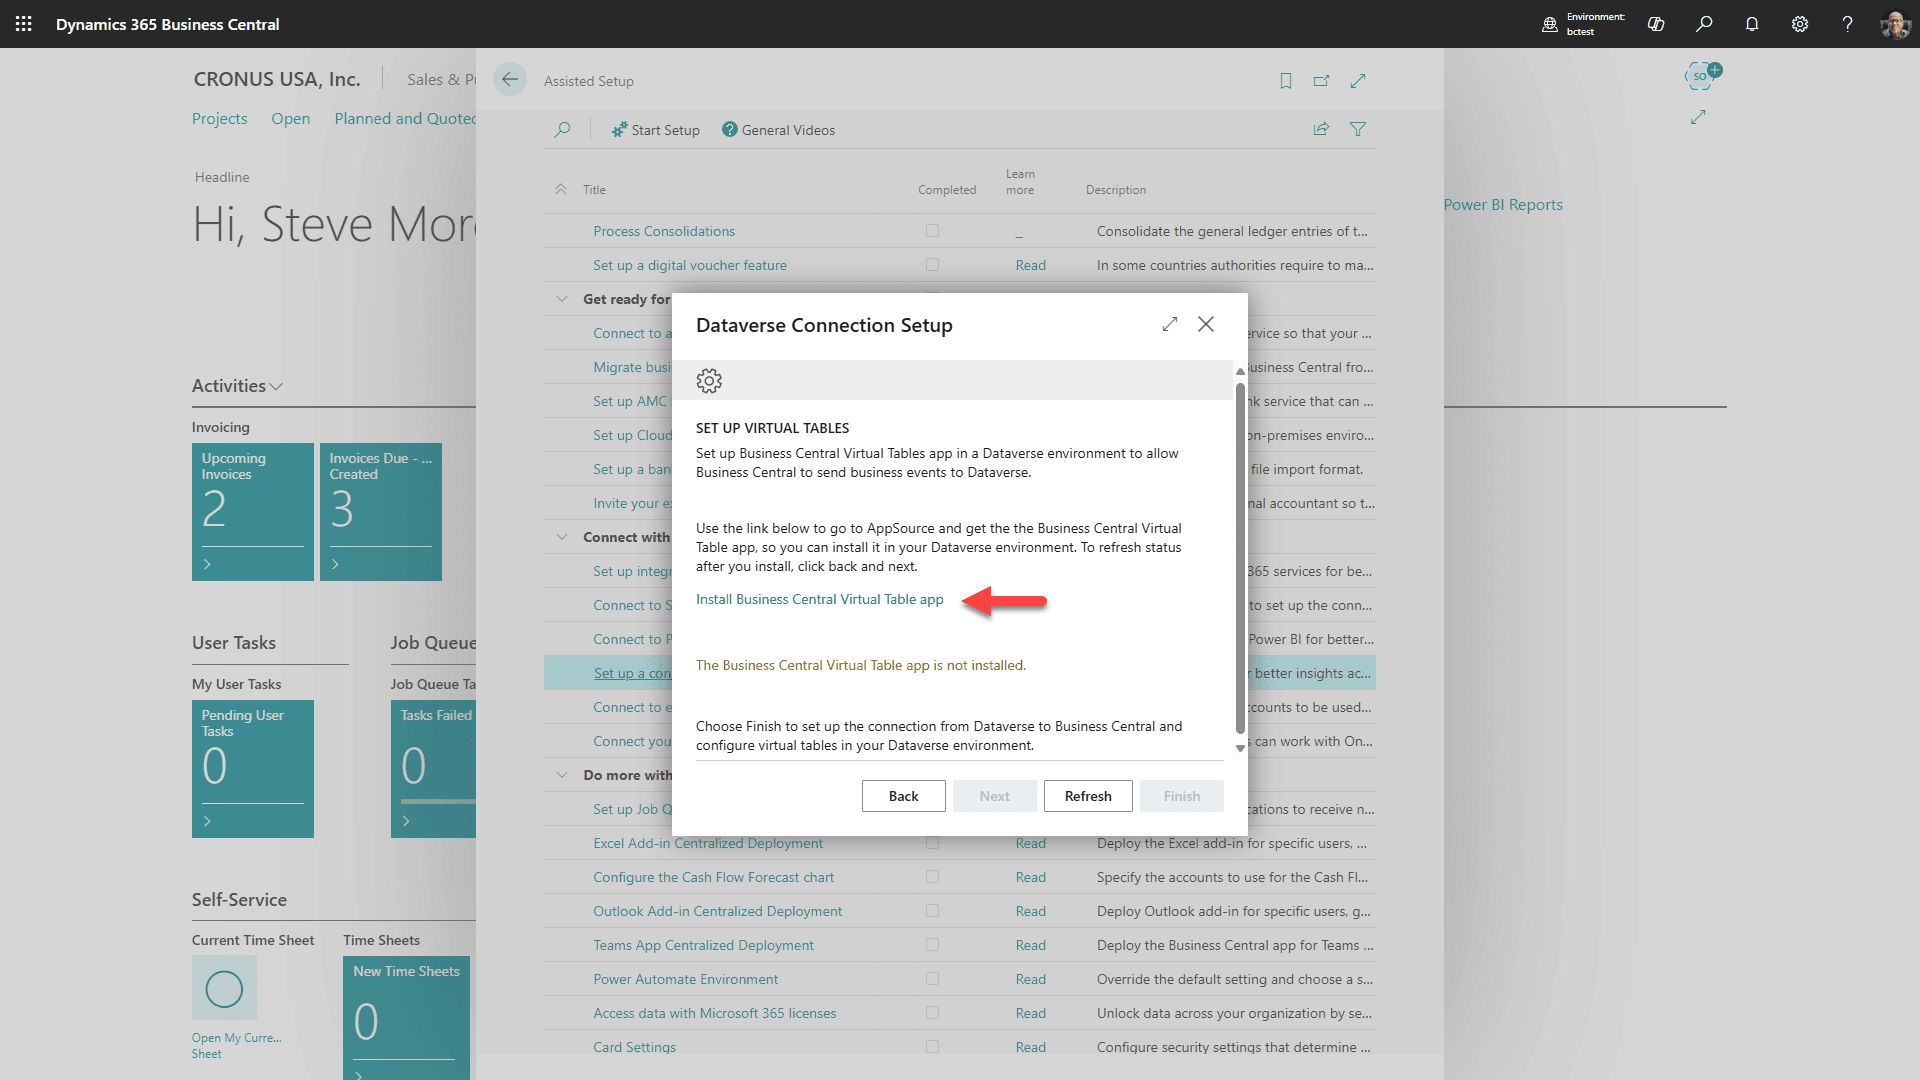
1. Click Link to Install Business Central Virtual Table app
2. Click “Next” (A new tab will open to AppSource)
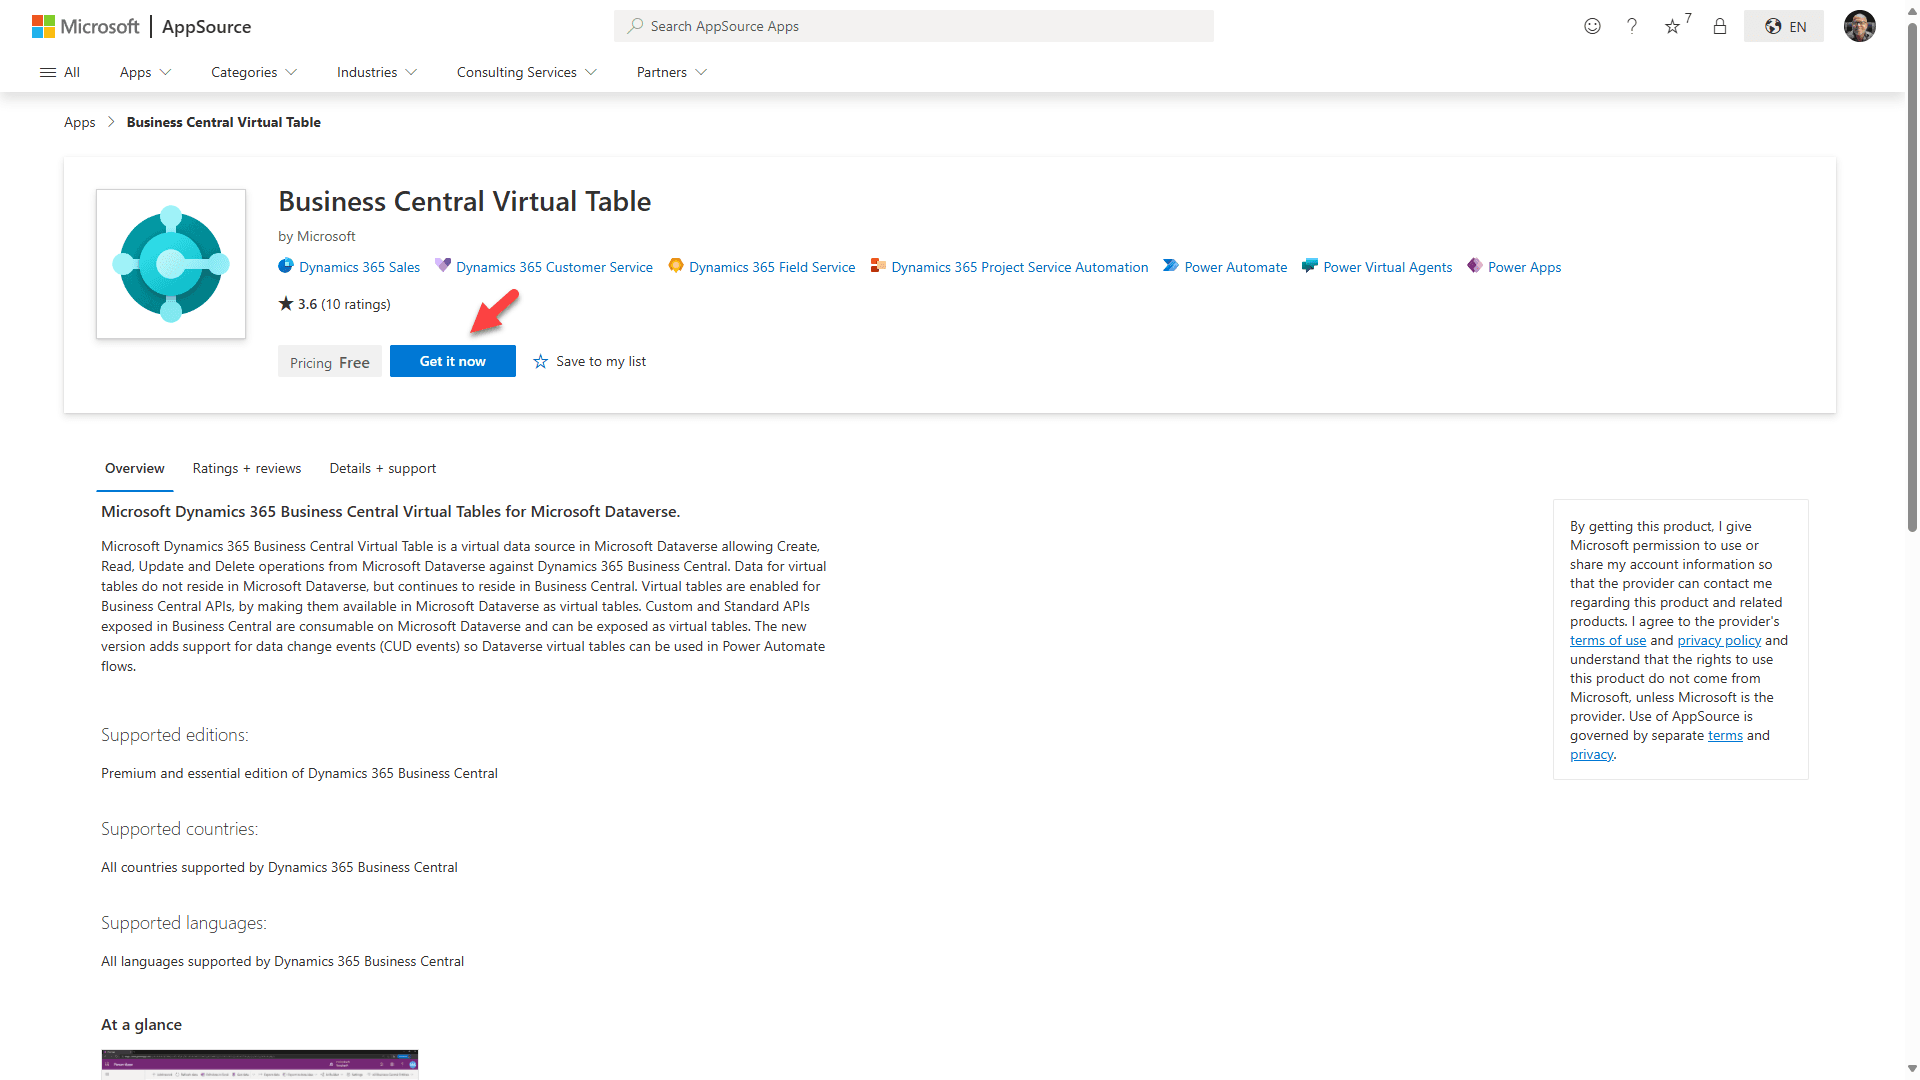
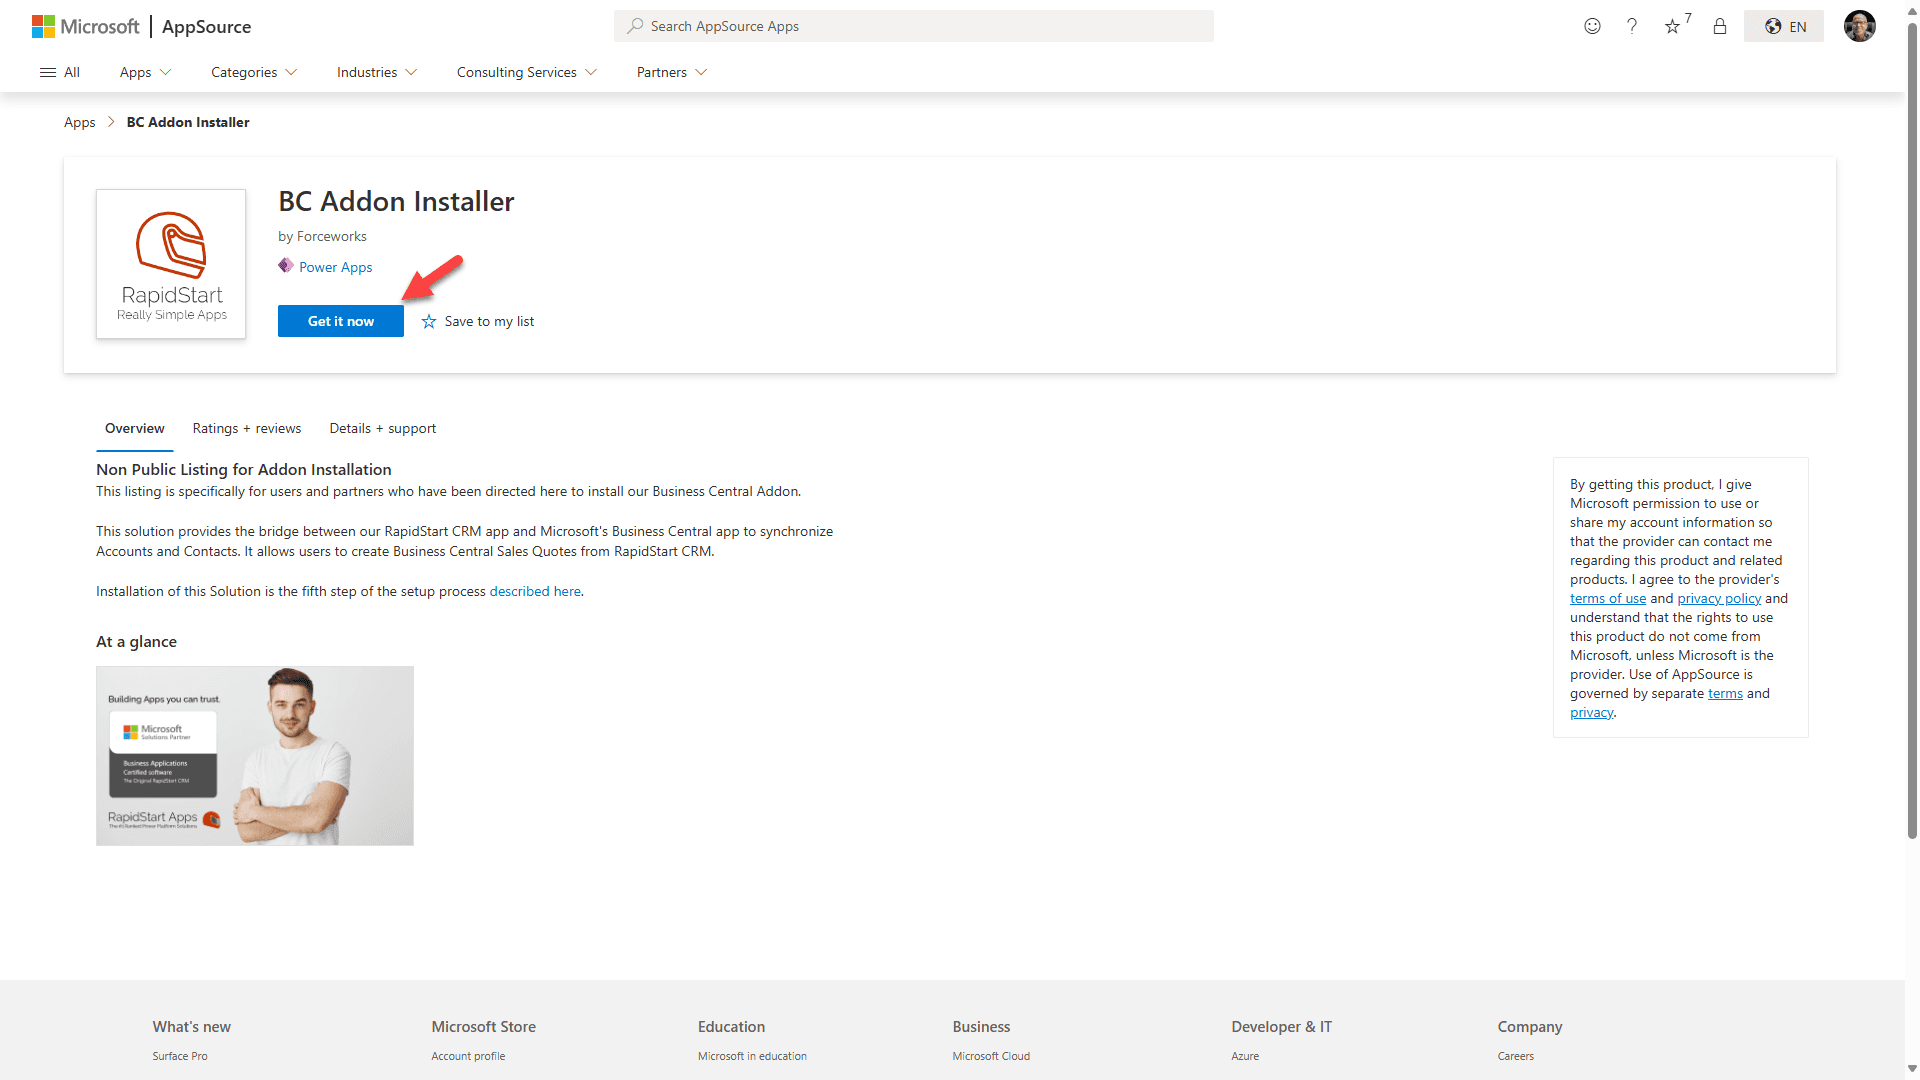
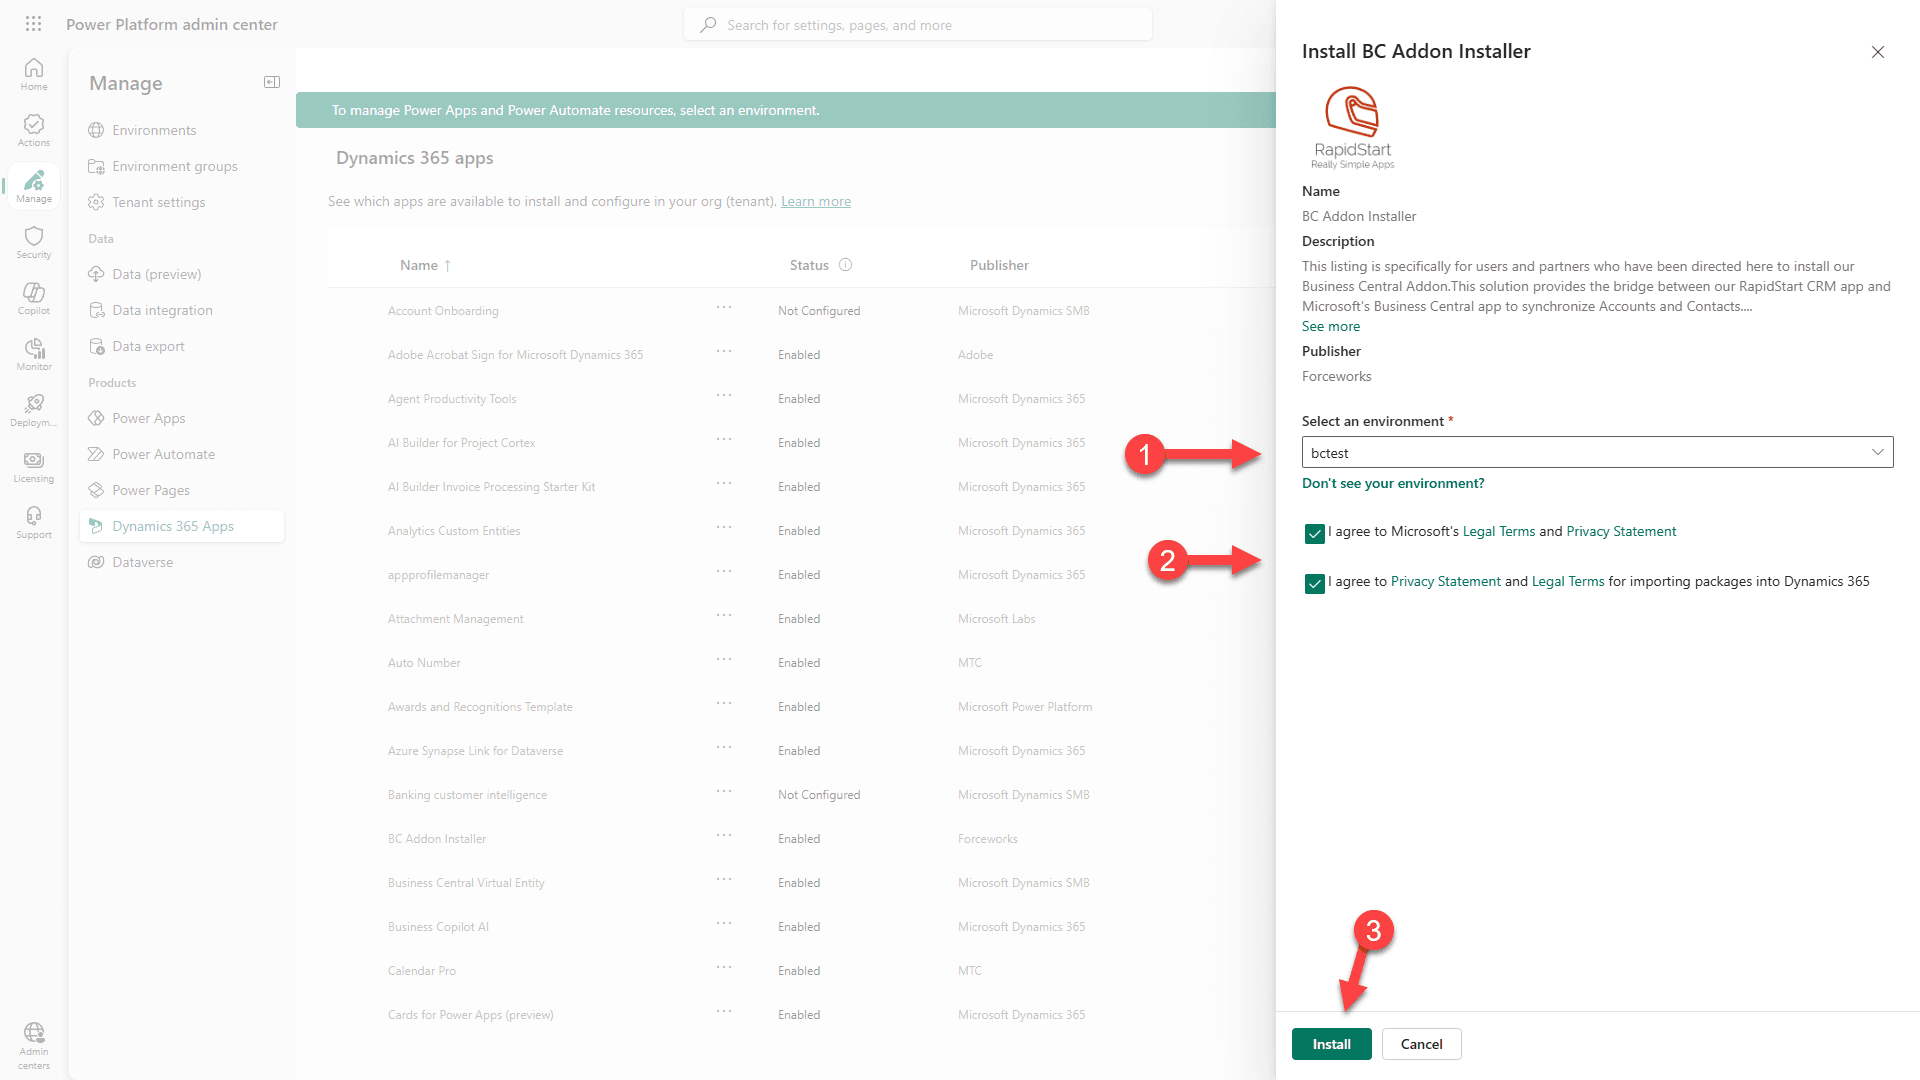
Click the “Get it now” button (This addon is free), and the following page will open:
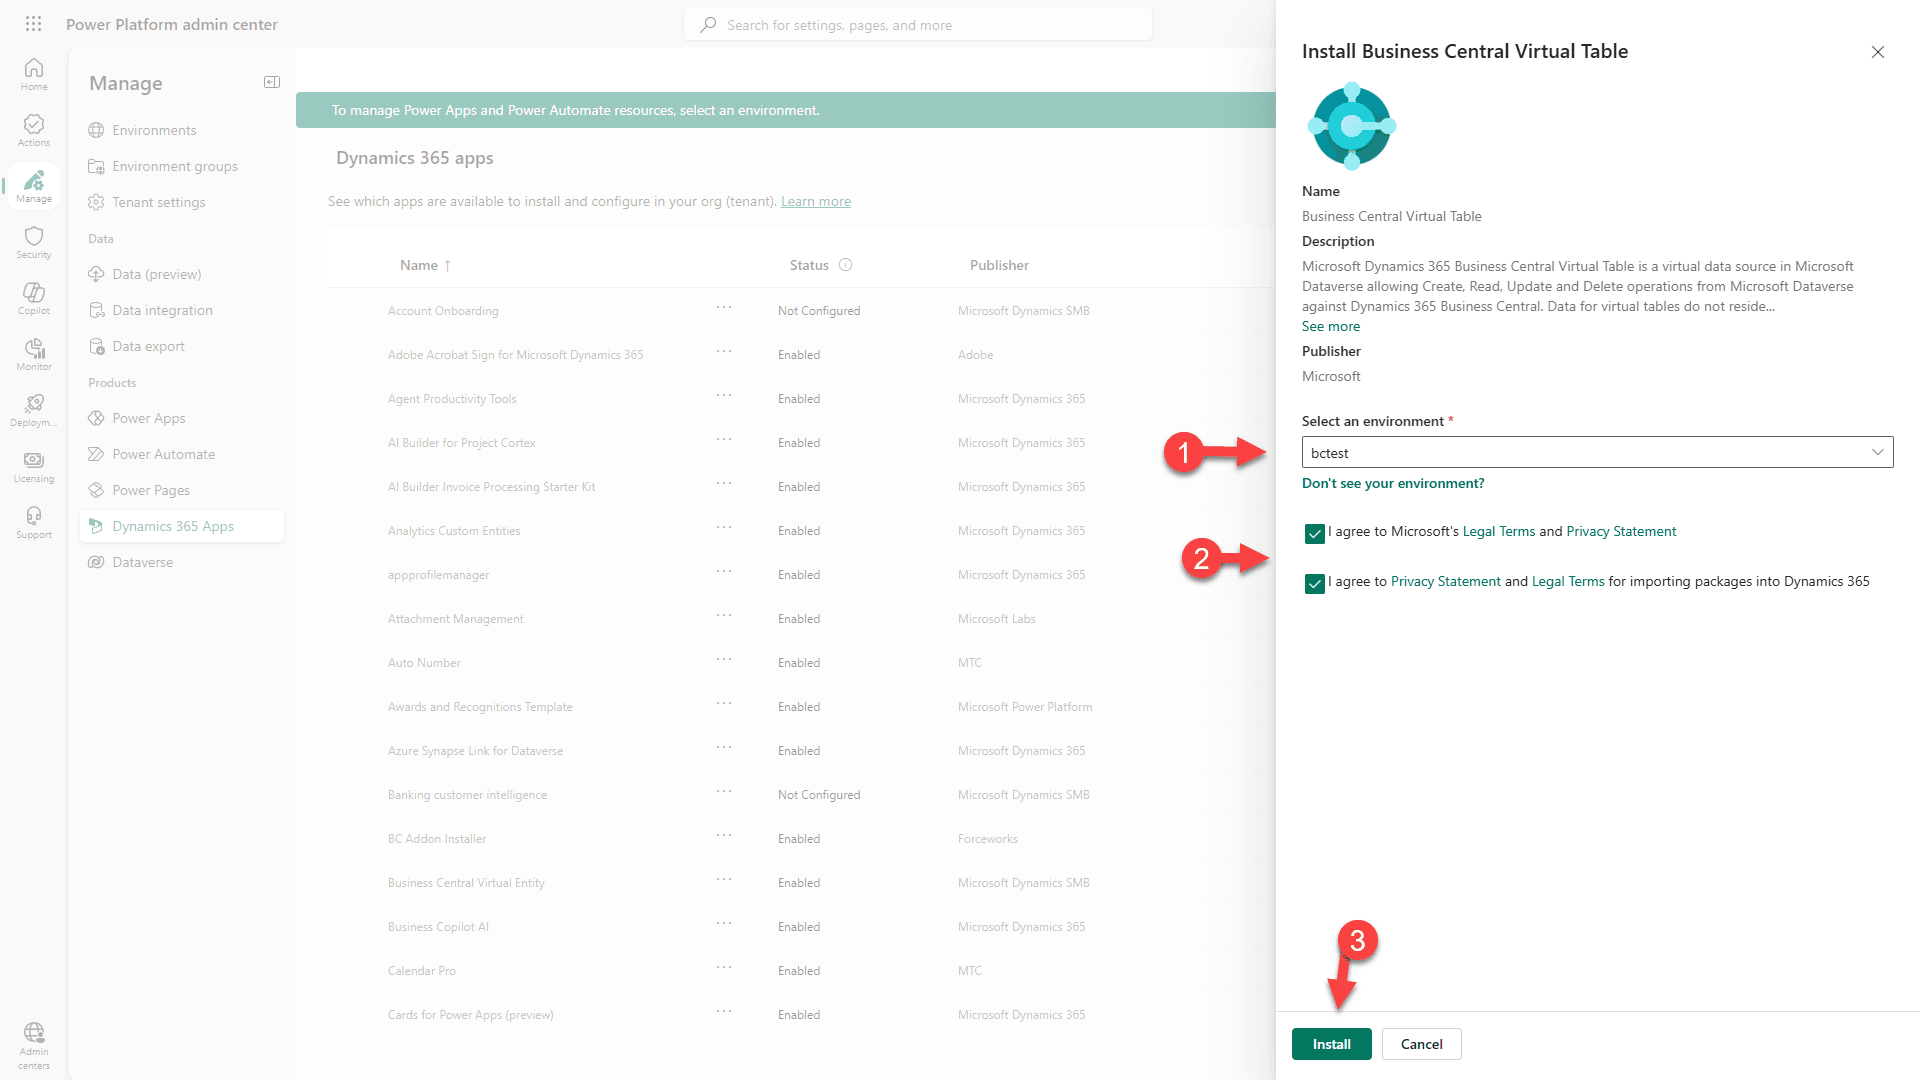
1. Select the target environment (where you have installed RapidStart CRM).
2. Agree to the terms.
3. Click “Install”.
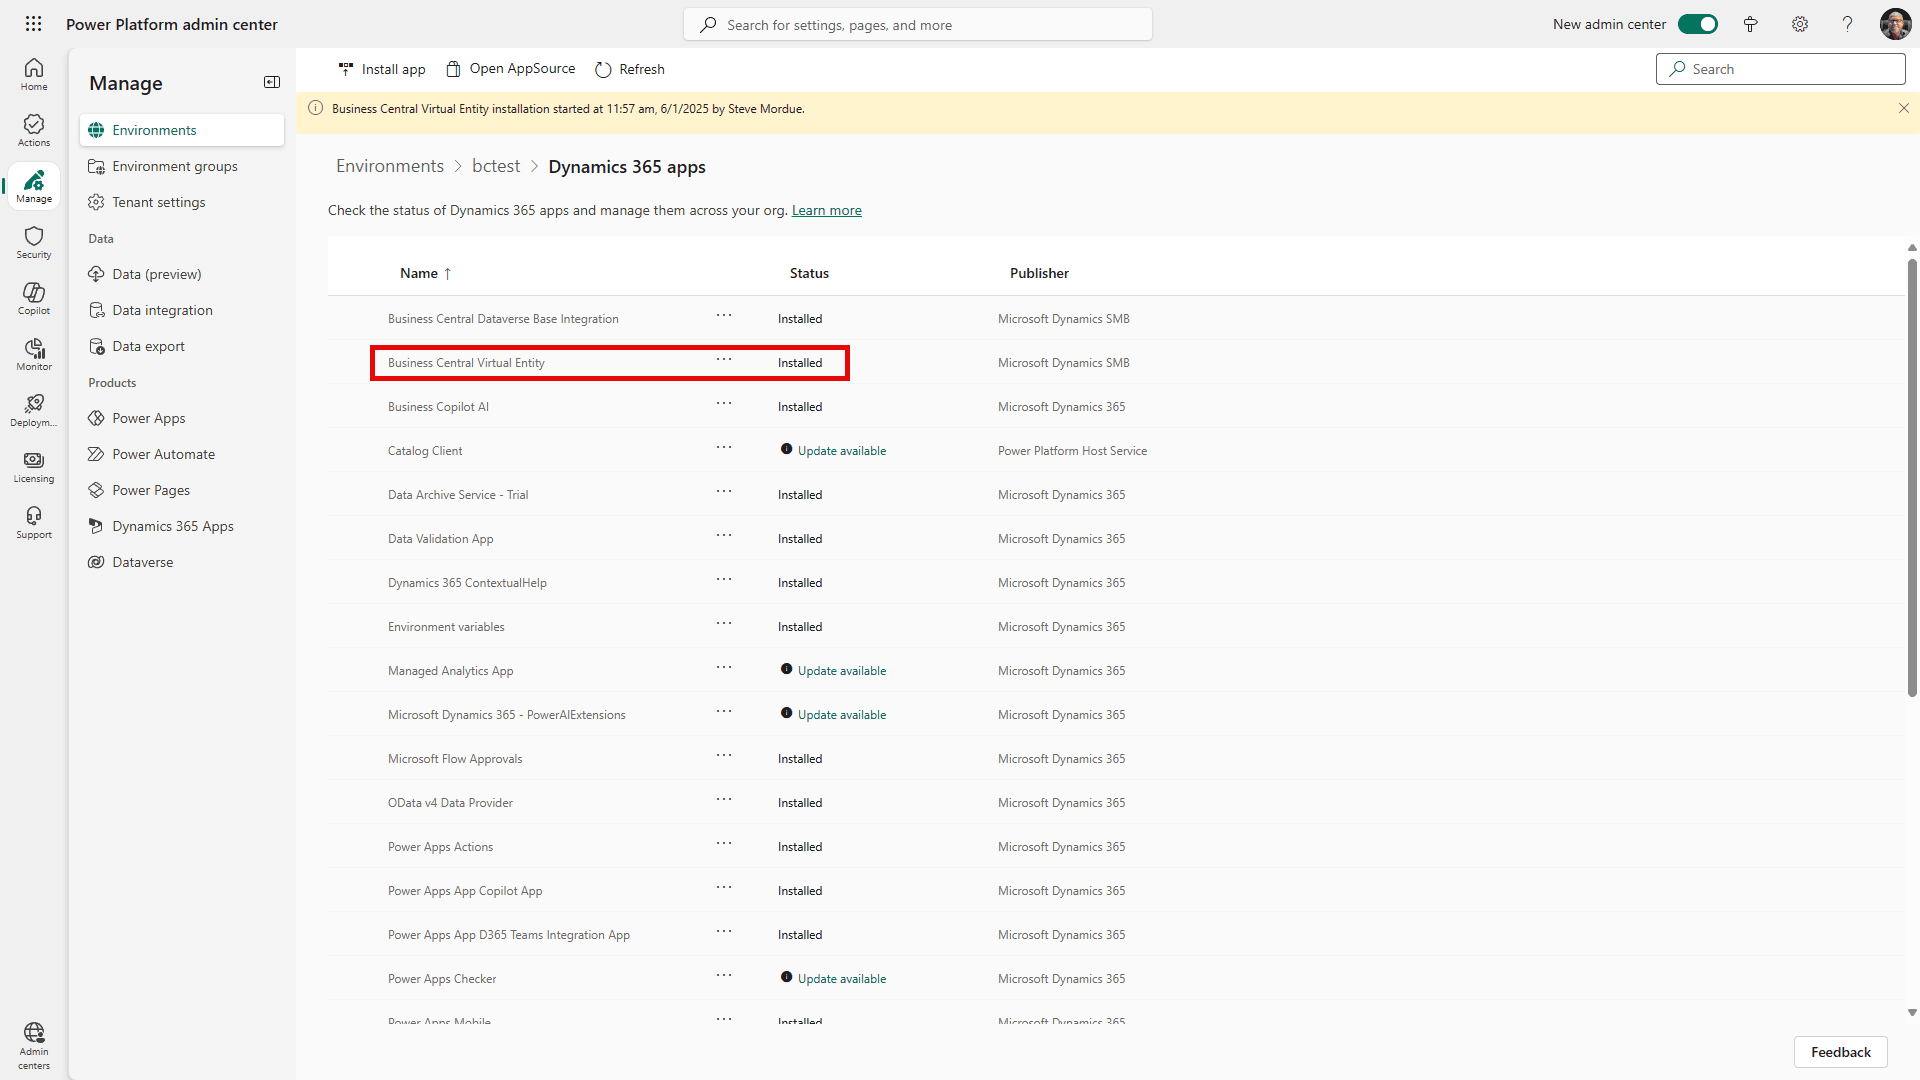
You will see that the solution is “Installing”. This could take several minutes to complete. Occasionally click “refresh” until you see that it is “Installed”, then go back the Business Central Browser tab to continue.

Click “Refresh”
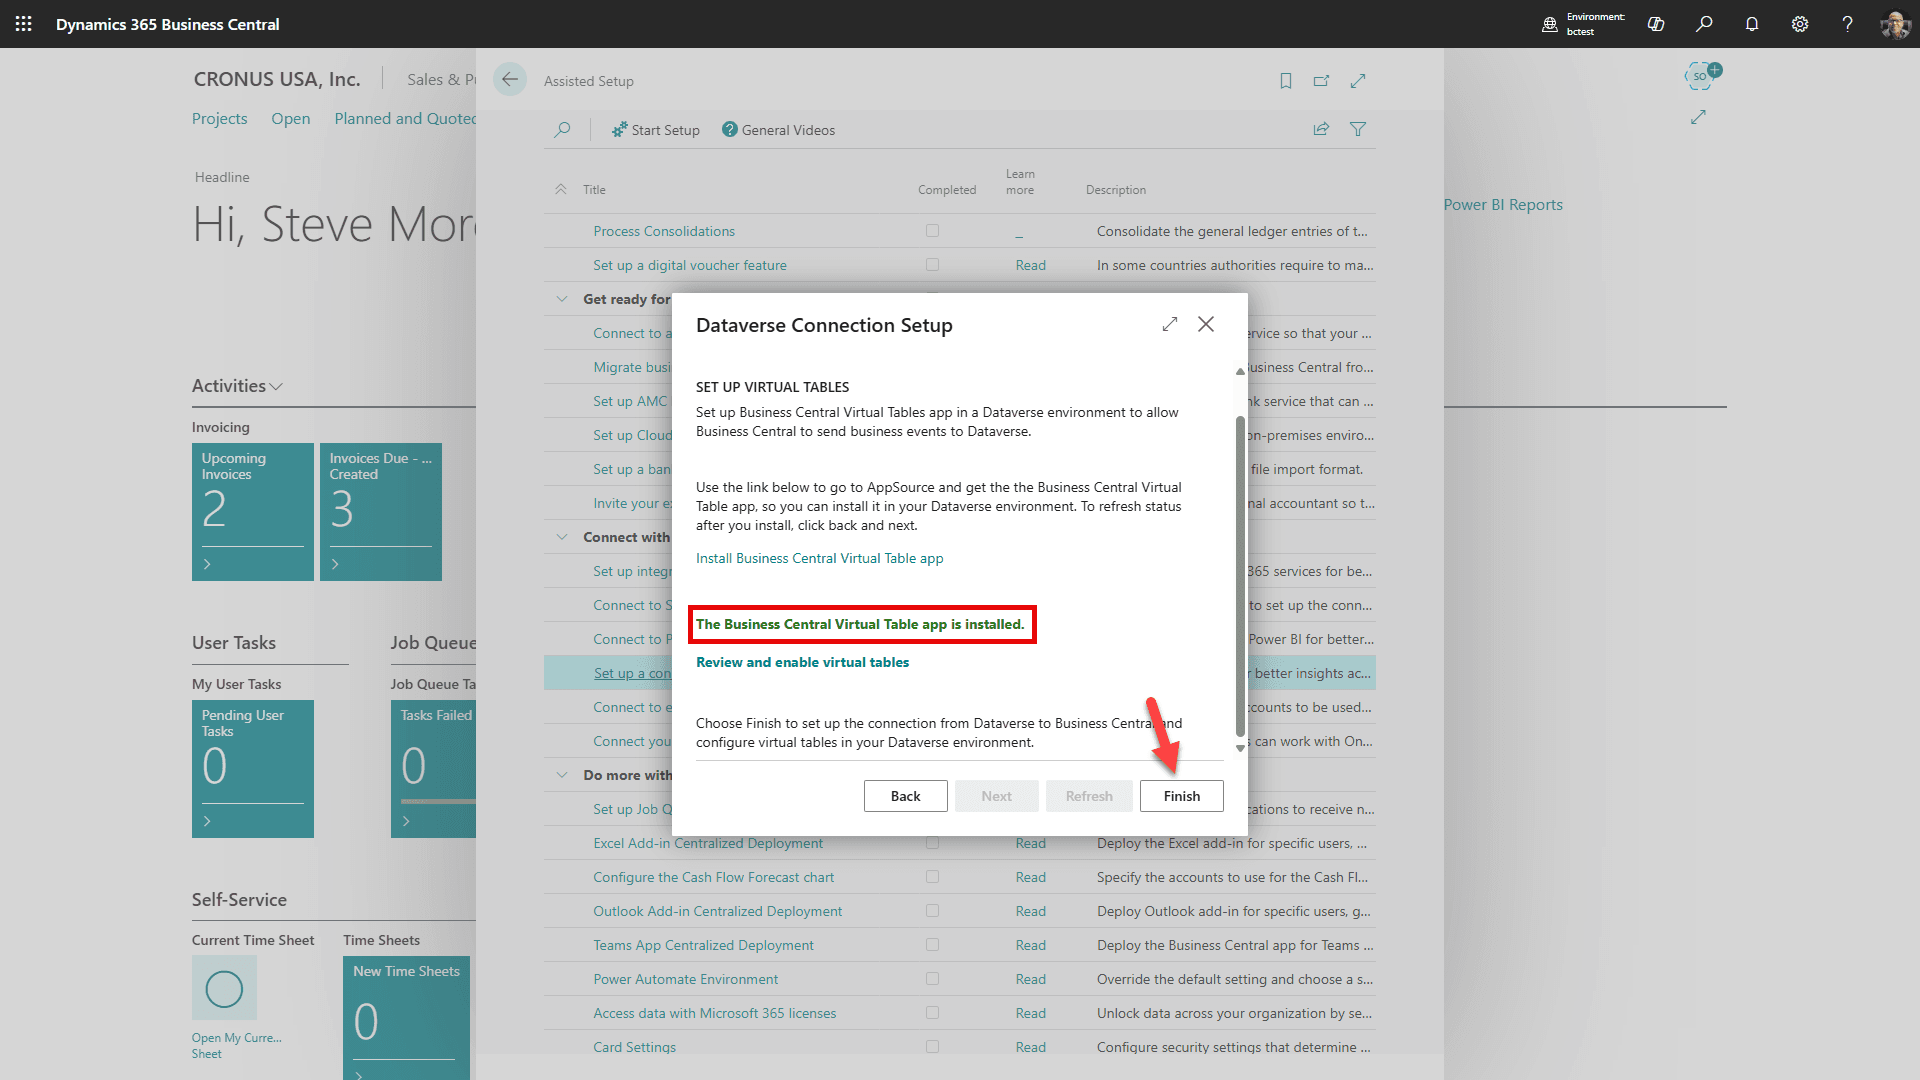
You will see that the Virtual Tables app has successfully installed. Click “Finish”
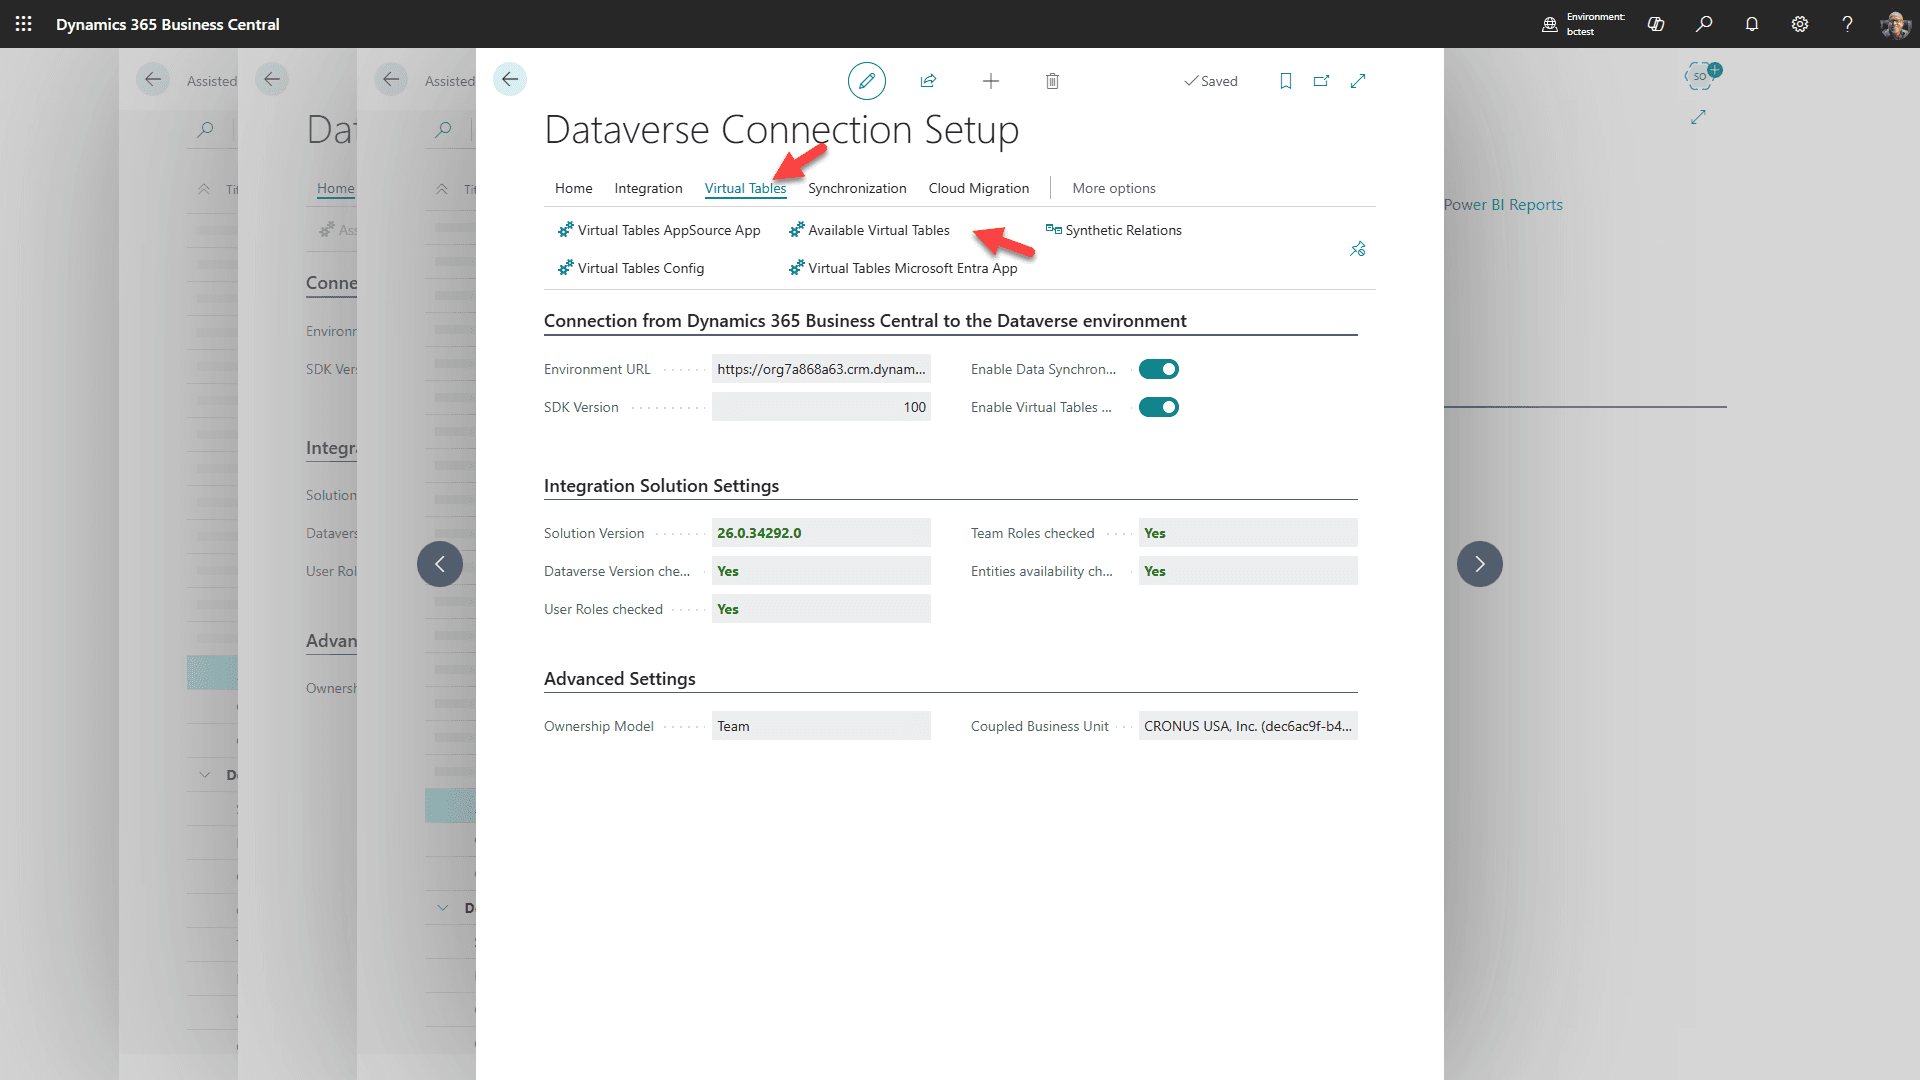
After a few minutes this page will appear. Select Virtual Tables Tab and then “Available Virtual Tables”
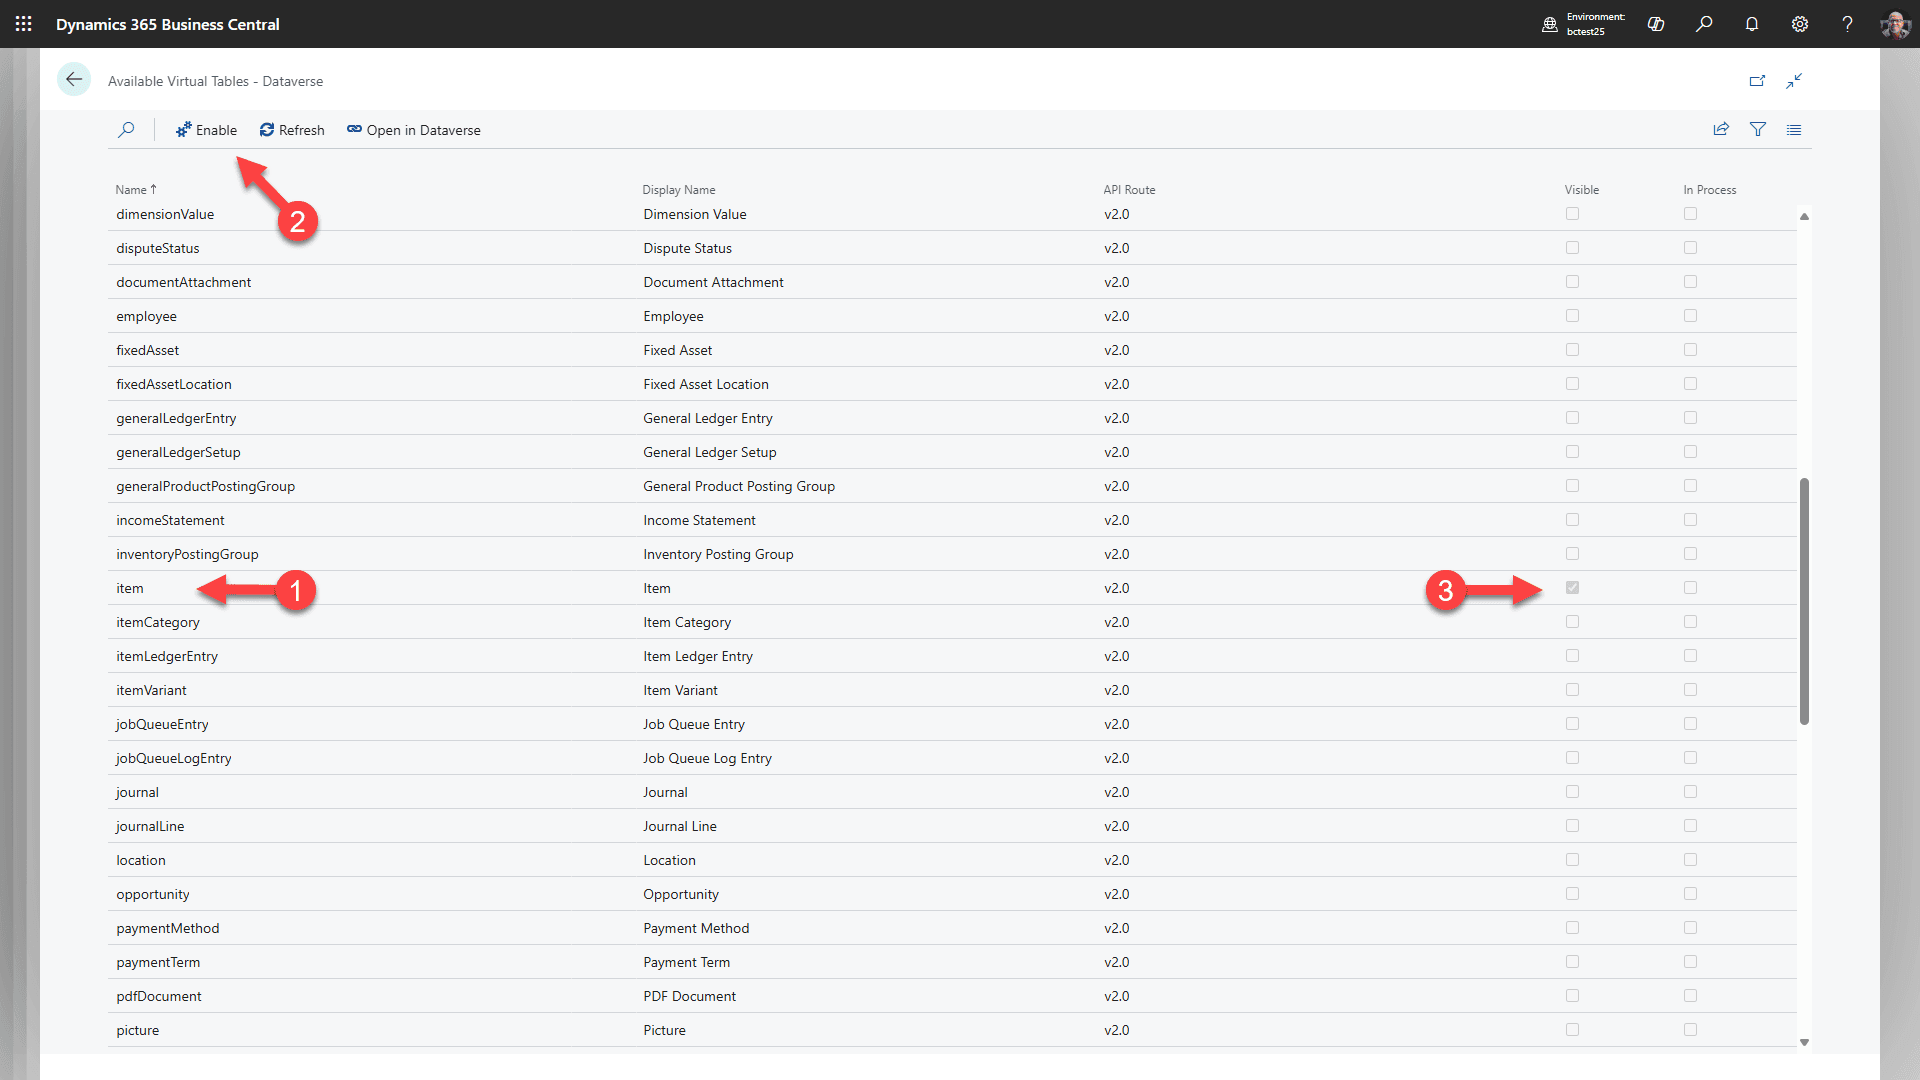
1. Starting by selecting the “item” line
2. Click “Enable” (This will create the virtual table in Dataverse for items)
3. Wait until you see “Visible” box checked. You may need to refresh a few times.
Repeat these steps for: salesInvoice, salesInvoiceLine, salesOrder, salesOrderLine, salesQuote, salesQuoteLine, salesShipment, and salesShipmentLine. This will take several minutes for each one to enable.
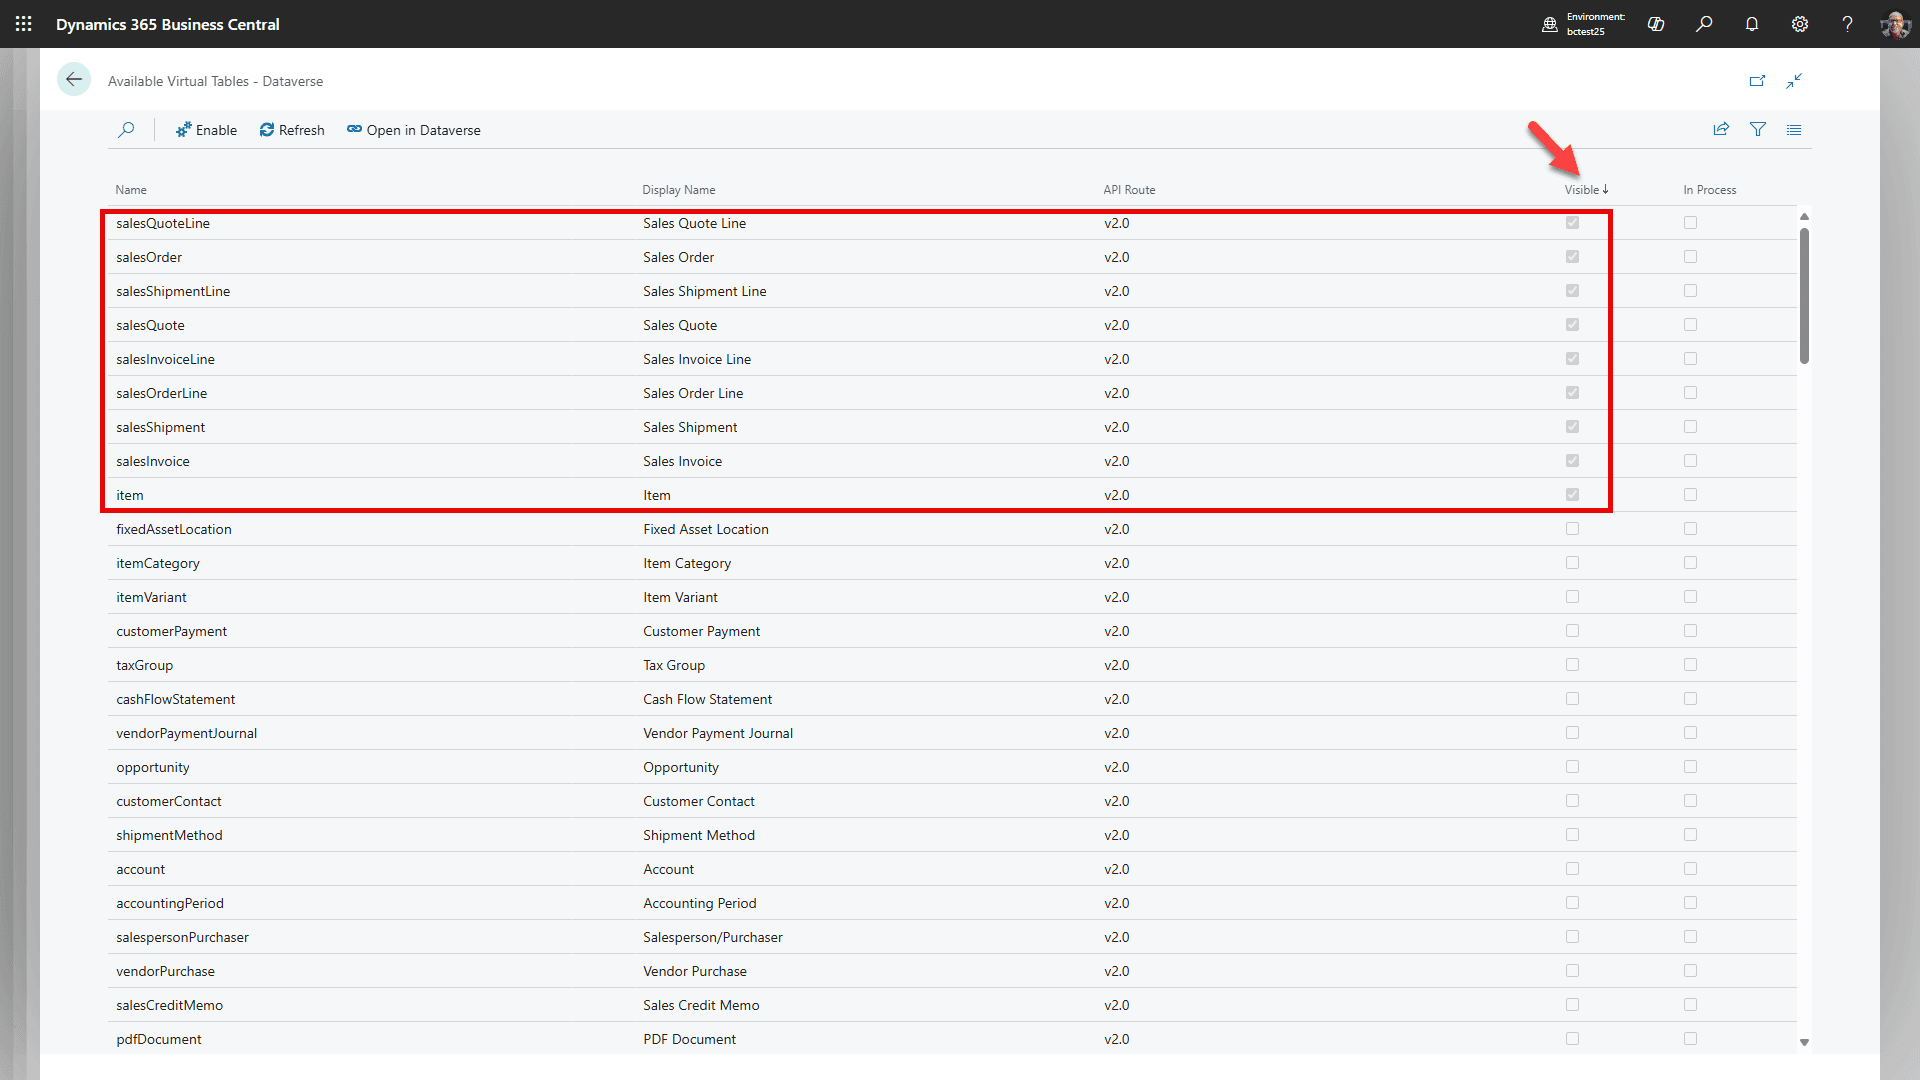
Change to sort by Visible/descending, and confirm you see all of these tables. Do not add more Virtual Tables at this time. You can leave the screen as is (we will come back to it) and open a new tab.
Step 4: Updating the Application User Role
Click this link to open the Power Platform Admin Center and confirm you are logged in with your business account.

Select “Manage” in the sidebar and then click the target the environment link
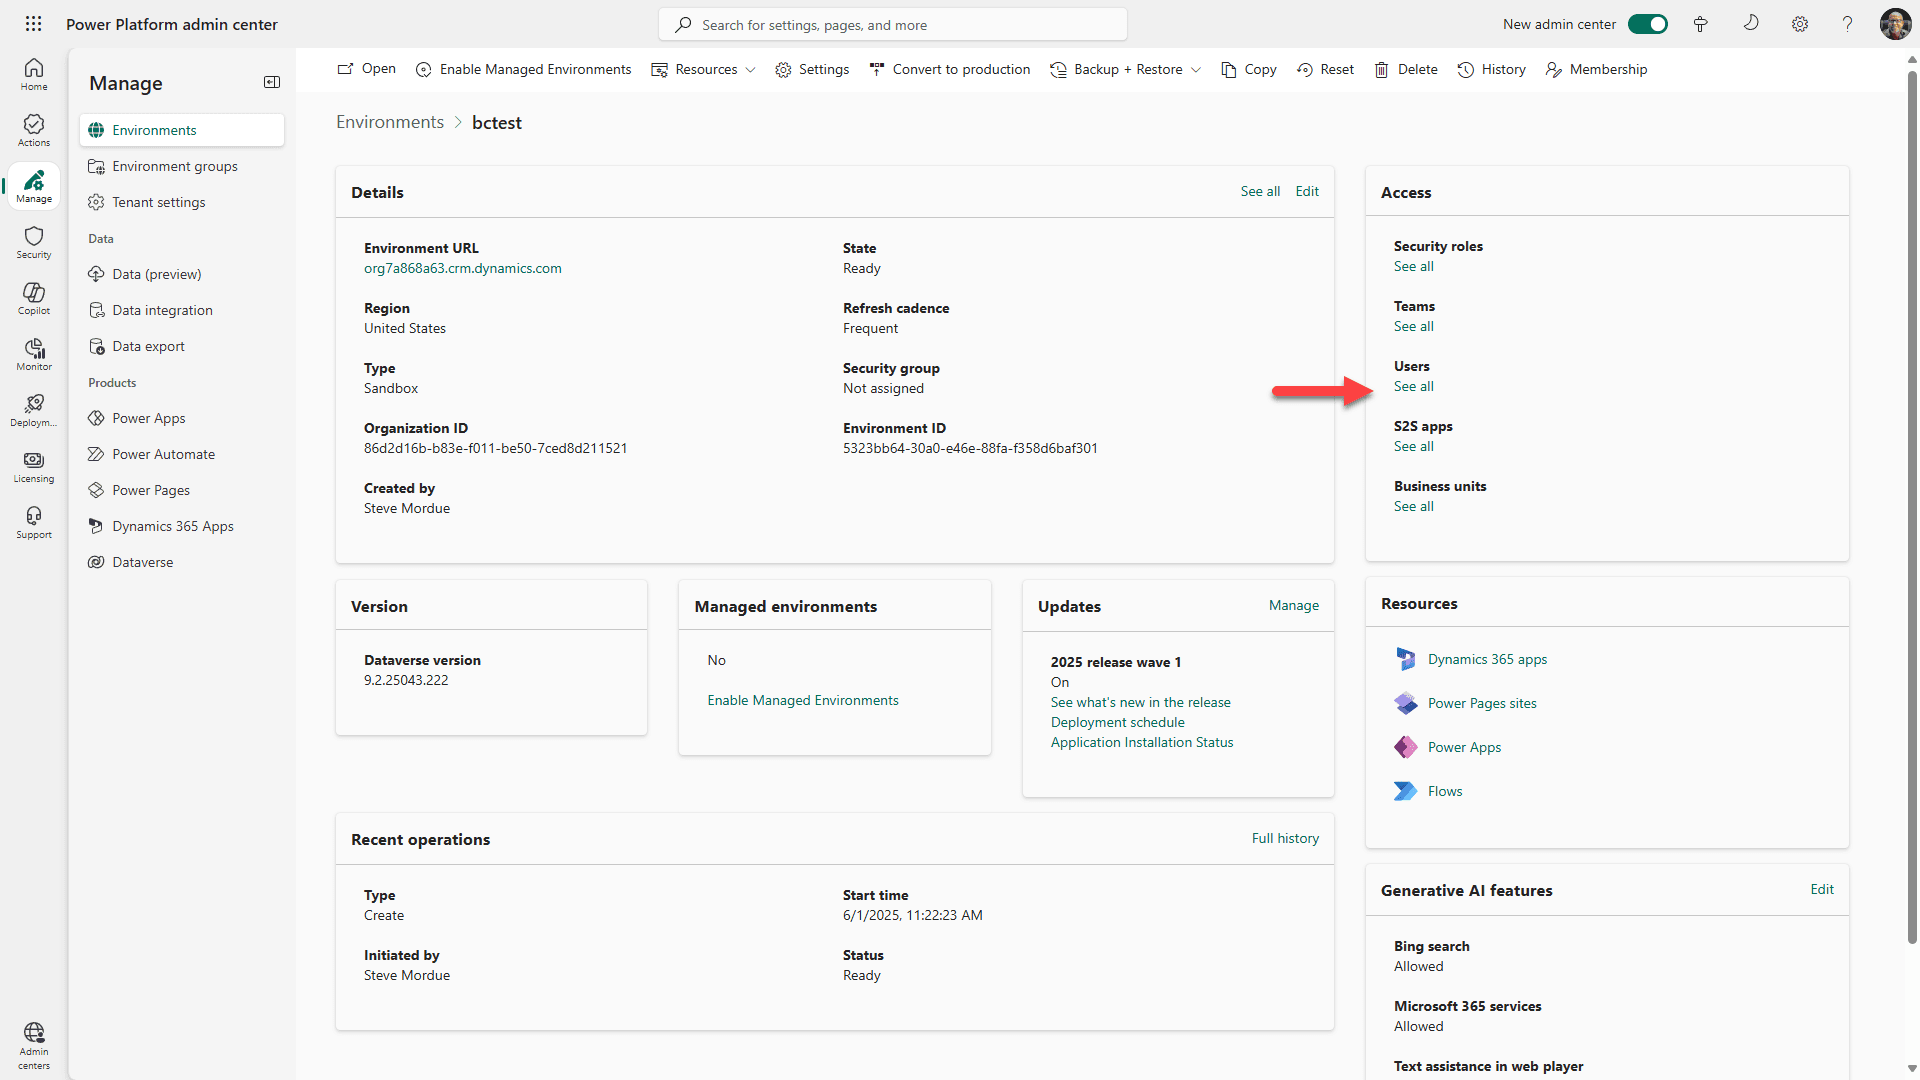
Select “See all” for Users
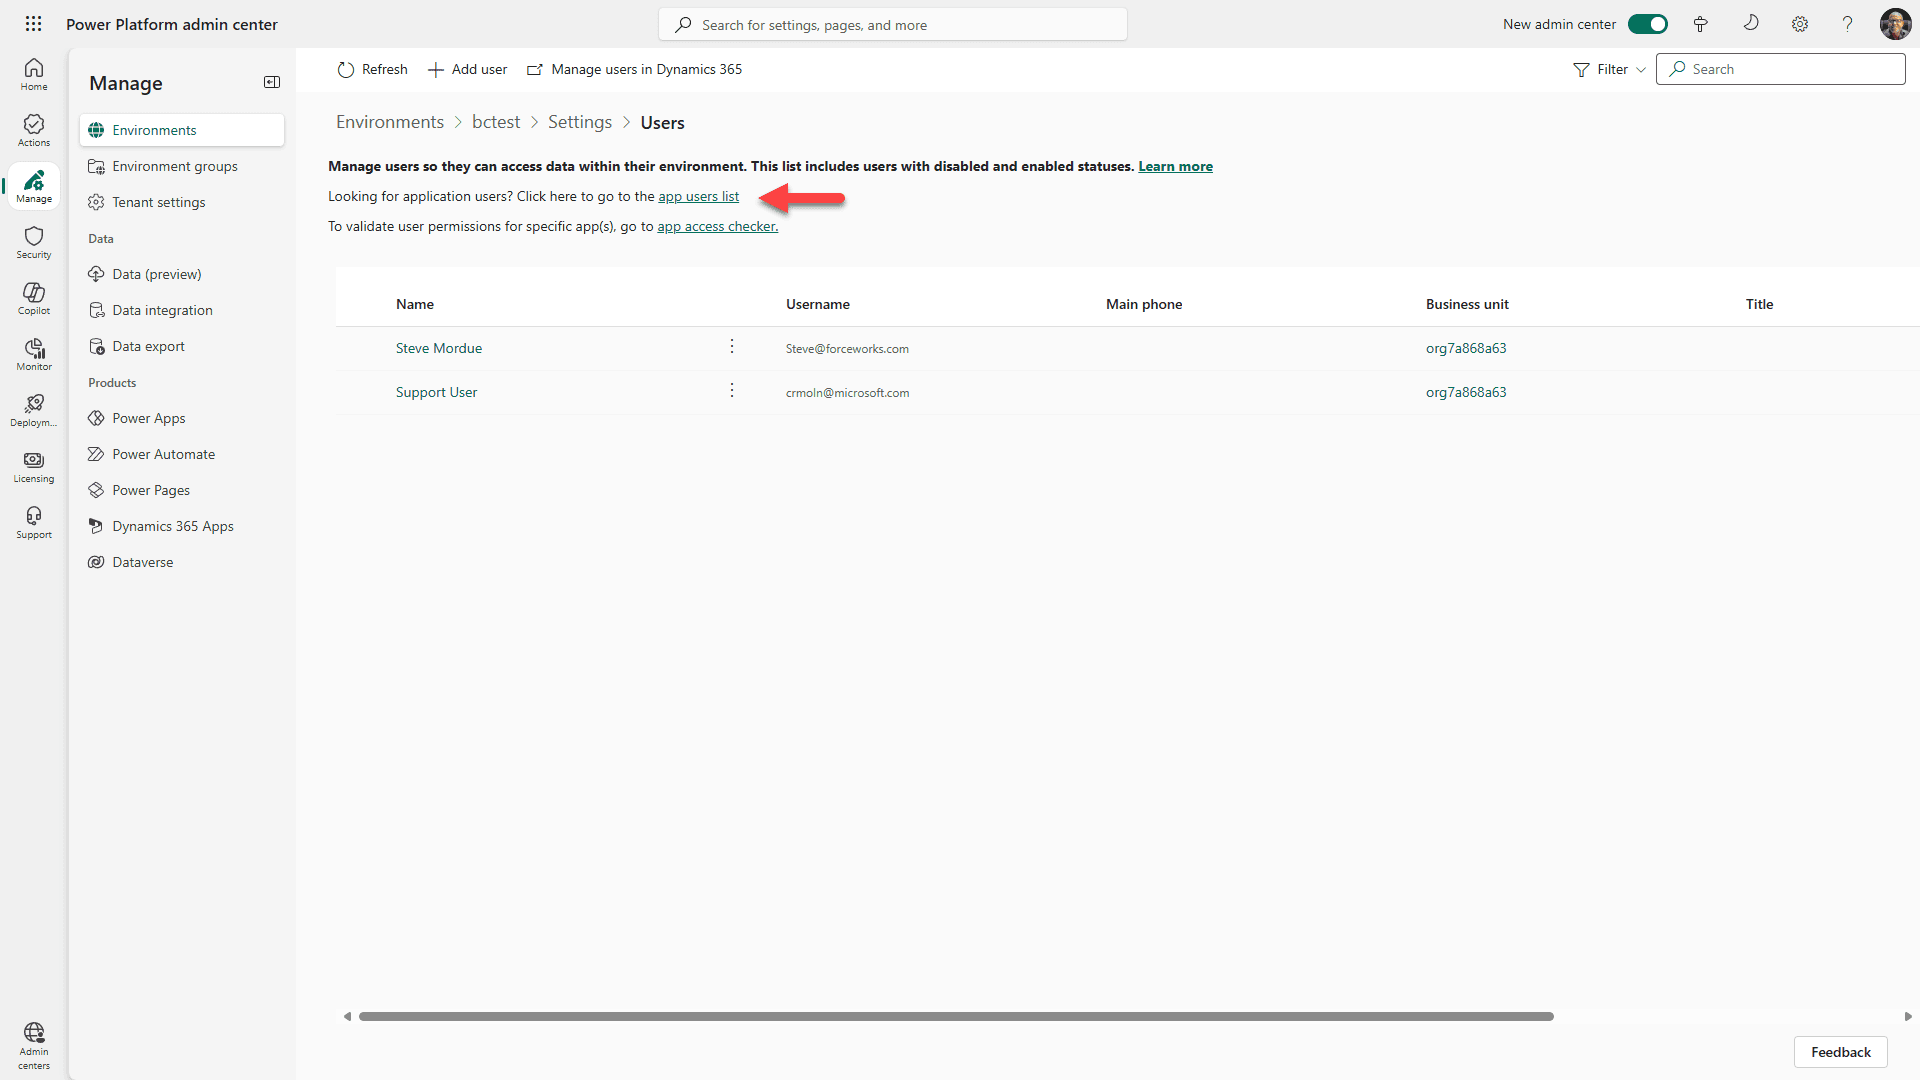
Select app users list link
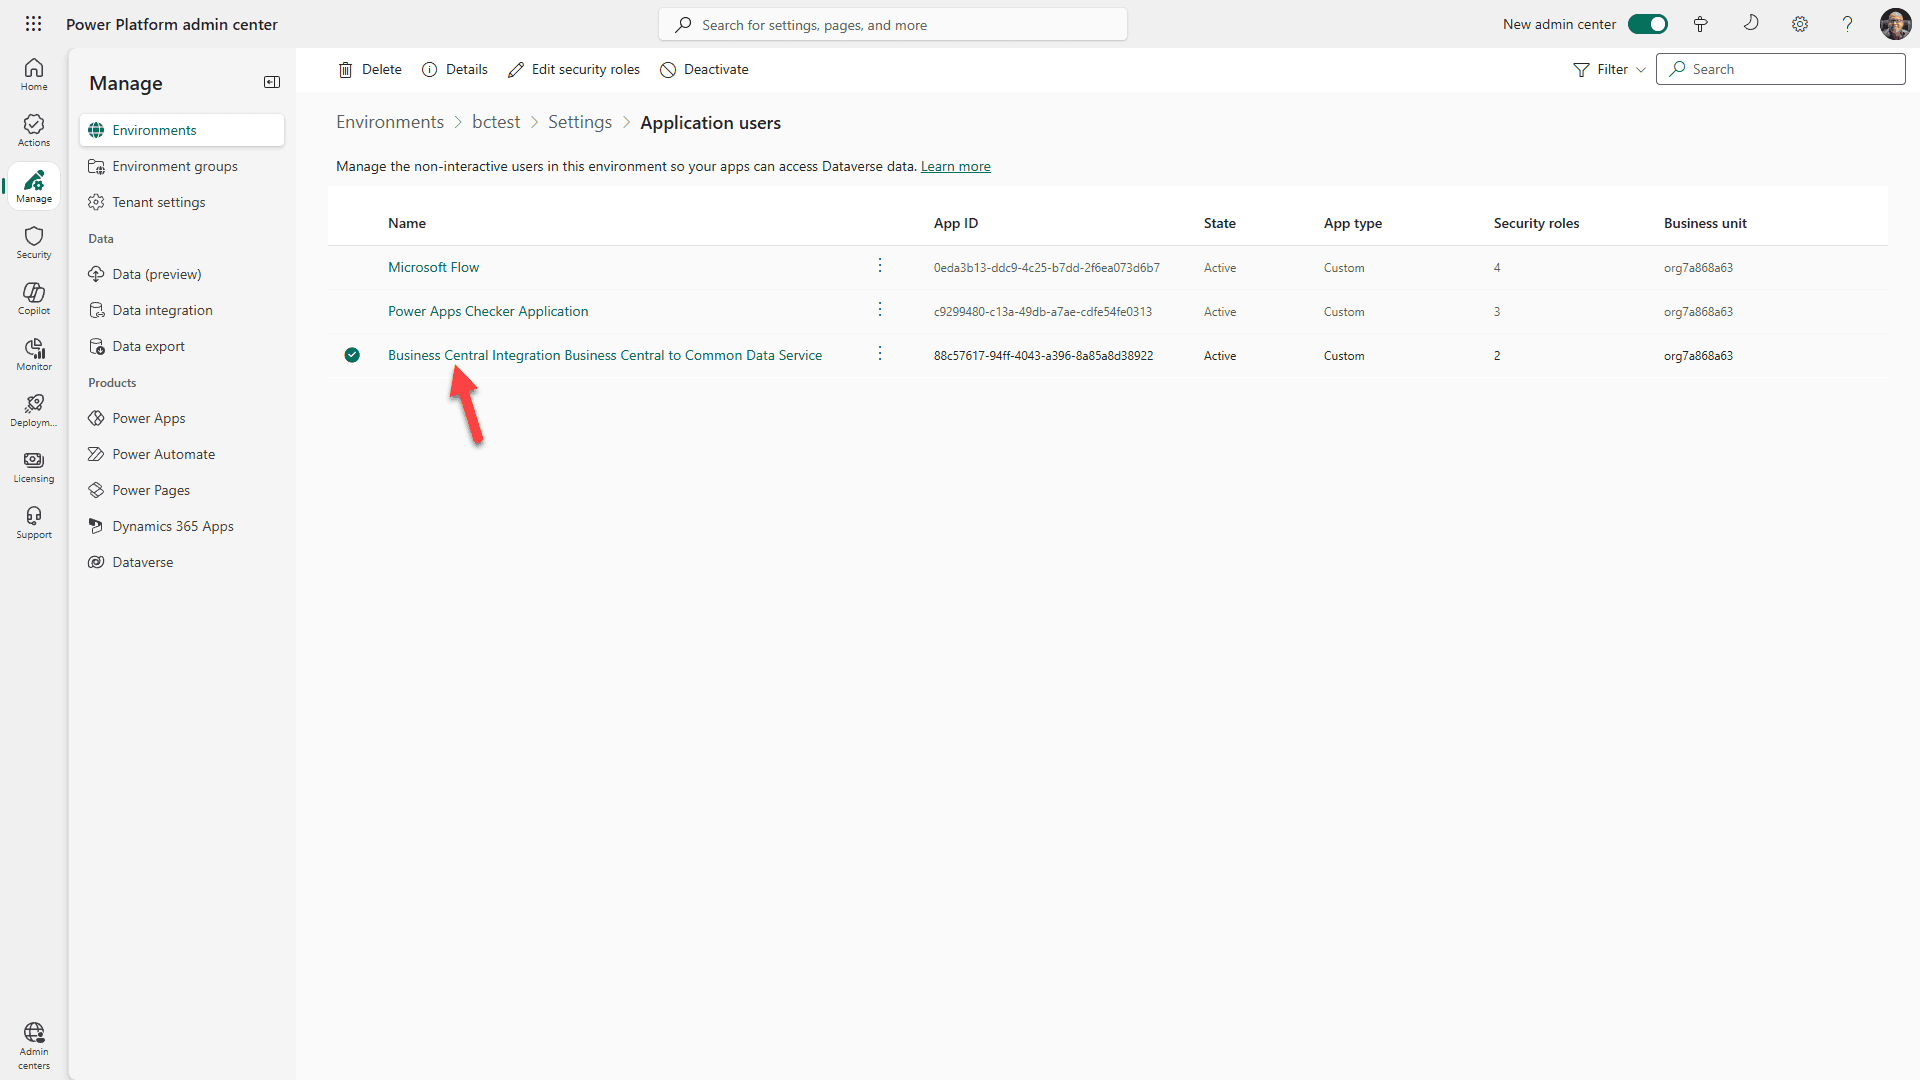
Select the Business Central app user.
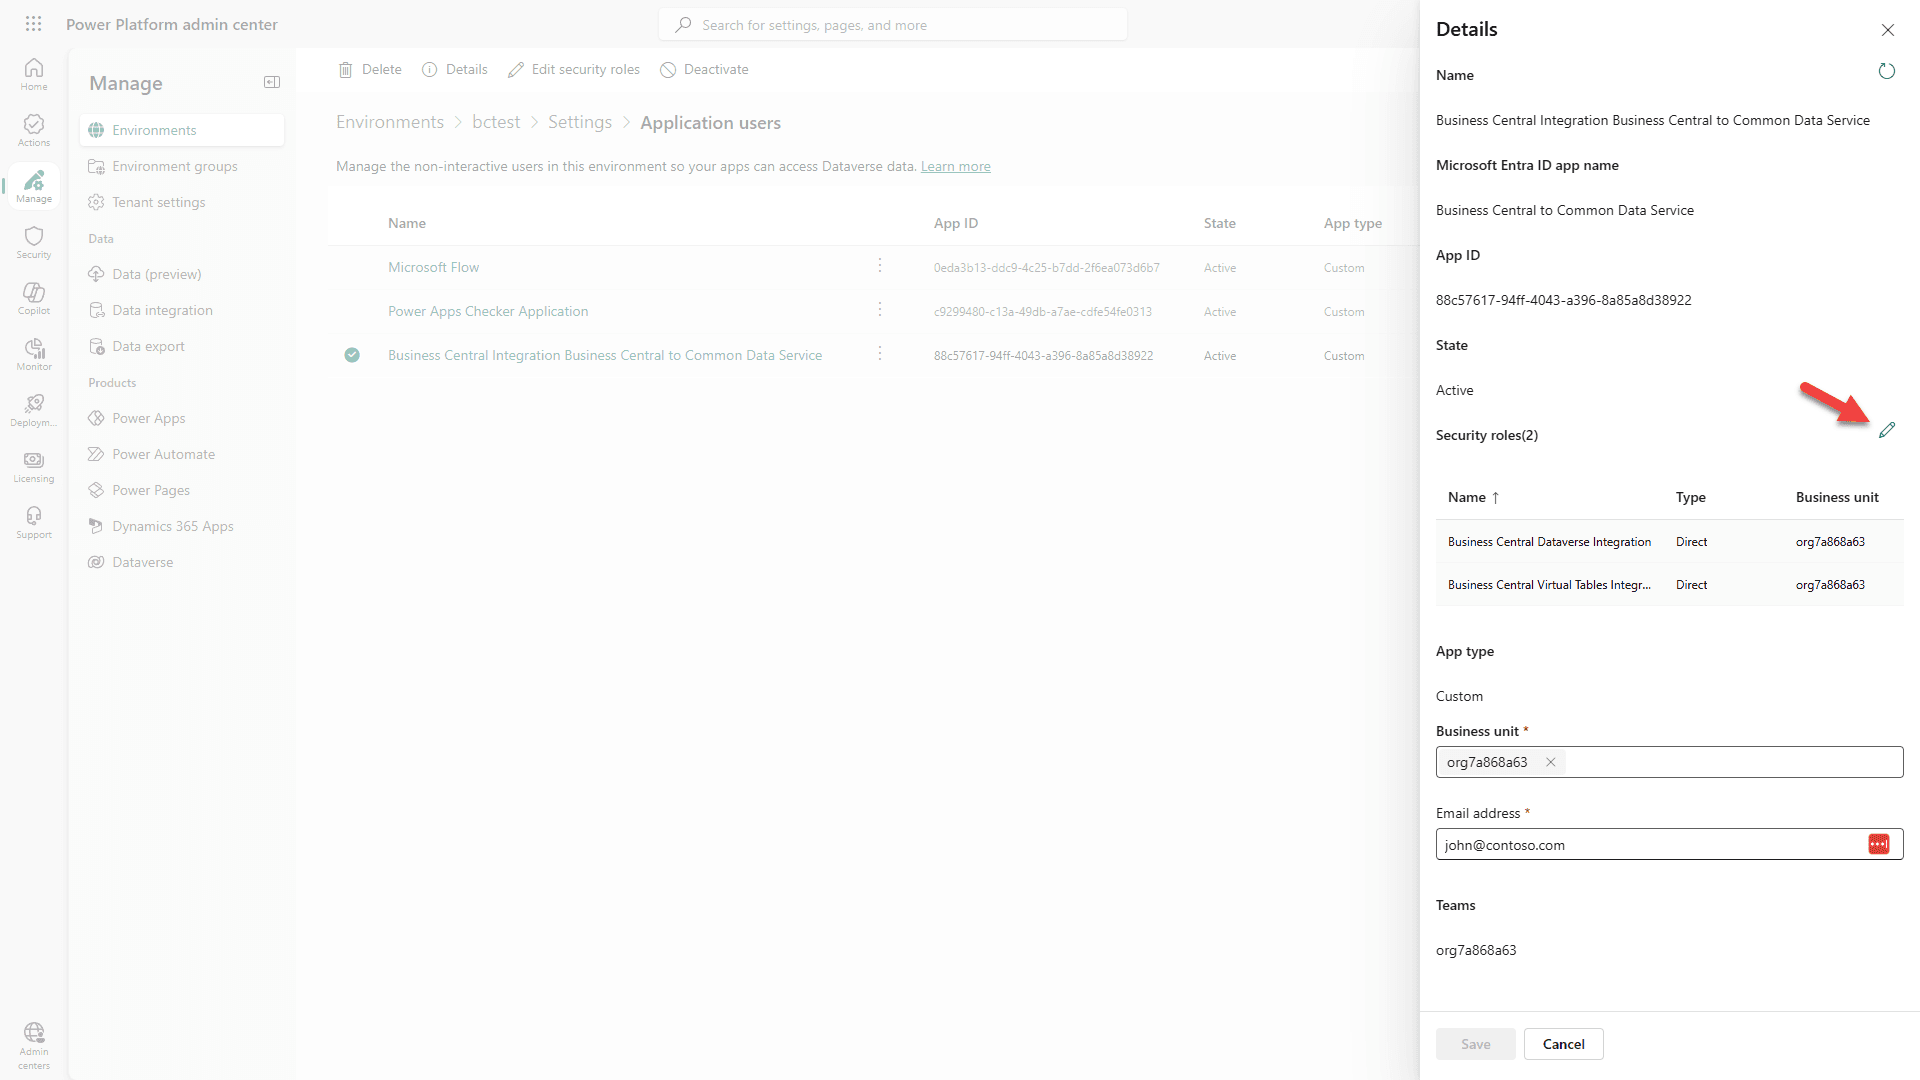
Click the “edit” icon for “Security Roles”

1. Scroll to and select “System Administrator”
2. then click Save
Step 5: Set up Record Mapping and Coupling
Go back to Business Central tab in your browser that we left open.
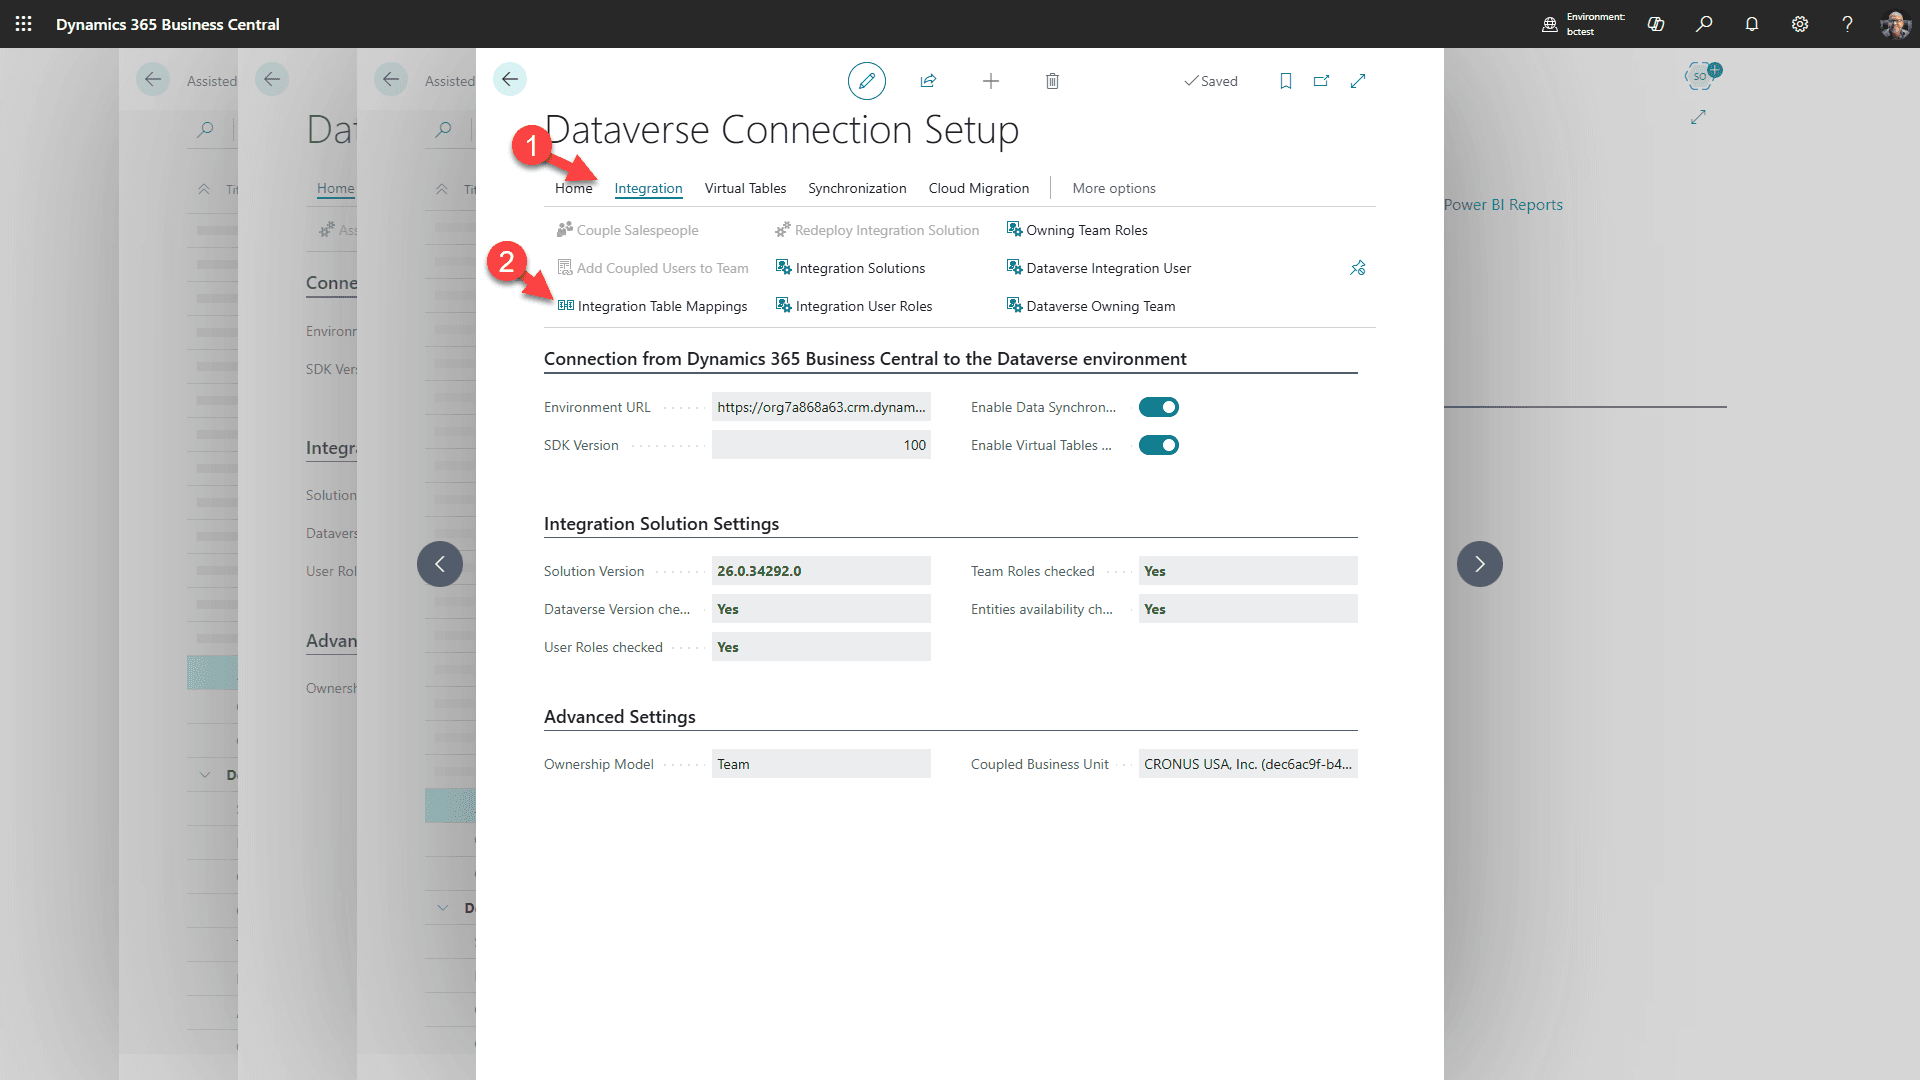
1. Click the “Integration” tab
2. then “Integration Table Mappings”
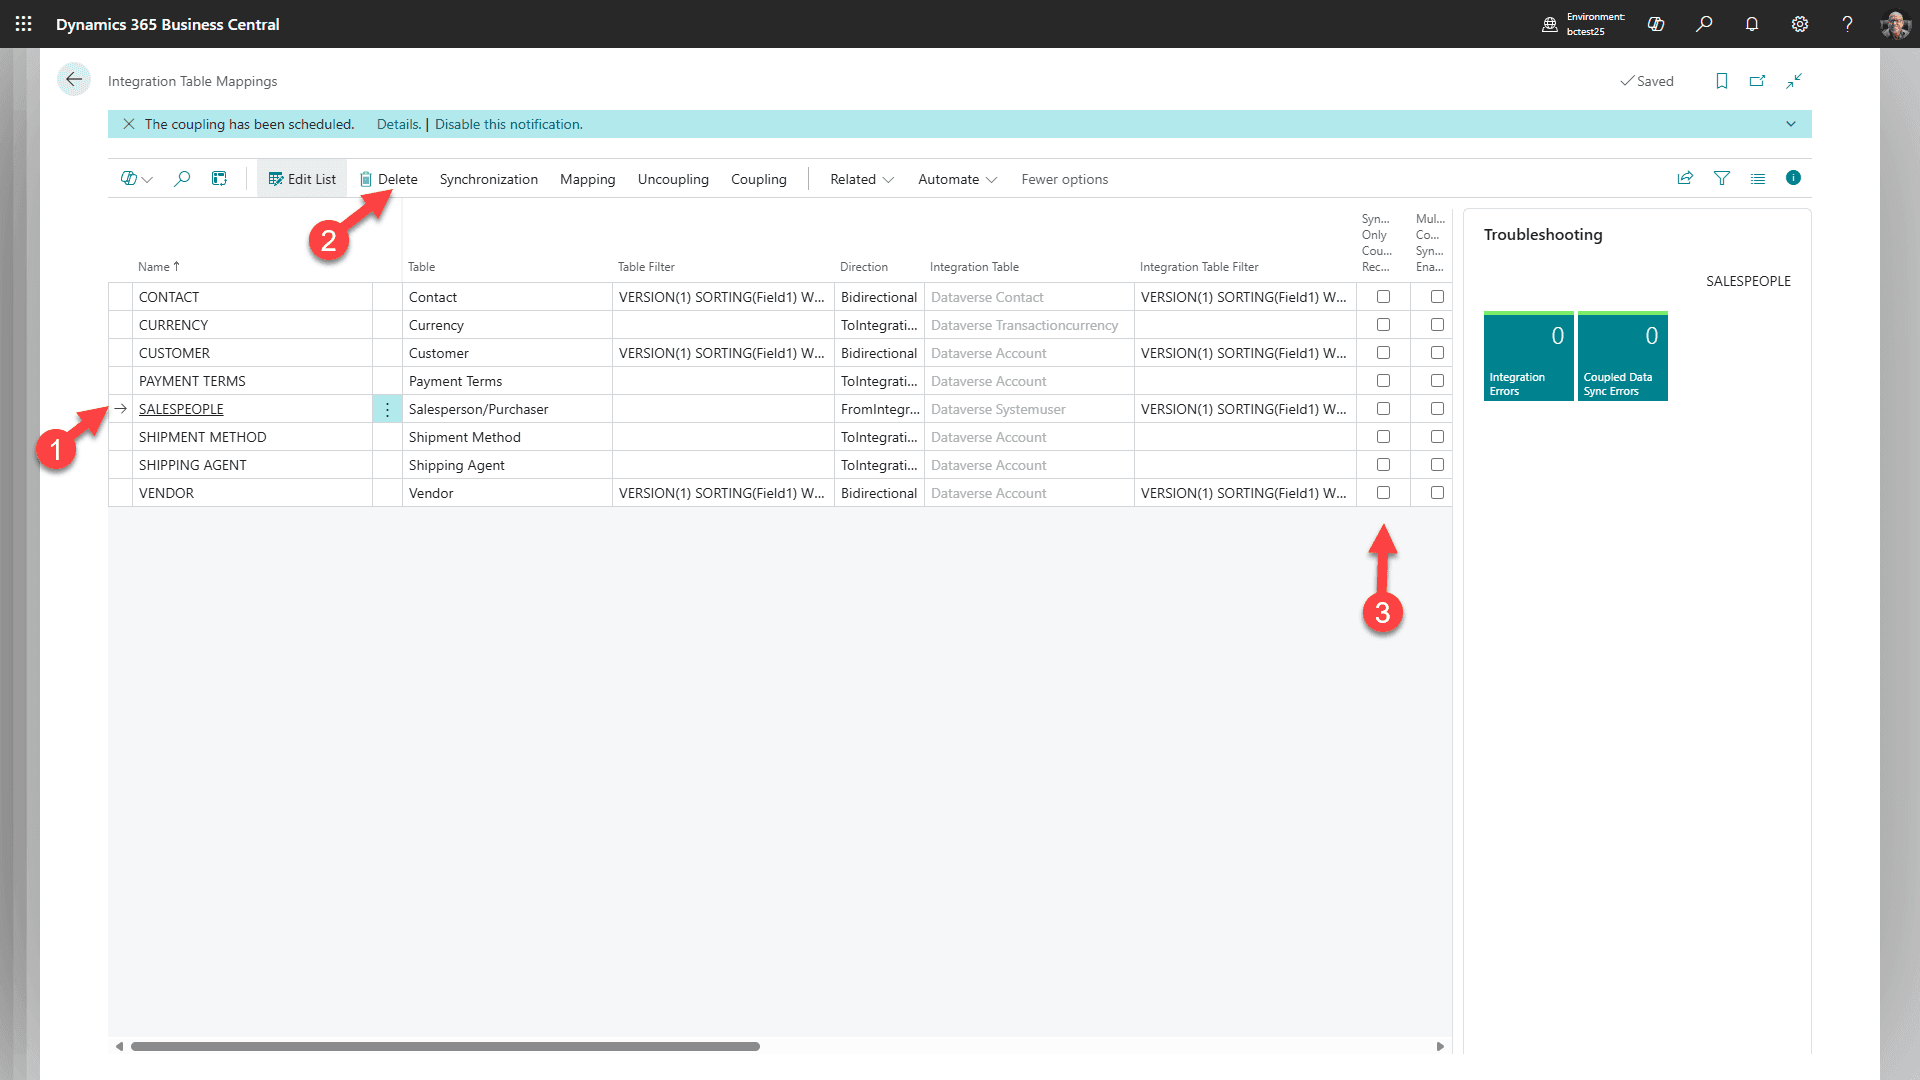
1. Select SALESPEOPLE
2. Delete
3. Untick Coupling for all items
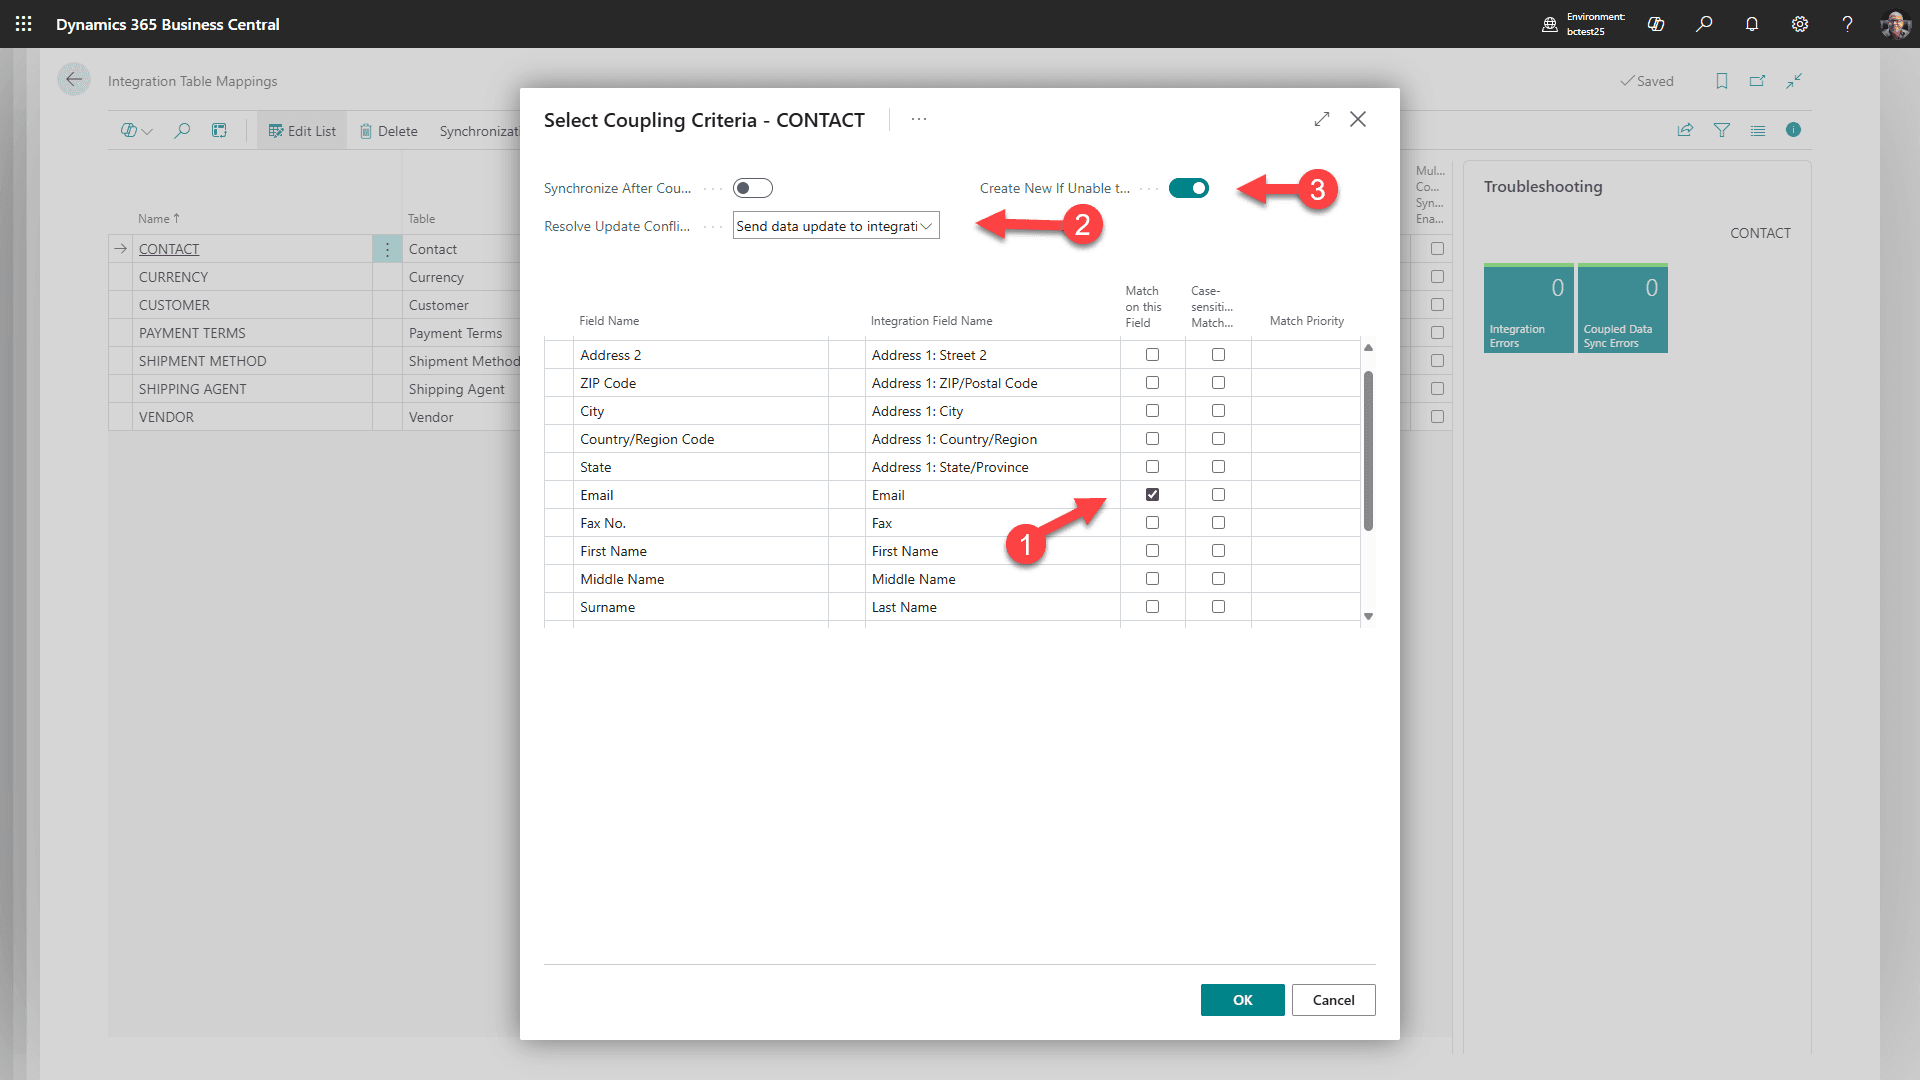
1. Select CONTACT
2. Select Coupling
3. Then click “Match-Based Coupling”.
4. Match the above and click OK

1. Select CURRENCY
2. Select Coupling
3. Then click “Match-Based Coupling”.
4. Match the above and click OK
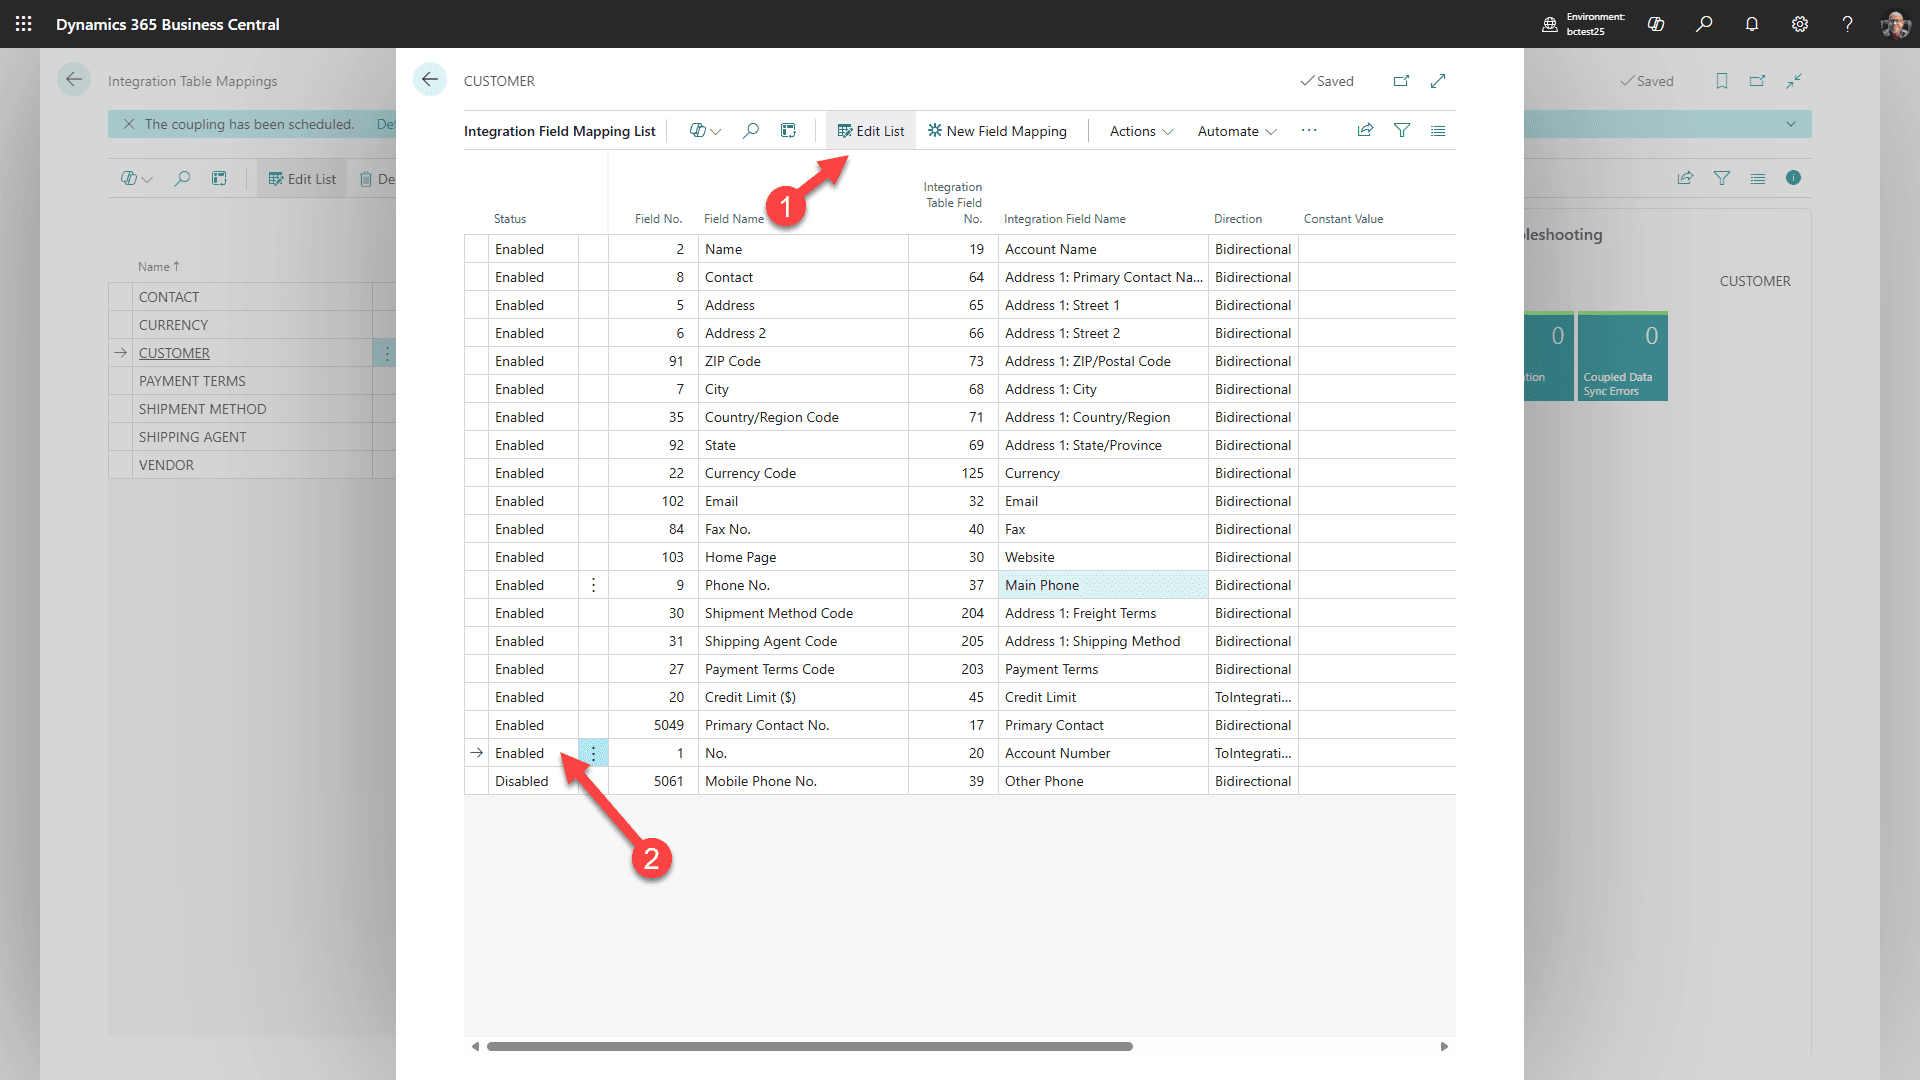
For CUSTOMER Select Mapping/Fields
1. Select “Edit List”
2. and “enable” Account number.
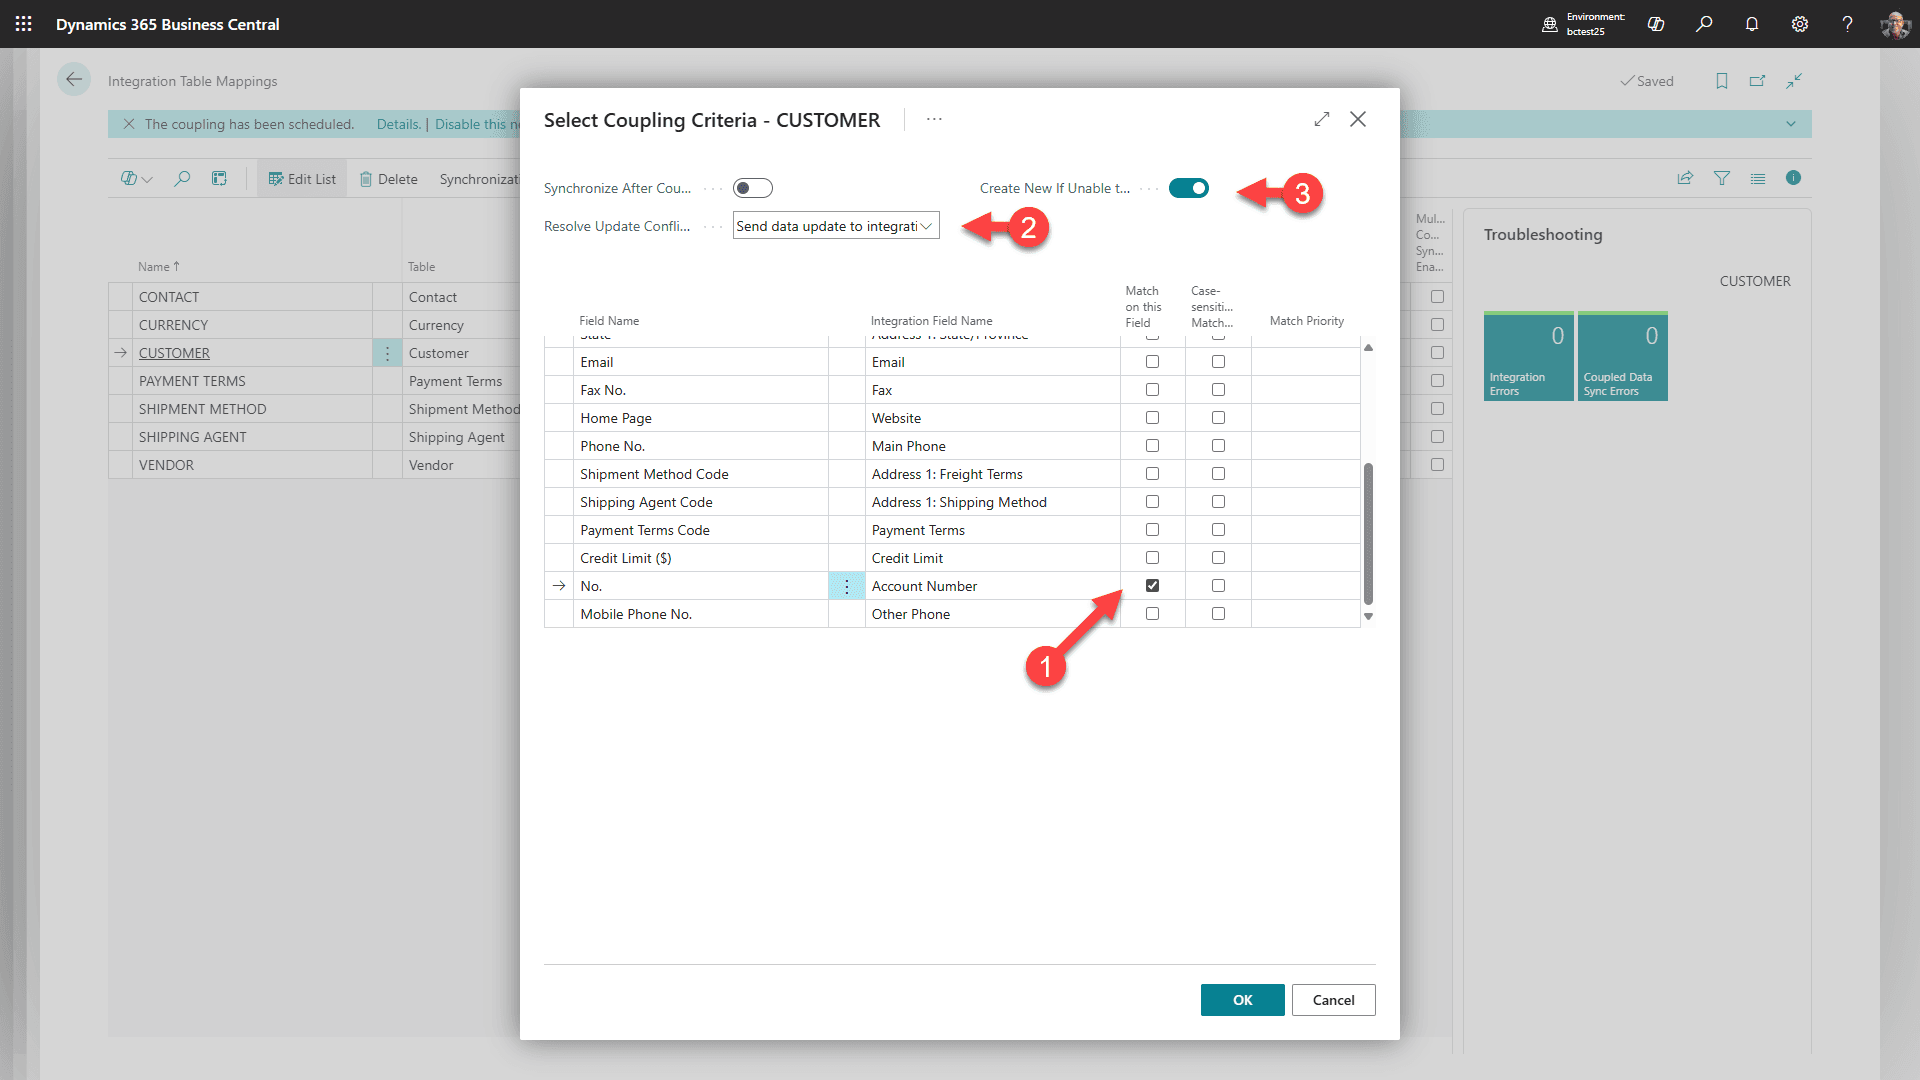
Still for CUSTOMER, select Coupling/Match-Based coupling and match to above

For PAYMENT TERMS, select Coupling/Match-Based coupling and match to above.

For SHIPMENT METHOD, select Coupling/Match-Based coupling and match to above.
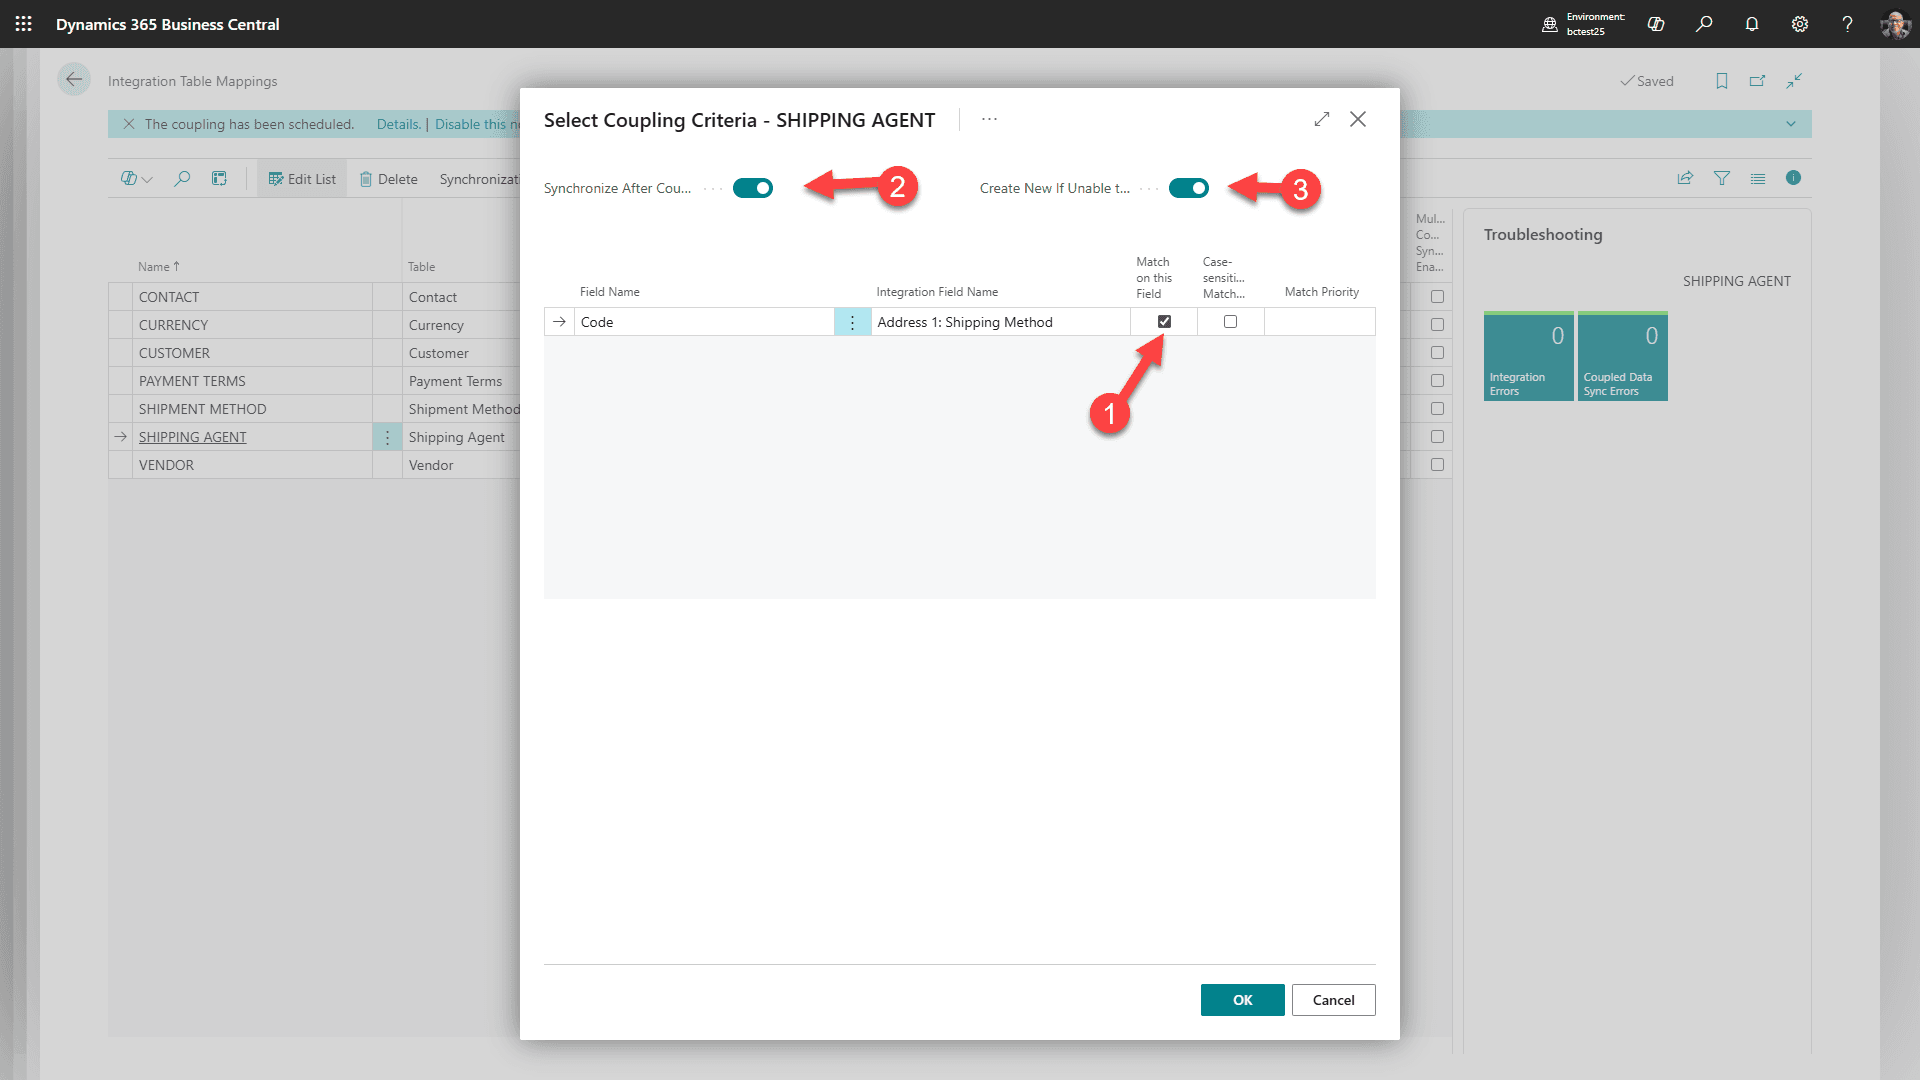
For SHIPMENT AGENT, select Coupling/Match-Based coupling and match to above.
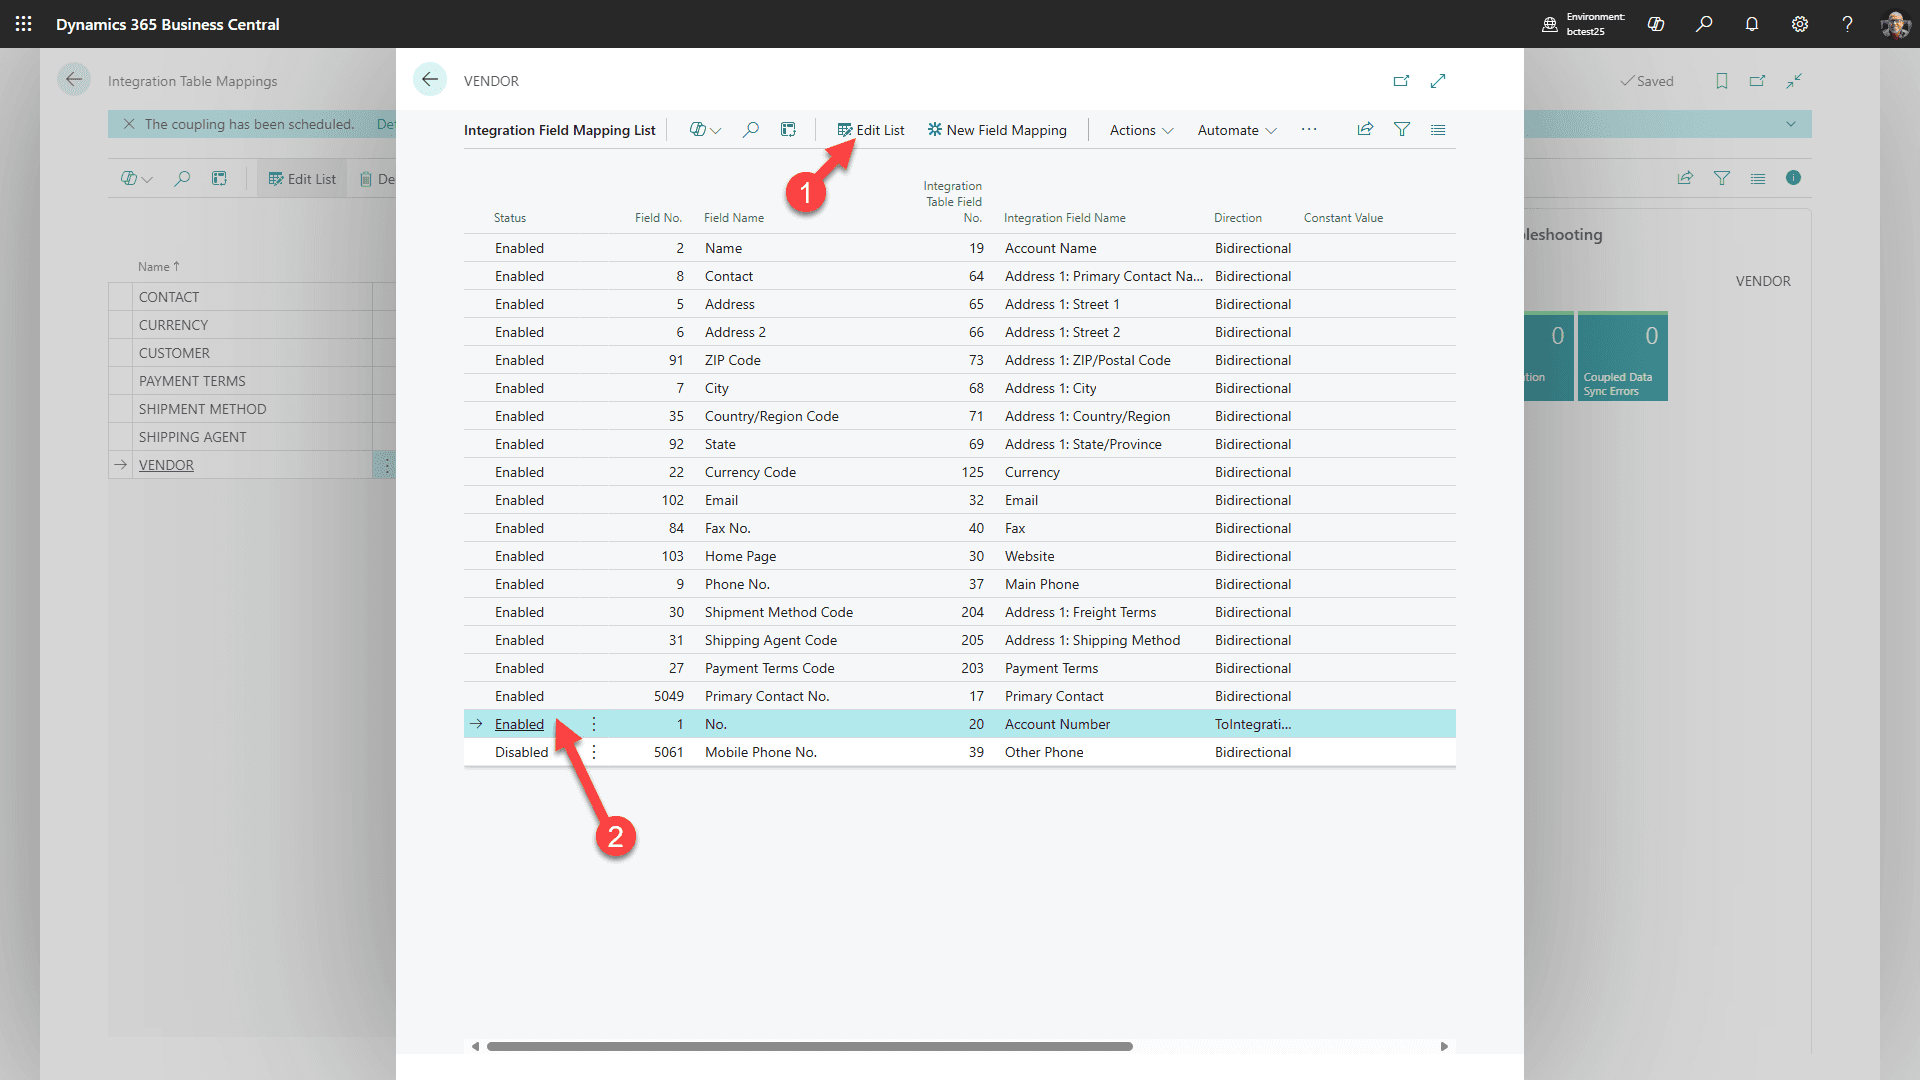
For VENDOR Select Mapping/Fields
1. Select “Edit List”
2. and “enable” Account number.

Still for VENDOR, select Coupling/Match-Based coupling and match to above
Step 6: Install the Business Central Addon for RapidStart CRM from AppSource
⚠️ This Step will Fail if any of the previous steps have not been completed.
Click this link to open Microsoft's AppSource and confirm you are logged in with your business account.
Select “Get it now” to initiate the installation.
1. Select the environment where you installed the Virtual Tables solution.
2. Agree to terms.
3. Click Install. Note that installation could take several minutes.
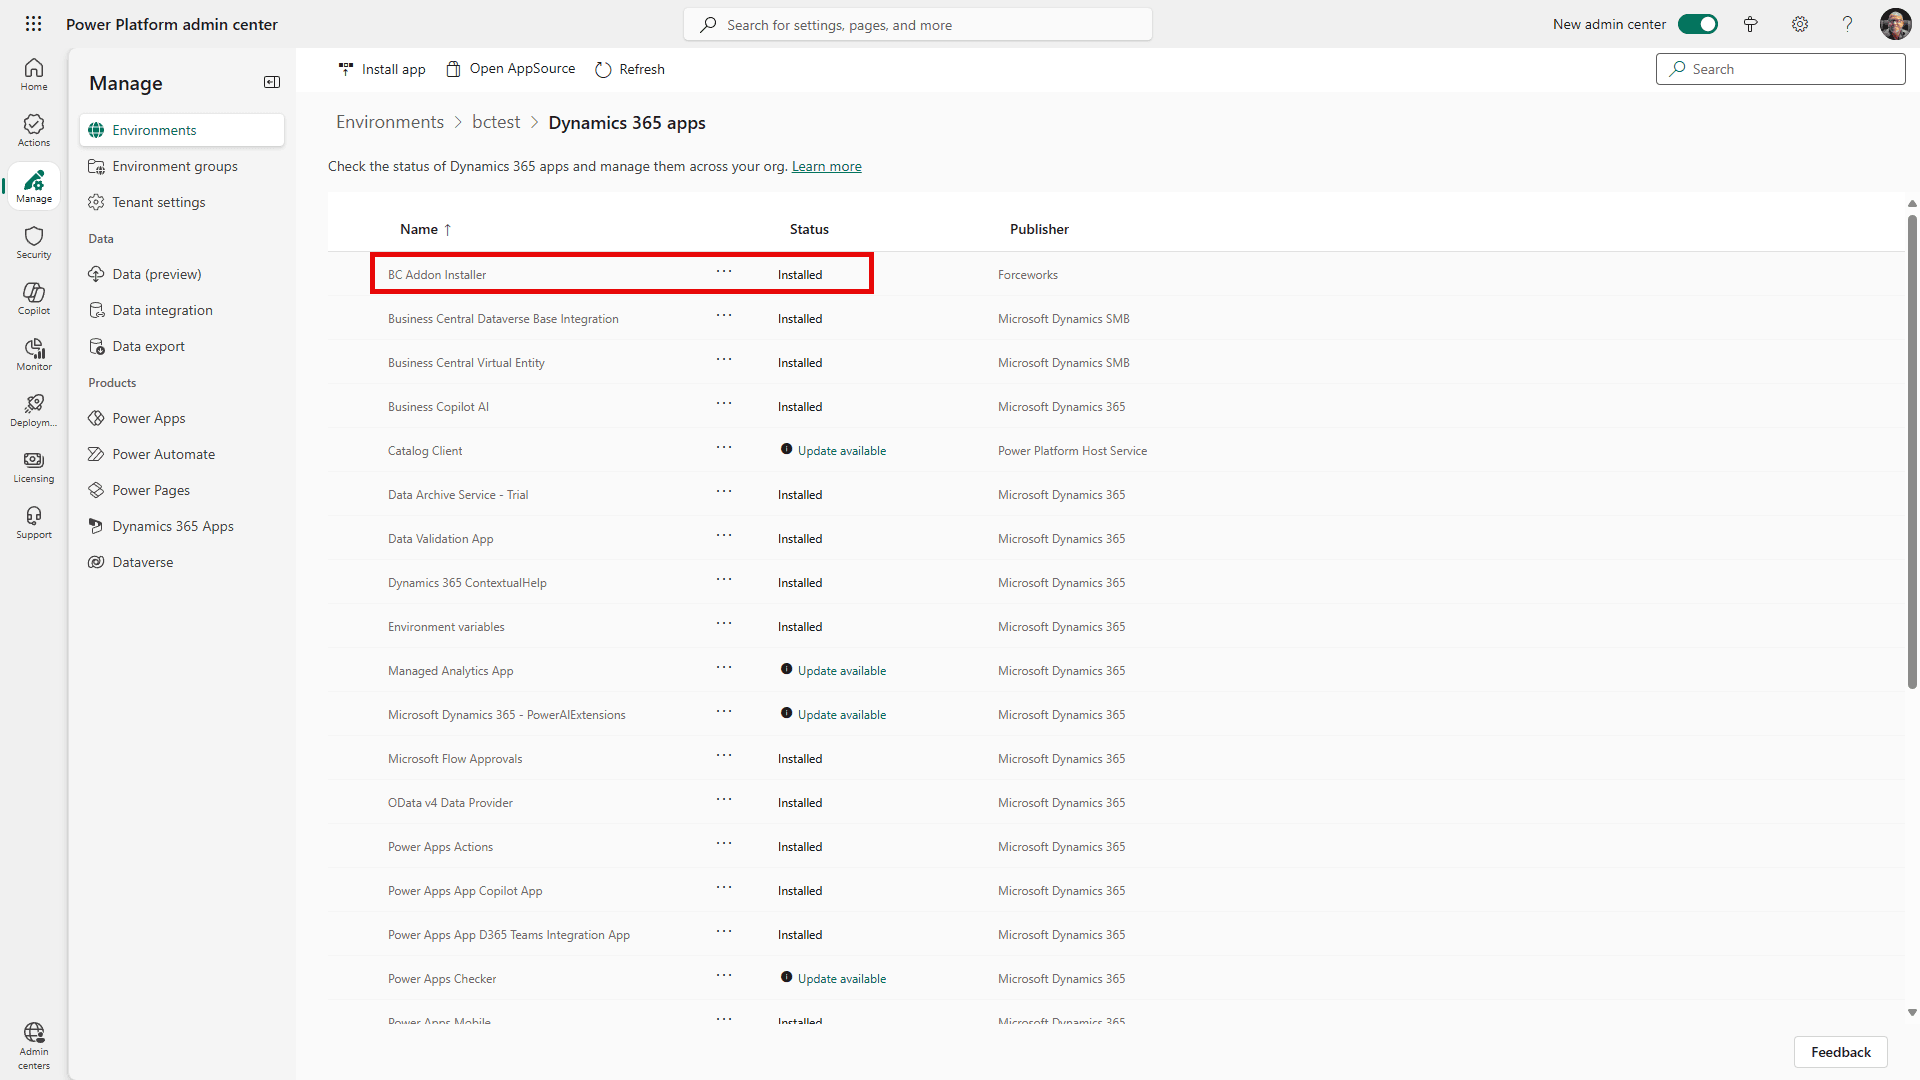
You will see that the solution is “Installing”. This could take several minutes to complete. Occasionally click “refresh” until you see that it is “Installed”.
Step 7: Update Environment Variables
Go to the Maker portal
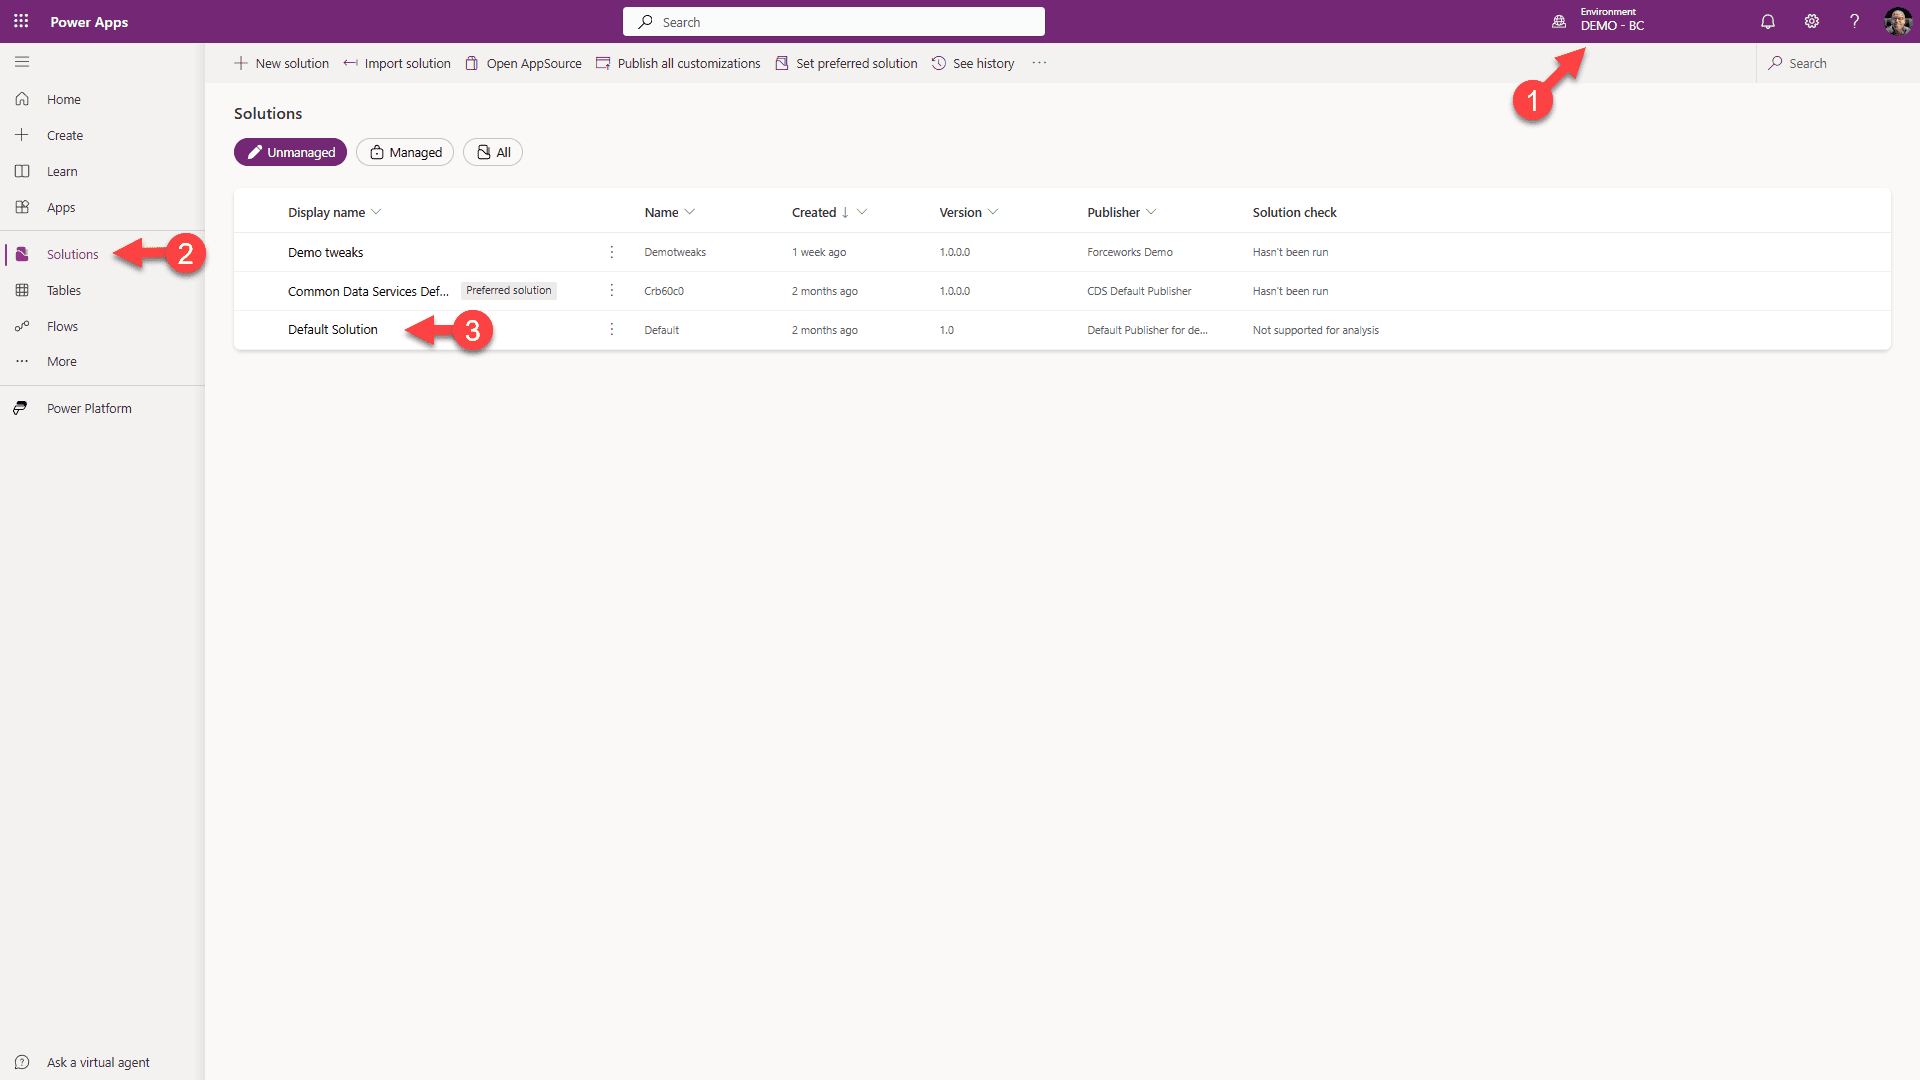
1. Select the environment where the solution was installed.
2. Click Solutions in the sidebar.
3. Click to open the Default Solution

1. Select Objects.
2. Scroll to and select “Environment Variables”
3. Click on BC Company ID.
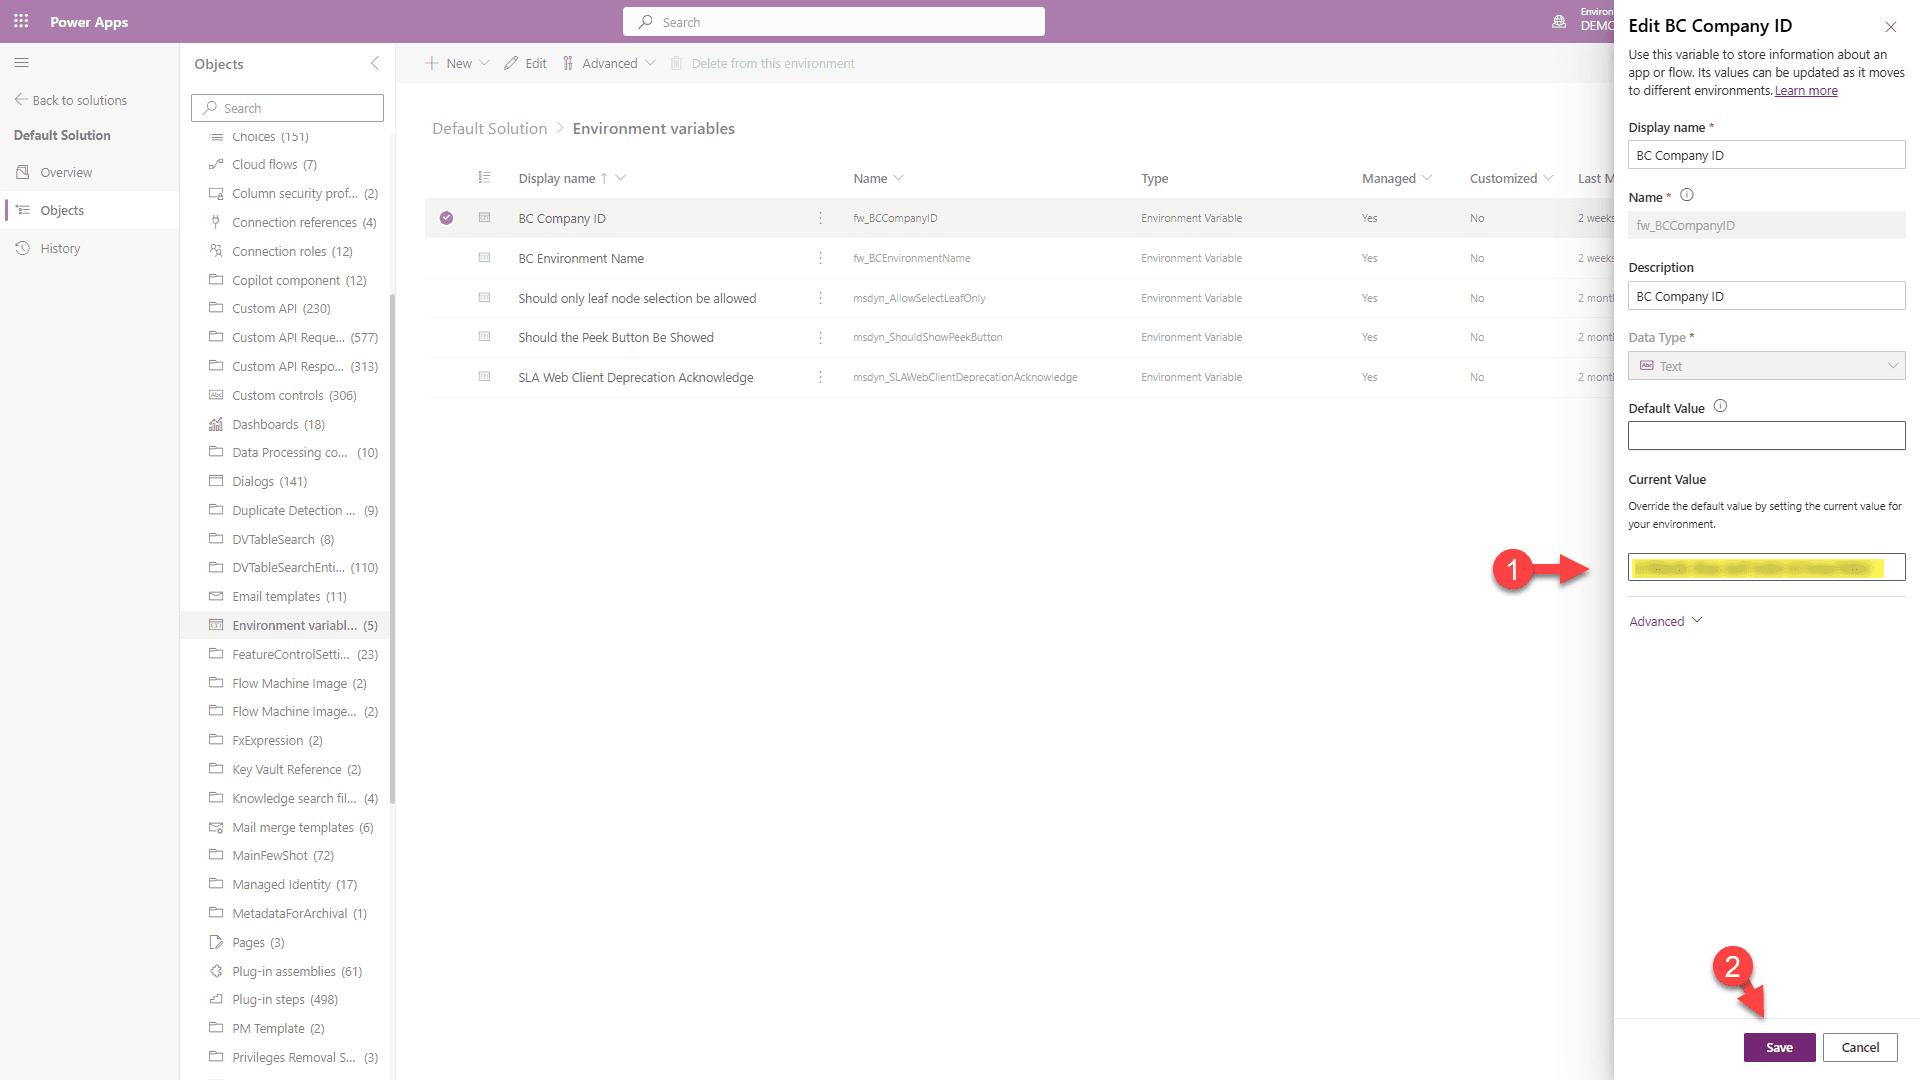
1. Paste the Company ID you copied earlier here.
2. Click Save.
3. Repeat this for the “BC Environment Name” variable, using the other value you copied earlier.
When finished, click “Back to Solutions” in the sidebar.
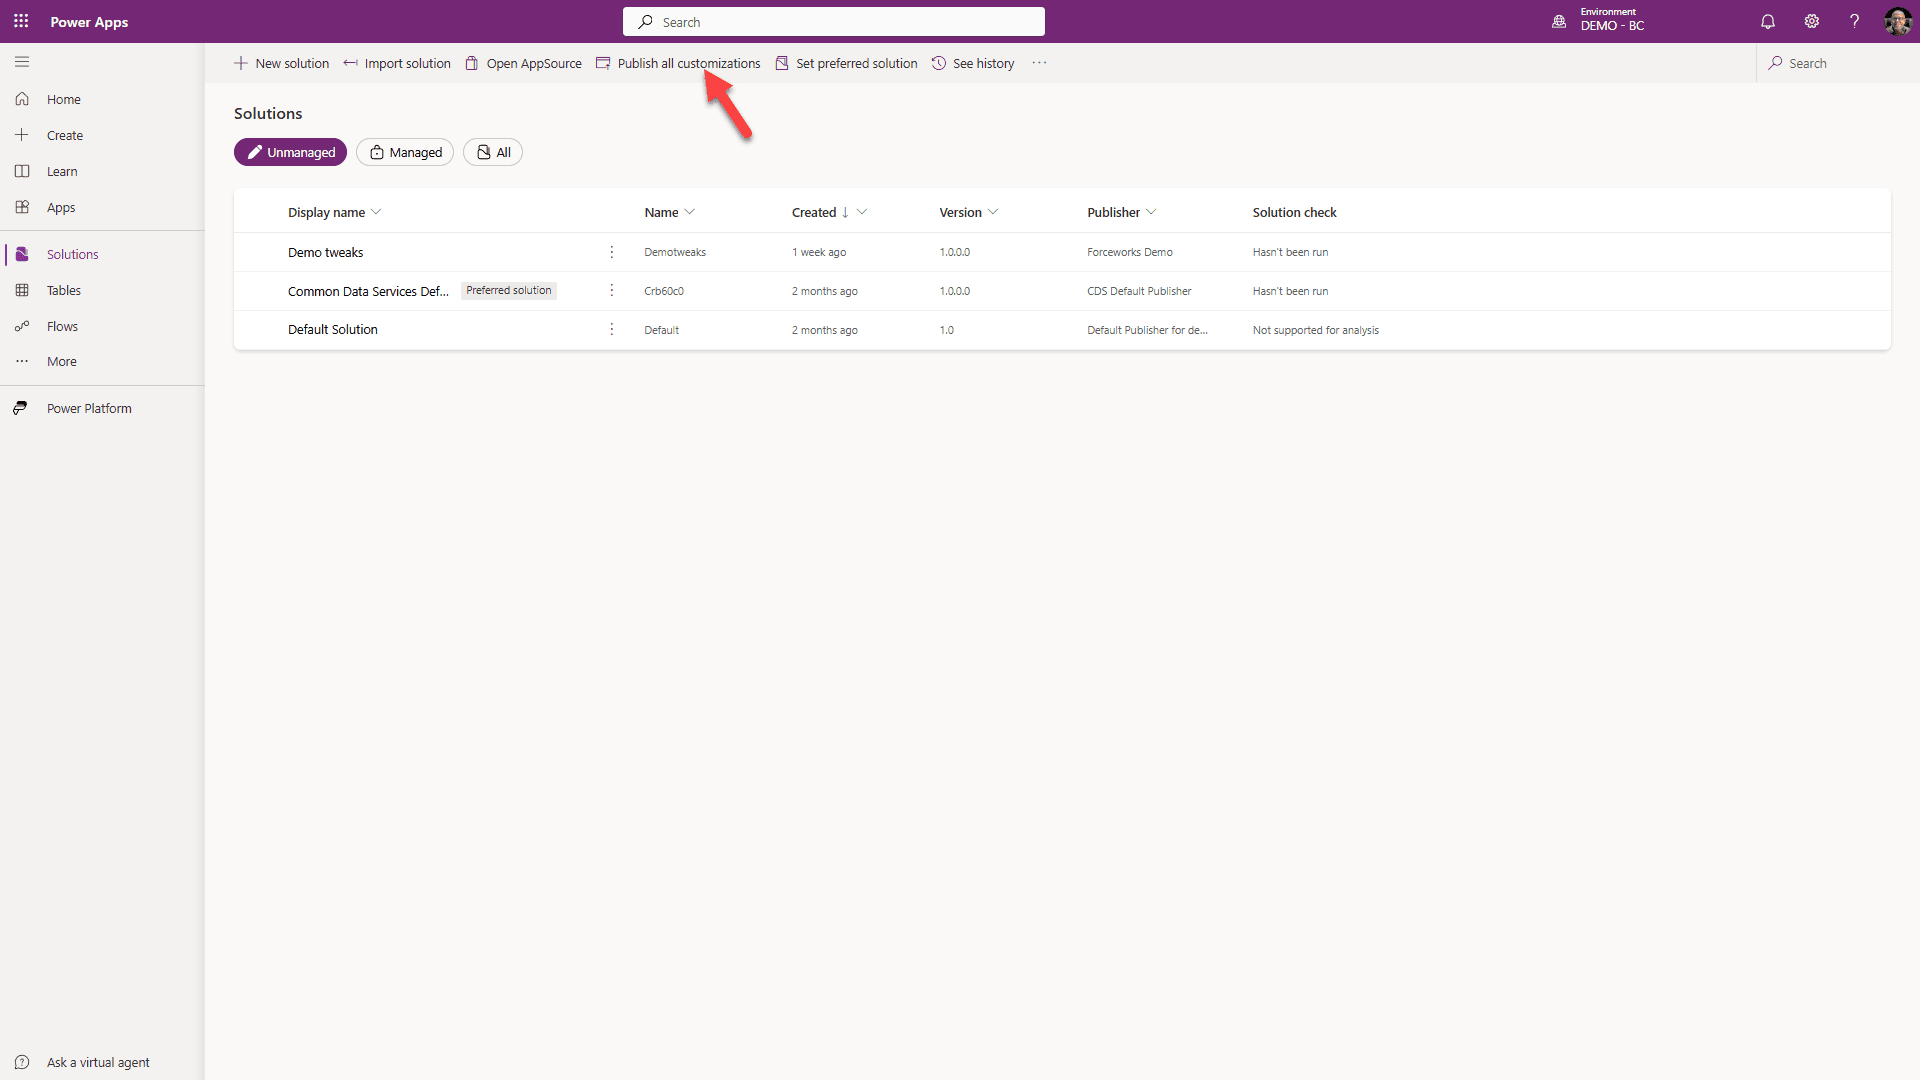
Click to Publish all customizations.
Step 8: Assign User Security Roles
While still in the maker portal:
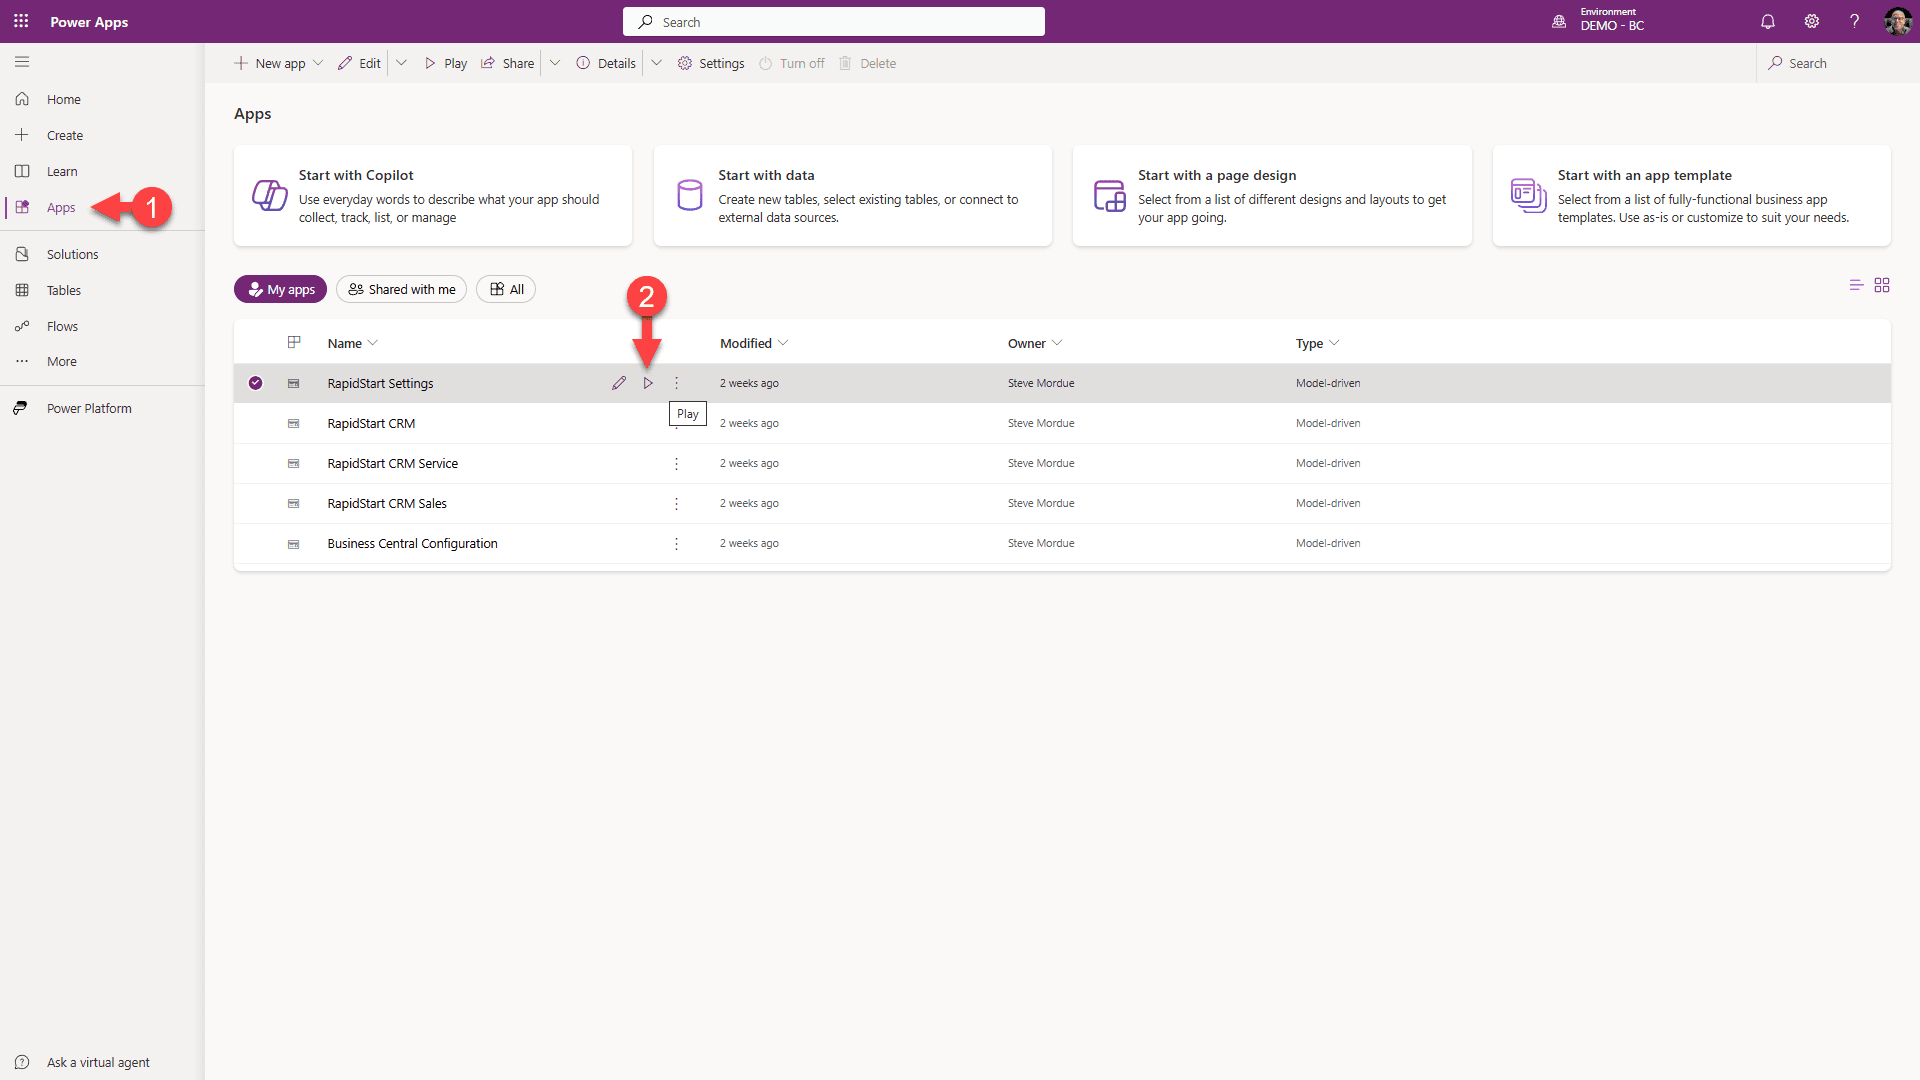
You can open the RapidStart Settings app from the App Selector in RapidStart CRM, or from the maker portal. From the maker portal:
1. Select Apps in the sidebar.
2. Click on the Run icon.

1. Select “Users” in the sidebar.
2. Click on a User's name.
3. If no users are listed, then select the dropdown to show “Available Users”.
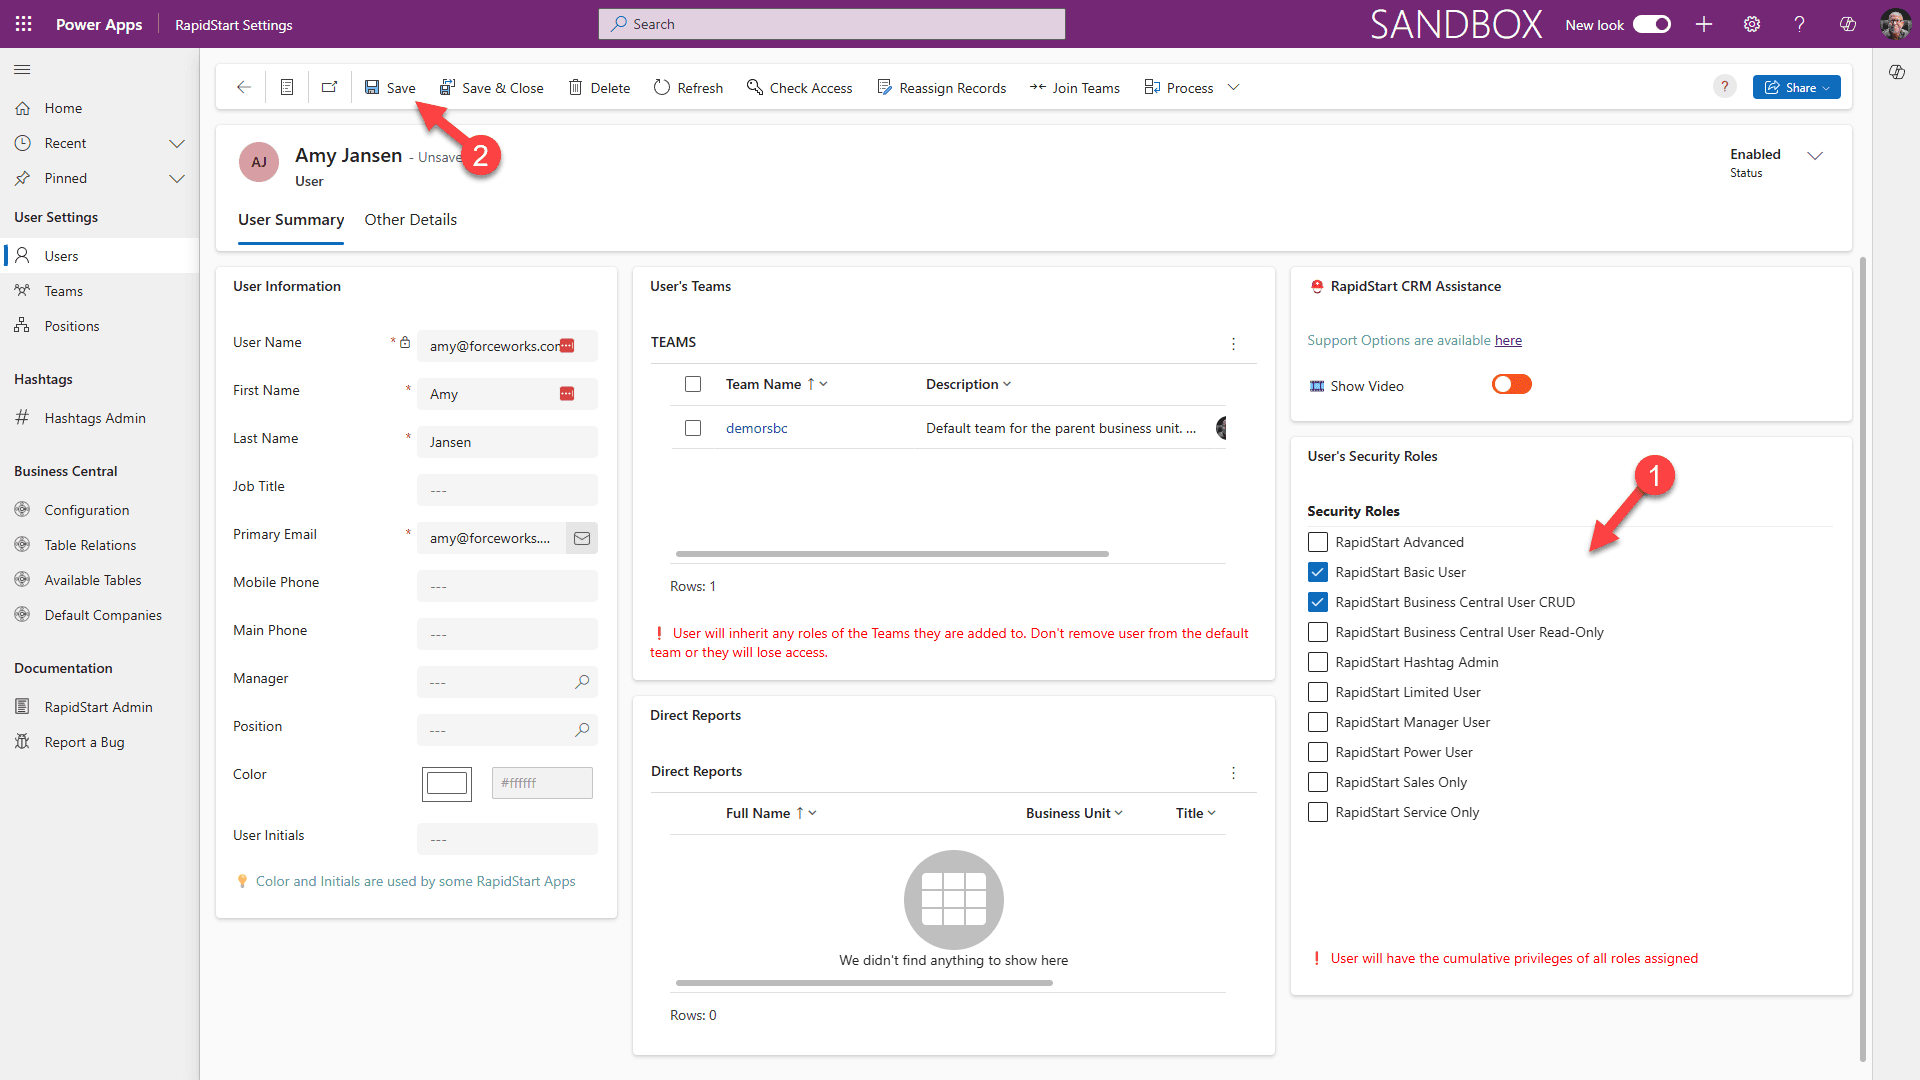
1. In addition to any RapidStart CRM roles (at a minimum, the “RapidStart Basic User”), select either the RapidStart Business Central User “CRUD” or “Read-Only” role.
CRUD allows the user to create Sales Quotes from RapidStart CRM.
Read-only restricts the user to requesting that a Sales Quote be created by a BC user.
Step 9: Link Environments (Optional)
To prevent someone from accidentally deleting environments, you can link them. Start back in Business Central.
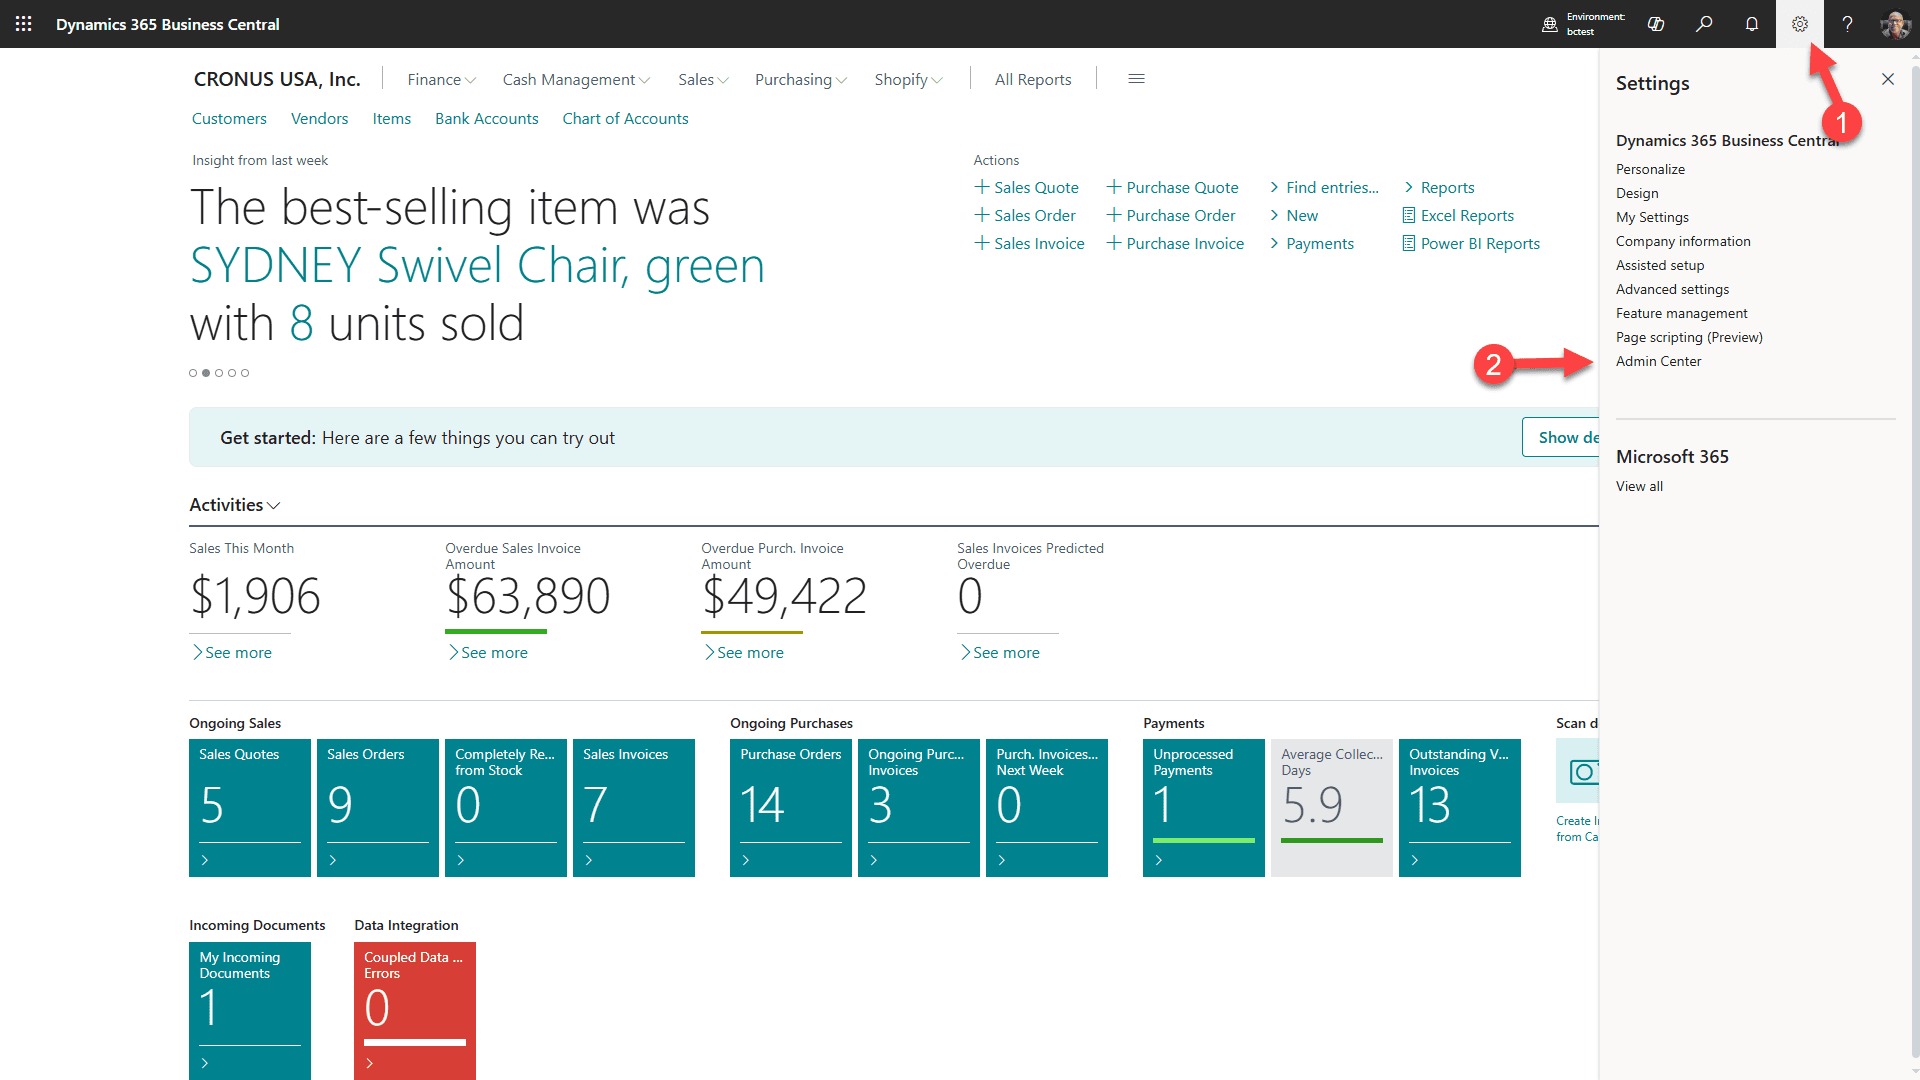
1. Select the Gear icon
2. Then select Admin Center

Select the target environment link
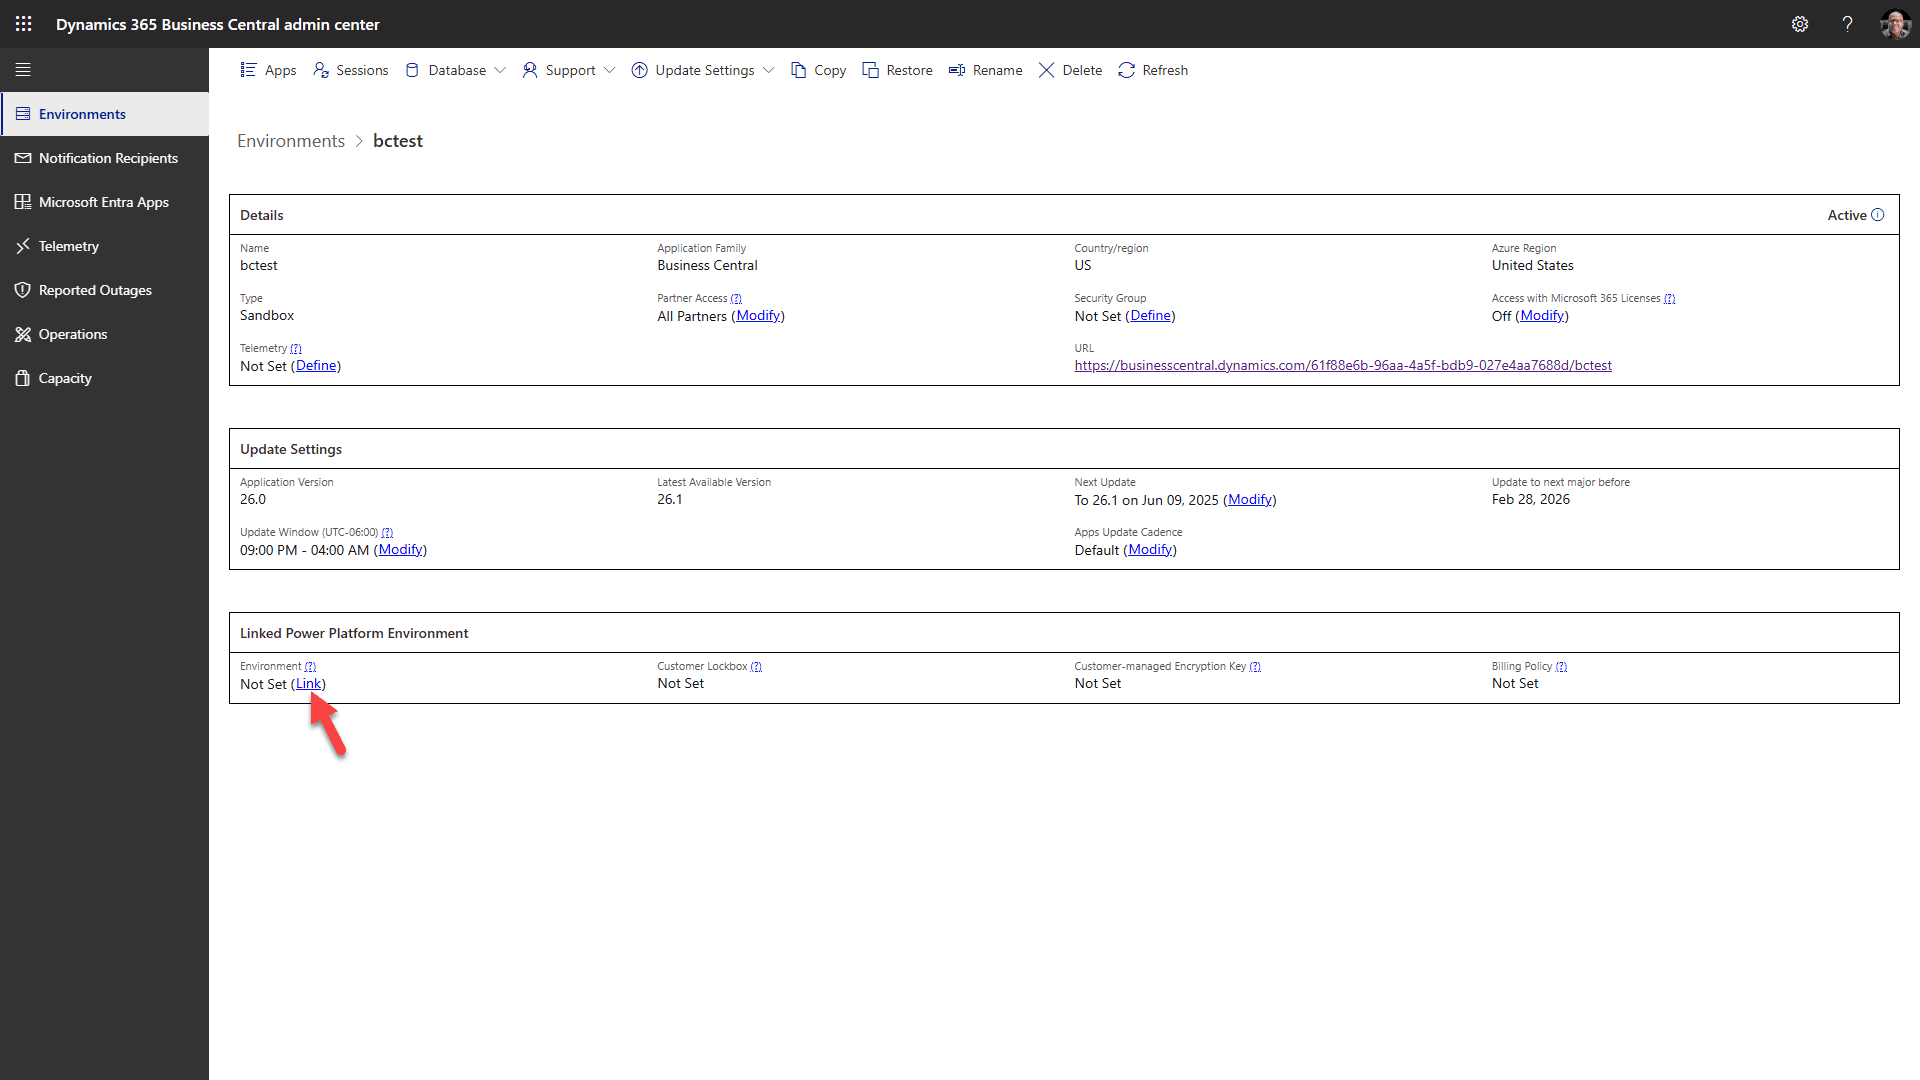
Click on “Link” and select your Dataverse environment
Step 10: Power Automate Flows
Our Addon includes several Power Automate Flows. Two are turned off by default. You can turn them on or edit them to meet your needs. The ones that are turned off are:
Sync New Account to BC
This flow triggers whenever you add a new Account in RapidStart CRM that does not have a BC Account Number. It creates a new BC Customer and then updates the Account with the BC account number to ensure the records are synced. Be aware that, as designed, this flow will create records in BC whenever records are created in RapidStart. You may or may not want this.
Sync New Contact to BC
This flow triggers whenever you add a new Contact in RapidStart CRM that does not have a BC Contact Number. It creates a new BC Contact and then updates the Contact with the BC contact number to ensure the records are synced. Be aware that, as designed, this flow will create records in BC whenever records are created in RapidStart. You may or may not want this.
🎉 Deployment Complete!
If there are issues with this documentation, please let us know.