Advanced Development for RapidStart CRM or Dynamics 365 — Part 6
In Part 6 of this series, we add the new View we created in Part 5 to our Model-Driven Apps so it actually appears for users.
Adding the View to Your App
Ensure you are in the correct environment, select Solutions in the sidebar, and double-click on your “My Customizations” solution to open it.
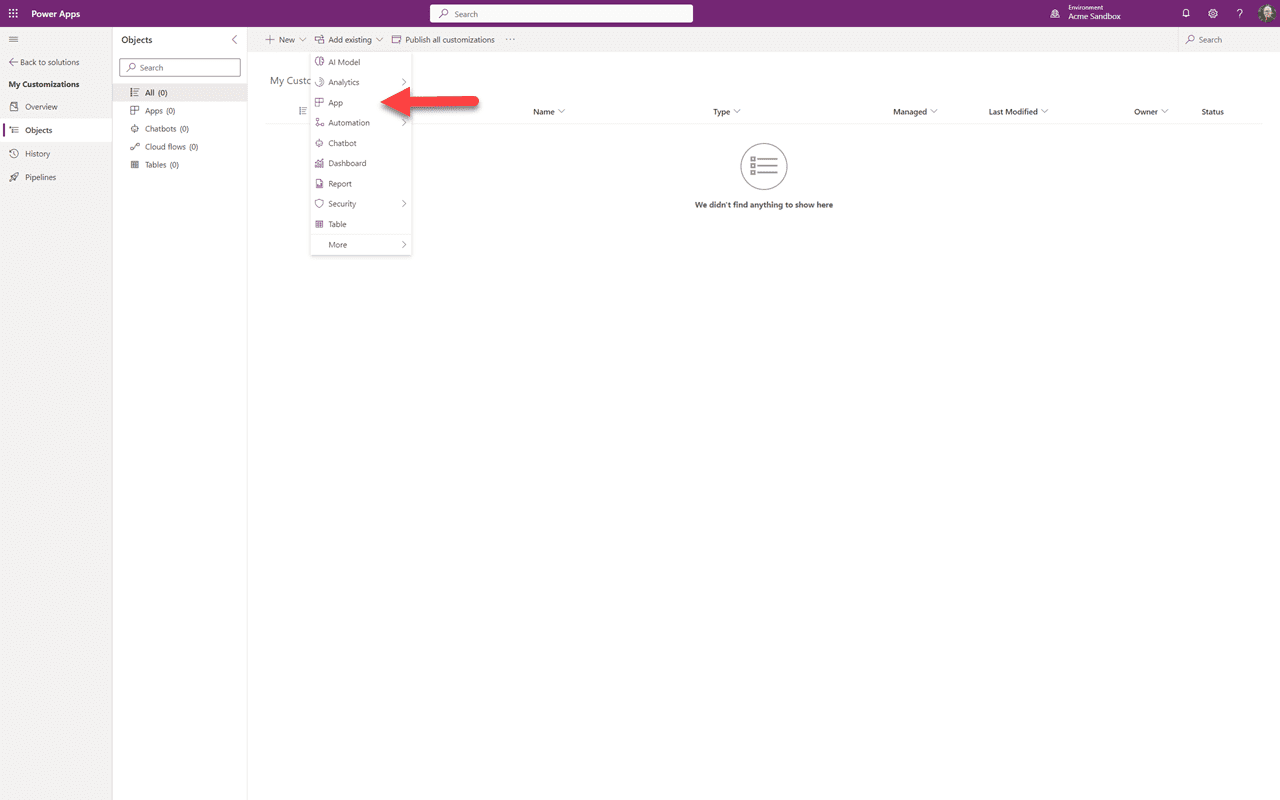
Similar to when we added the existing table before, but this time we will select to add an existing “App”. Then select “Model-Driven” apps.
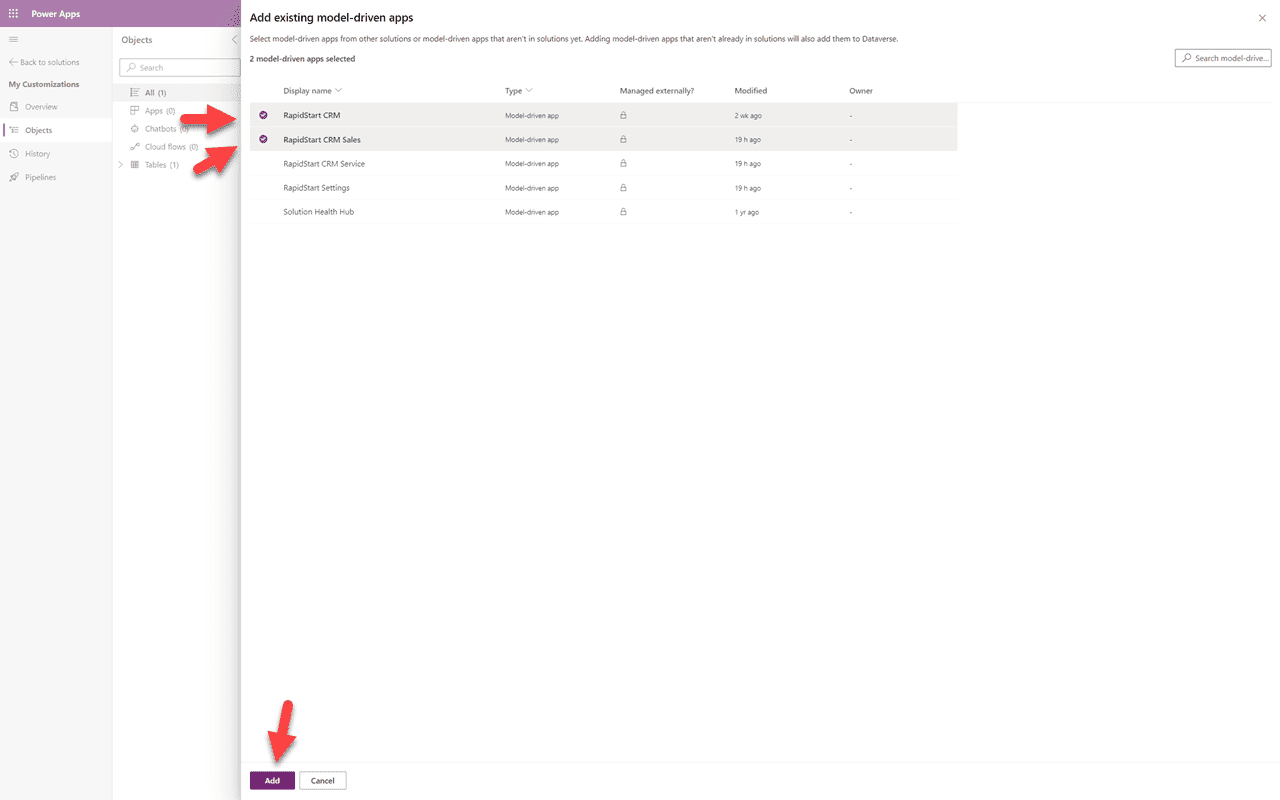
We have determined that our new affiliates view should appear in both the RapidStart CRM and RapidStart CRM Sales apps, so we tick them and click “Add”.
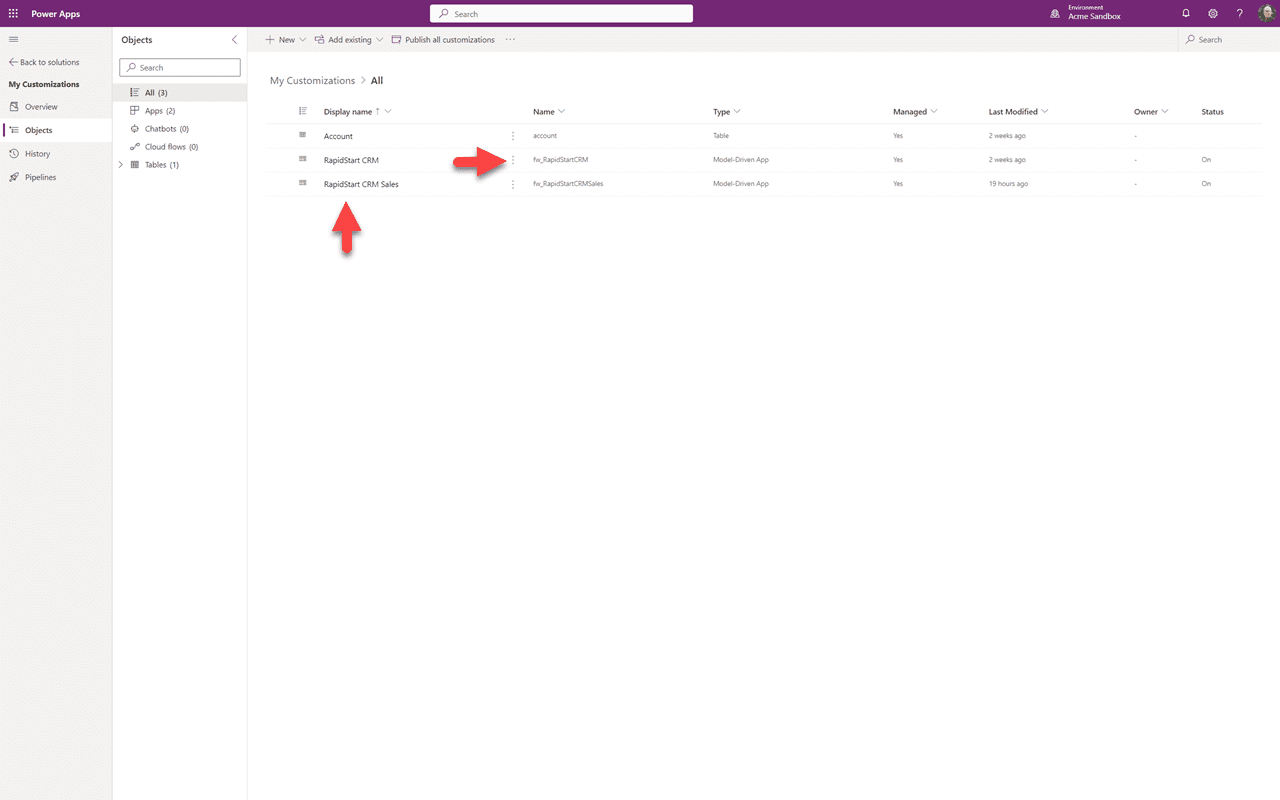
We can see that the two apps have been added to our “My Customizations” solution. Click the three dots next to either app, and select “Edit” from the dropdown that appears.
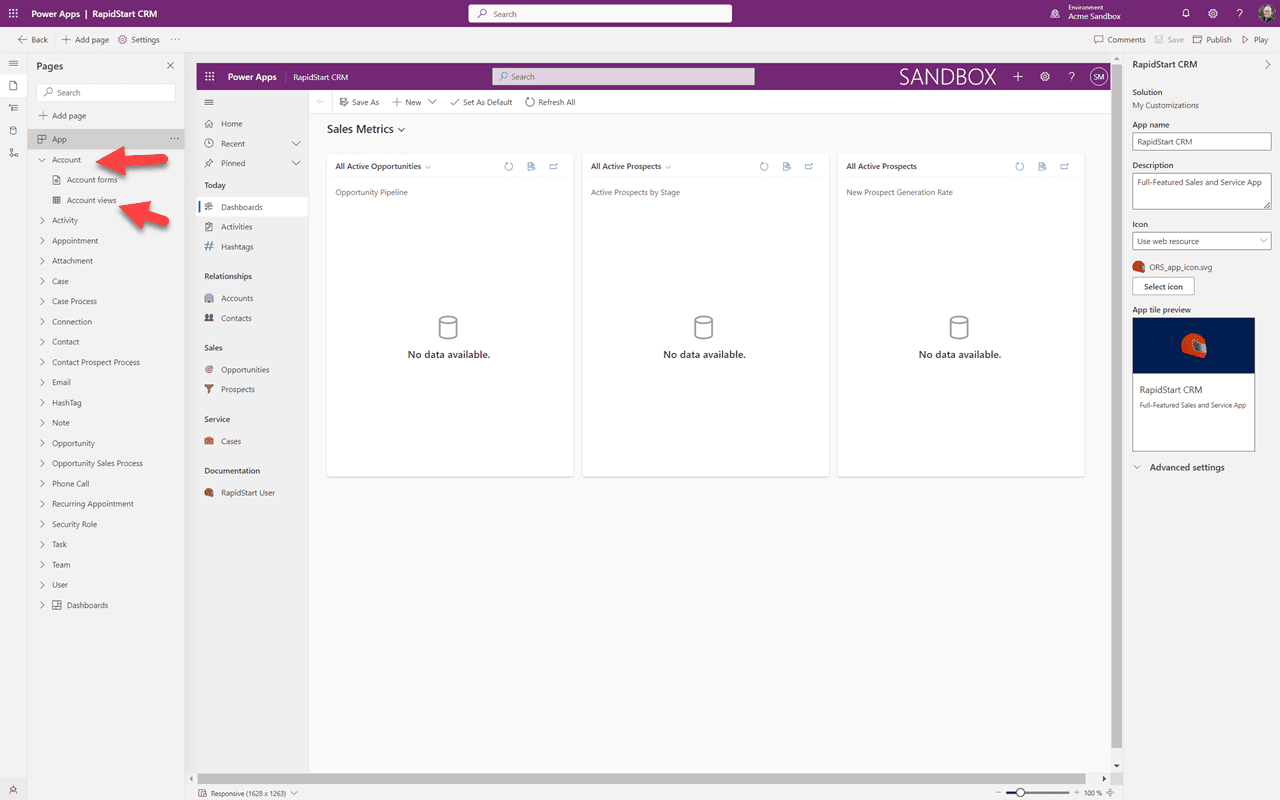
The selected app is displayed in the design canvas. Since we want to add our view we will click “Account” in the sidebar, then select Account Views.
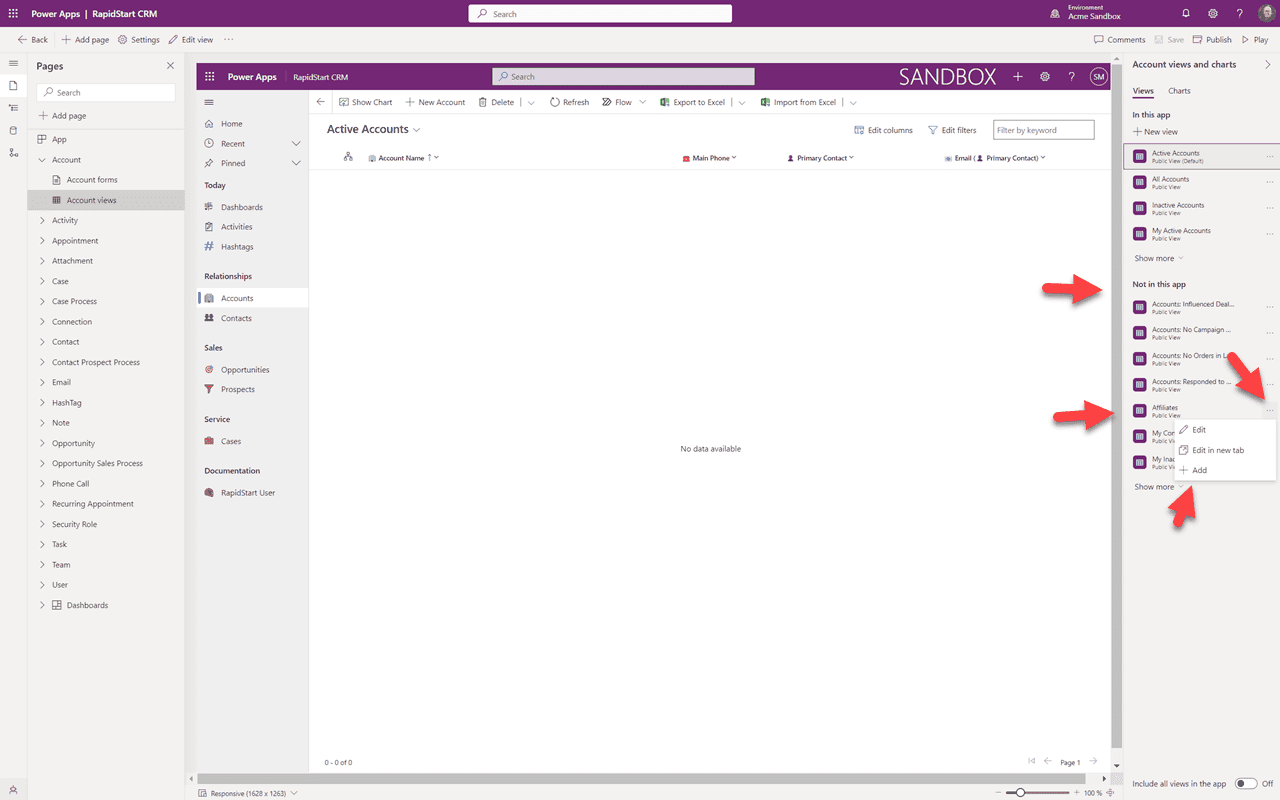
The canvas will refresh to display accounts. In the right sidebar you can see views that are “Not in this app”, and in that list is our “Affiliates” view. Click the three dots next to the view and select “+ Add”.
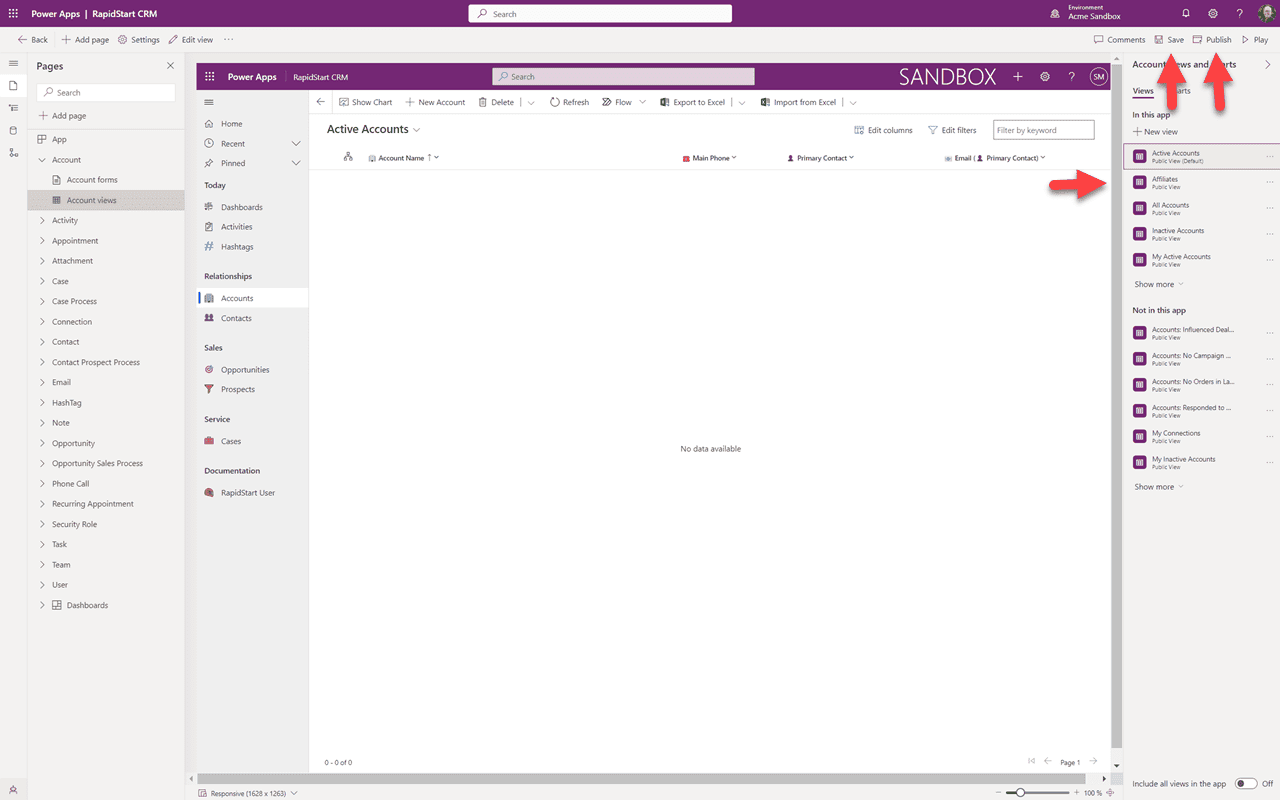
We can now see that the “Affiliates” view is “In this app”. So let's “Save”, and after the save is complete we'll “Publish”. Now you can go back to your app in your sandbox and see this view. Again, you may need to refresh your browser. You can repeat these steps for the other app.
Summary
In this Part 6 we have added the new view we created in Part 5 to our app(s). In Part 7, we will clean up any previous customizations we had made and get them into our “My Customizations” solution.