Advanced Development for RapidStart CRM or Dynamics 365 — Part 7
In Part 7 of this series, we go on a scavenger hunt to find any unmanaged customizations and bring them into our "My Customizations" Solution.
Cleaning Up Unmanaged Customizations
Ensure you are in the correct environment, select Solutions in the sidebar, and double-click on your “My Customizations” solution to open it.
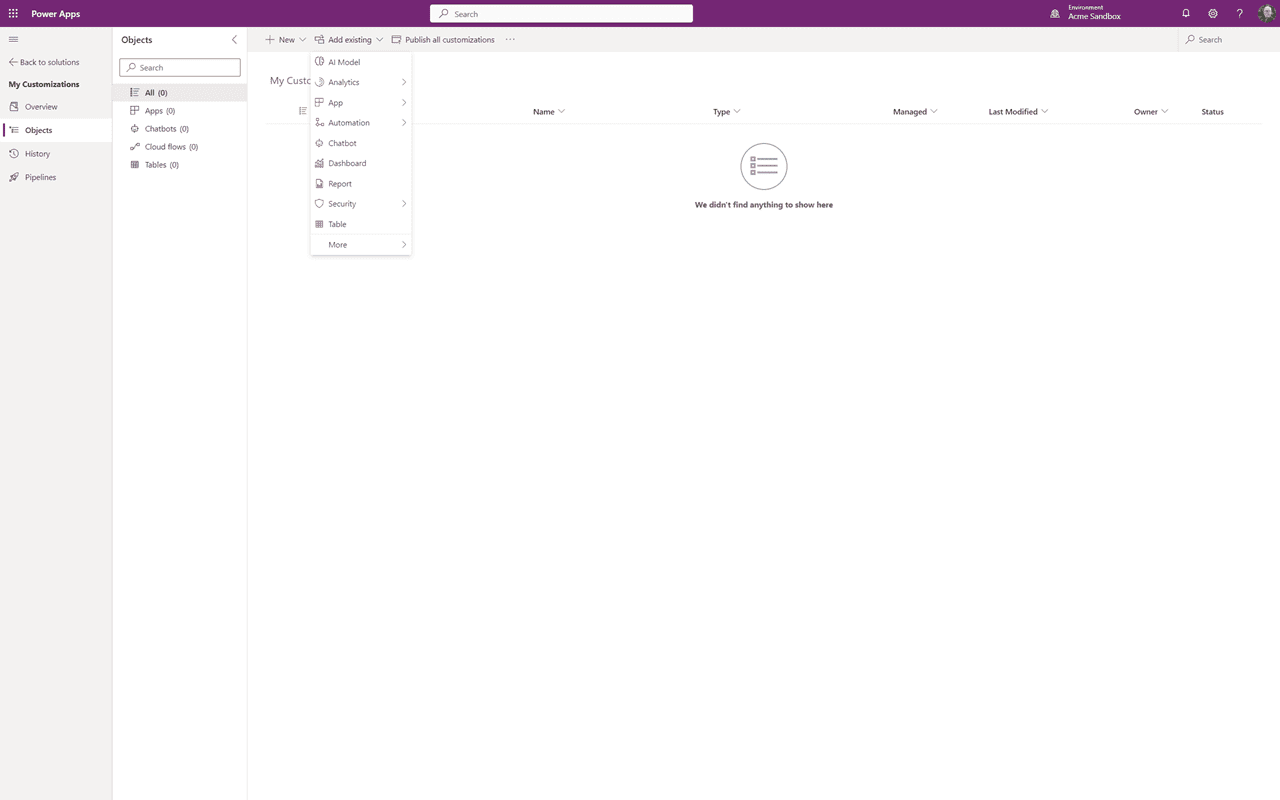
We're going to be using the “Add Existing” capability to locate and add all prior customizations. If you already know what was done, this will be a snap, otherwise “buckle up”. In my demo environment I created one field on Account and one field on Contact that are outside of the “My Customizations” solution, so we're gonna find them and add them.
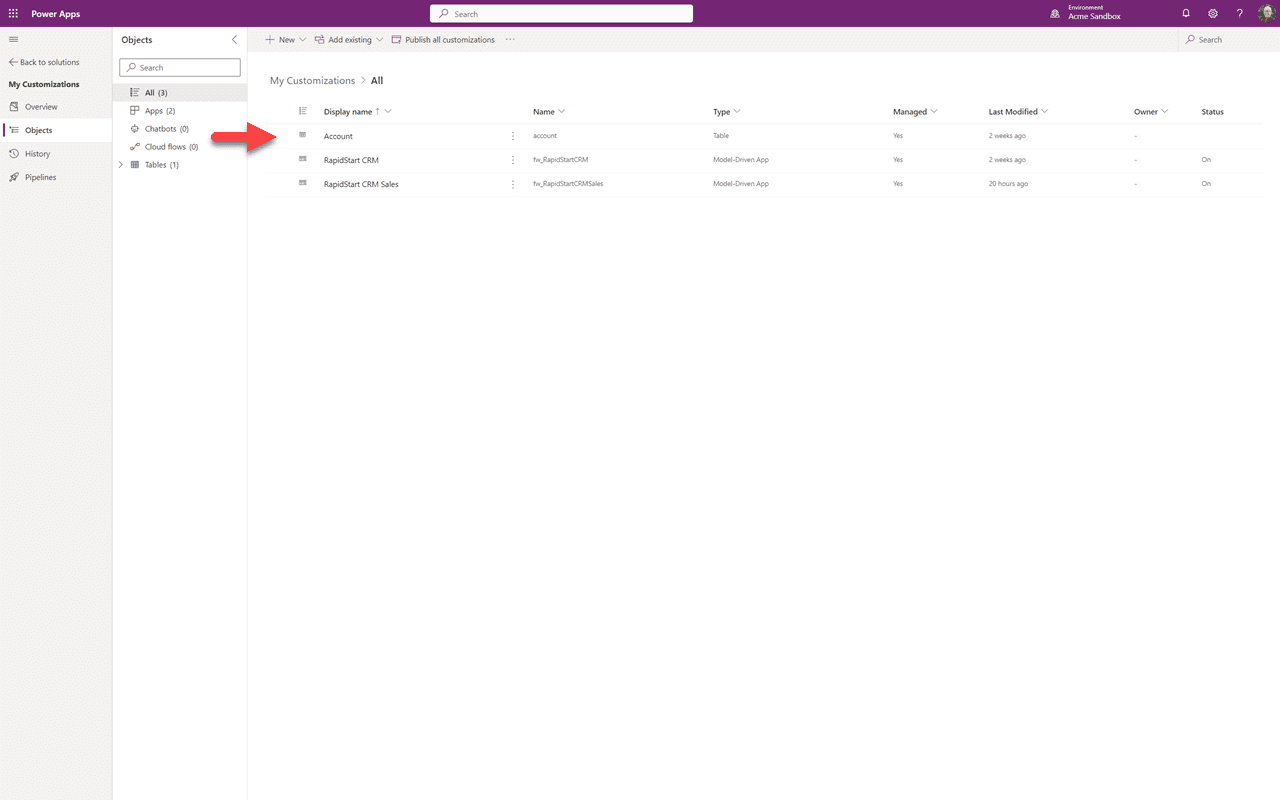
We'll start with the lost account field. Since I had previously added Account to our solution, we just need to add the lost field to it. So we'll click on the three dots and select “Open”.
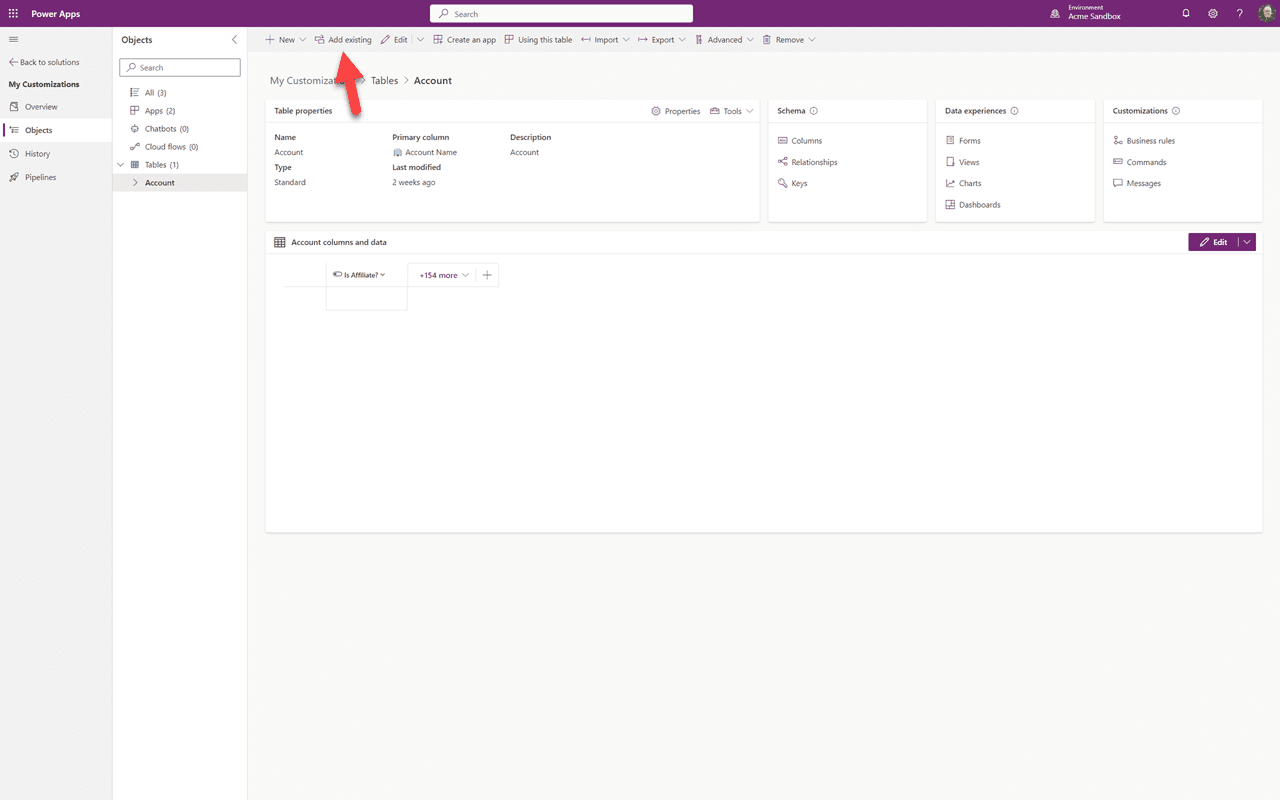
With the Account object open, we'll click on “Add Existing”.
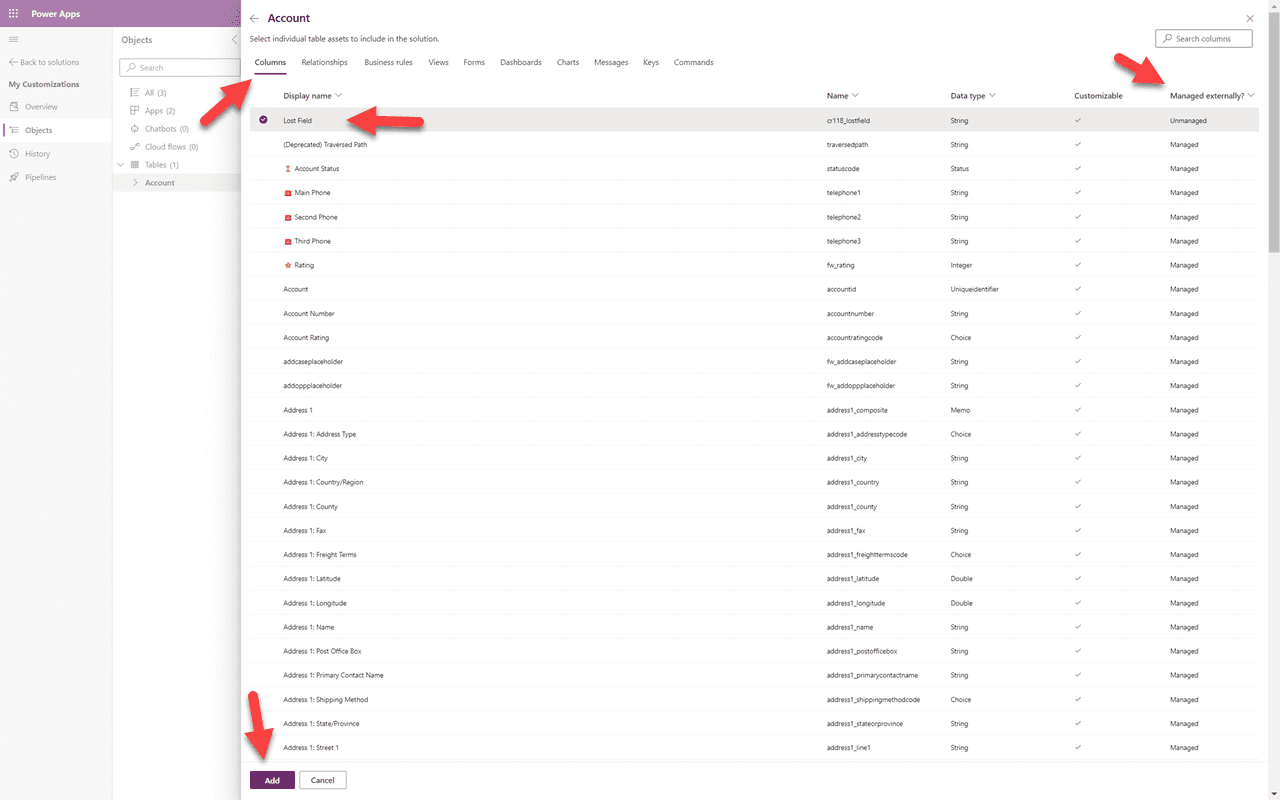
Across the top are all of the items related to the Accounts table. We are looking for a field so I will select “Columns”. To make sure I don't miss any, I will sort the “Managed Externally” column from Z-A. This will pop to the top any “unmanaged fields”. I can see my “Lost Field”, and any other “lost” fields. I'll tick it and click “Add”. When we do this kind of cleanup for customers — where we don't really know what customizations may have been made — we will go through each of the areas across the top.
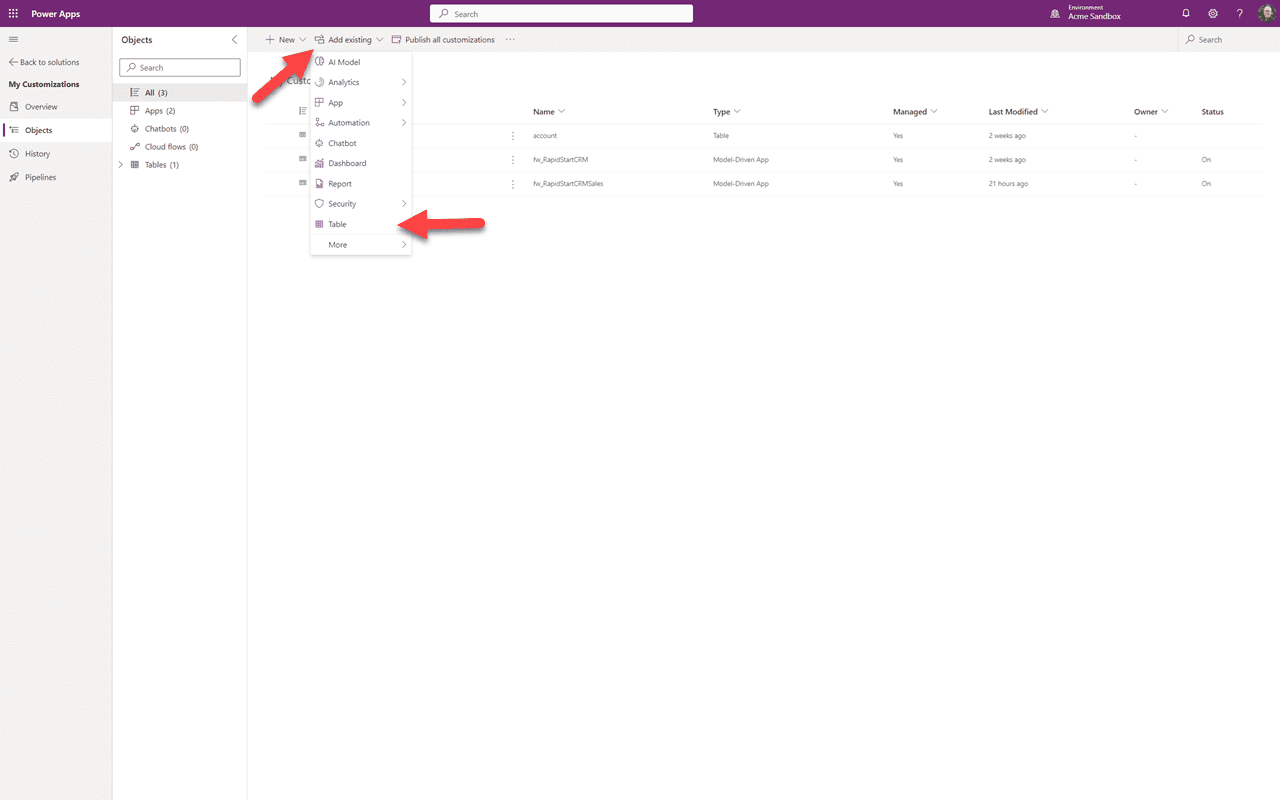
Now for the lost Contact field. Select “Add Existing” and in the dropdown select “Table”.
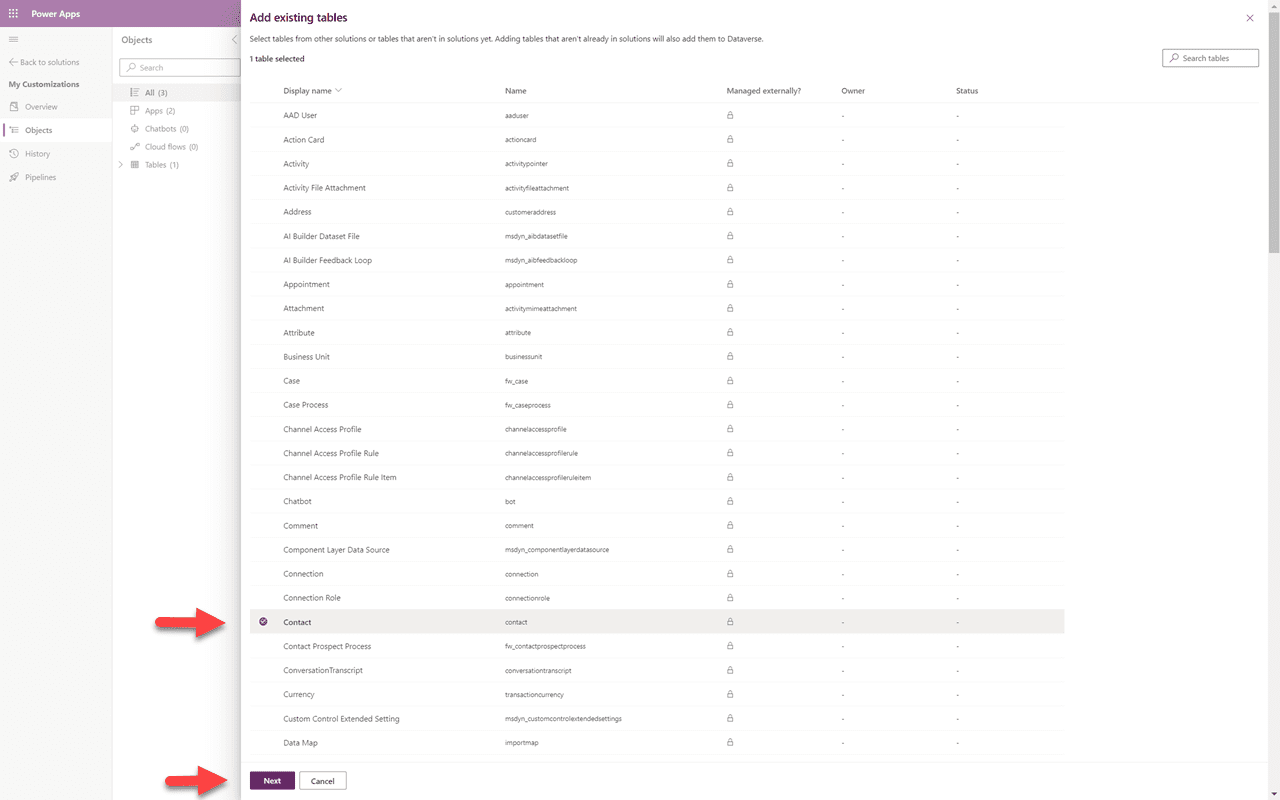
Scroll down and select the “Contact” table and click “Next”.
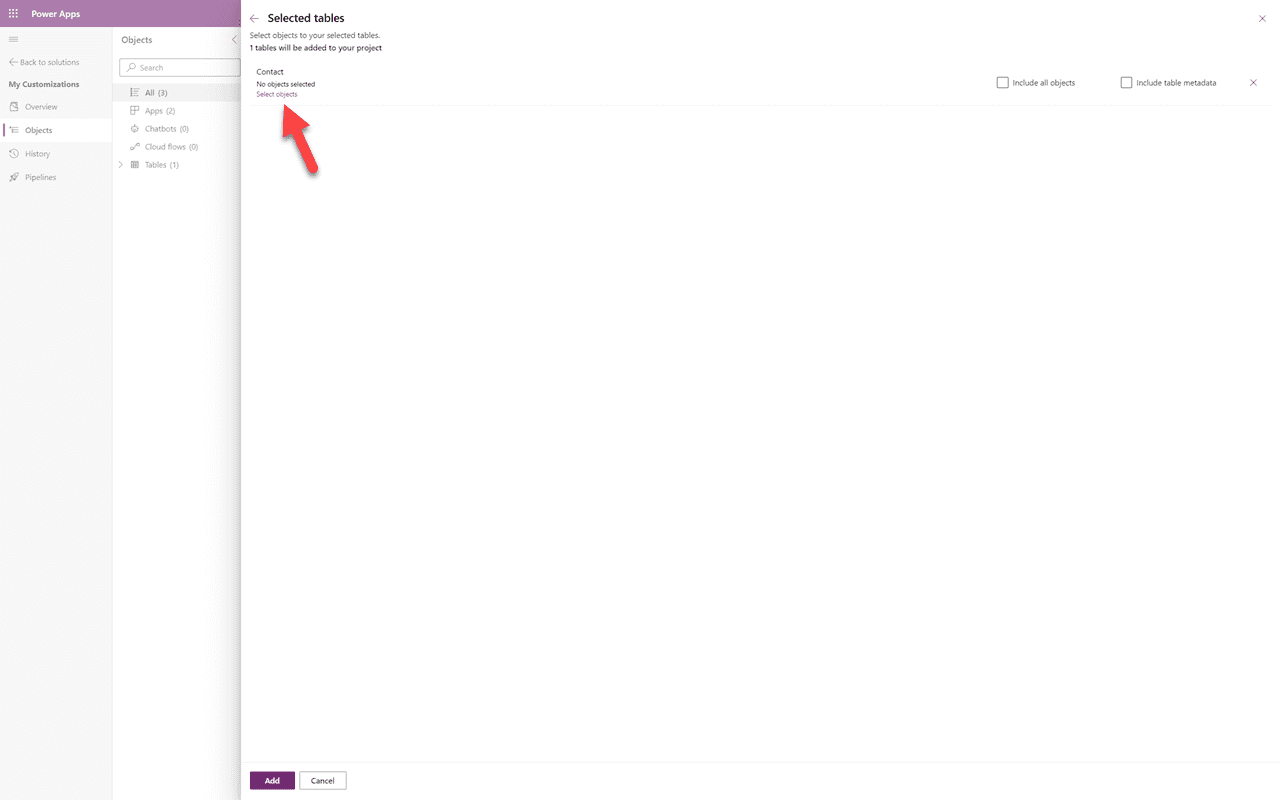
⚠️ Reminder
Once again, NEVER select “Include all objects”. Instead click the “Select Objects” link.
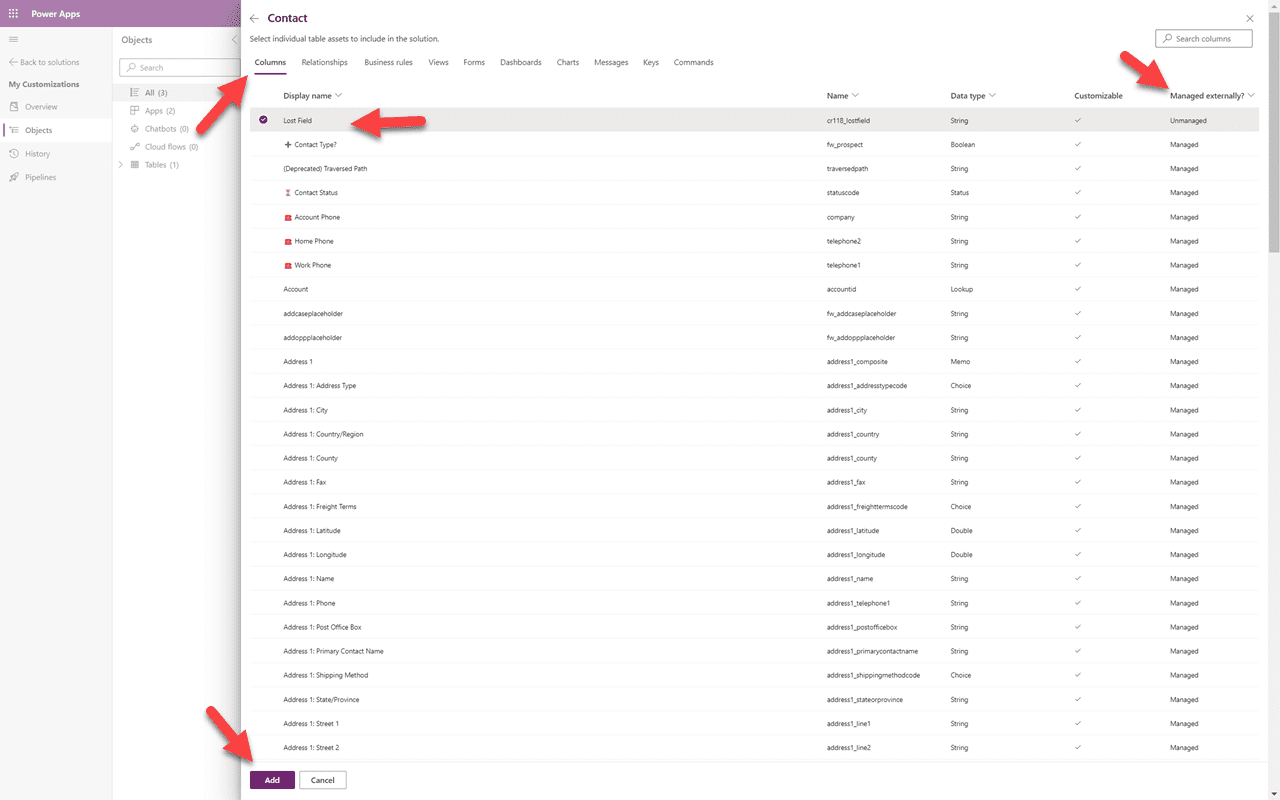
Similar to the lost account field above, I will select the Columns area and sort the “Managed externally” column Z-A and see my lost field. I'll tick it and add it. You may have to click “Add” twice.
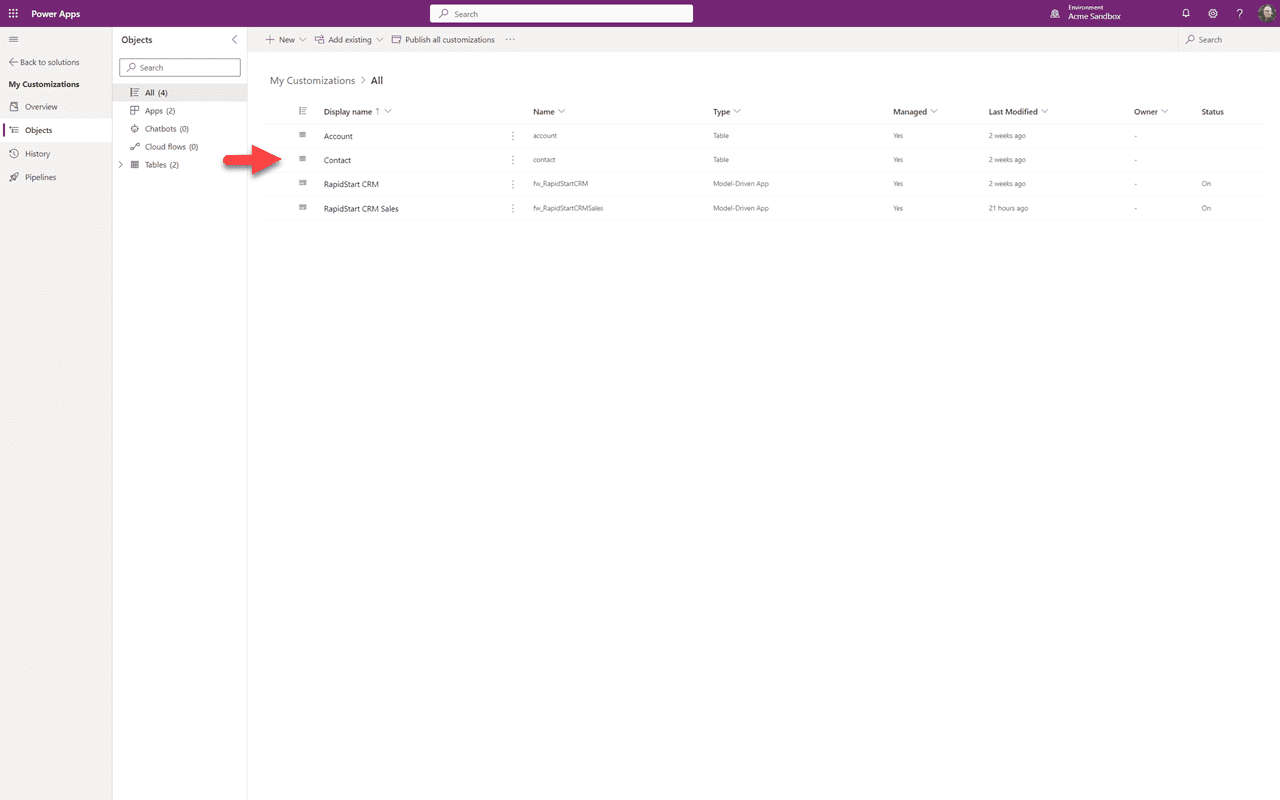
You can now see that the Contact object has been added to our solution, but it only contains the one field we added.
Summary
In this Part 7 we went on a scavenger hunt for unmanaged items to add to our “My Customizations” solution. At this point your Sandbox should be quite tidy. In Part 8, we will go over exporting and importing solutions to bring this tidiness to your production environment.